Condo Blues: sewing
Showing posts with label sewing. Show all posts

Sunday, April 16, 2017

Renaissance Noble Dress Project Part 3: Princess Dress Reveal!

I blogged about designing a new Elizabethan Nobility Dress to perform with Husband at Renaissance Festivals. This project was harder than any other costuming project I’ve done. I like the finished dress for the most part, but I don’t love it as much as I do the costume it replaces. There are a bunch of mistakes, and the bodice fit (among other things) needs tweaking which is why I haven’t shown you the finished project.

But I promised you a DIY renaissance festival princess dress and that you shall have, warts and all.
I started with a sketch after pouring over my favorite Elizabethan costuming books working backwards by buying the fabric first and coming up with a dress design second. I like to work the other way around.


Disclosure: affiliate links appear in this post for your convenience.

I started with the overskirt and underskirt (forepart) first. I attempted hand embroidering the brown velvet trim but didn’t liker my test pieces, not to mention  that kind of hand embroidery means an extra year for construction I didn’t have.

Tuesday, March 21, 2017

7 Ways to Make Magnetic Embroidery Needle Minders

If you do a lot of hand sewing, cross stitch, embroidery, beading, or other needle crafts, you know eventually you will play the I put my work down and where did my needle go? game.

Slipping the needle into the fabric works to keep track of your embroidery needle but can leave permanent holes in certain fabrics. In that case you can keep track of your needles with the power to science: a magnetic needle minder!

Basically, a needle minder is a magnet that holds your needle and is glued to the back of a fairly thin decorative piece on the top side of the work in your embroidery hoop that is held in place on back side by another magnet.

DIY Needle Minder Tutorial


I am hand sewing beads on a super size beading project – an Elizabethan under skirt. Since I am using a small beading needle on such a large and busy fabric, a magnetic needle minder will help me keep track of and find such a slender needle when I take a break.

Let’s make a needle minder!

 Pin this tutorial for later!

Tuesday, March 7, 2017

15 of the Best Scrap Fabric Projects

After spending an afternoon finding hidden fabric caches around the house (and wondering if I am turning into a ferret,) I organized the larger than I realized fabric stash into my super big DIY under bed fabric organizer

And oh my goooooooooooodness I learned I have a lot of scrap fabric! More than I thought.  I figure I should celebrate National Craft Month by sewing some scrap fabric project to clear out my stash so I can buy more fabric.

 Pint these all new and fantastic sewing and no sew ideas for later!

Sunday, February 19, 2017

12 Small Space Fabric Storage Ideas You Need To Try Right Now!

Recently during some serious Girl Time with a fellow costumer and my BFF, our conversation turned to to talking about how our fabric storage is out of control and threatening to take over not only our sewing studios, but the house as well.

Or at least it seems that way when you live in a small condo.

Most of the time I sew with nontraditional fabrics such as upholstery fabric, velvet, tulle, and plush fleece and they are more difficult to store than traditional cotton quilting and apparel weight fabrics because, even their scraps  require much more space!

12 of the Best Ways to Store Non Traditional Fabric

After spit balling fabric organizing ideas with my costumer friend and coming up short, I turned to the Internet. I found a bunch of small space fabric ideas to add to my ever growing To Do List and thought I’d share.

Ready? Set. Organize!

Tuesday, January 17, 2017

DIY Flannel Pajama Pants

My 2016 World of the Year was Hygge – the Danish concept of what loosely translates as a feeling of happy coziness which I had no idea Hygge became A Thing but it has.

Well, well, well lookit me being all bleeding edge hipster because I wanted to share the concept of Hygge with my family in the form of handmade pajama pants as Christmas gifts last year.

Pin this project for later!
I am including affiliate links in this post for your convenience.

Thursday, January 5, 2017

DIY Flannel Handkerchiefs and Friday Favorites Linky Party Week 353

My poor wee little nose just can't take it any more. I blew through a 100 +count box of tissues (literally) in three days and my Plague is now just barely showing signs of stopping. If it weren't for my neti pot (affiliate link for your convenience) I  wouldn't be able to breathe since I'm all stuffed up with a cold AND a sinus infection. Never do anything half way I always say! 

Fortunately, as I felt this ick coming on early, I made a stack of quick and easy flannel handkerchiefs to use in addition to disposable tissues to keep my nose from getting chapped and feeling raw. By bouncing back and forth between the two types of tissues I don't have a chapped nose for the first time in forever! Not to mention, the flannel hankies don't disintegrate after using a neti pot like the paper tissues do. (Ew.)

Flannel tissues are super simple to make!

 Pin this tutorial for cold and flu season!


1. Cut a piece of flannel cloth in the size of your choosing.

Sunday, December 11, 2016

16 of the Best Gift Ideas for Creative Crafters

Do you have a crafty or creative person on your gift giving list? The one who isn’t shy about making a thoughtful knitting or crocheting, needlepoint, cross stitch or sewing gift and you’d like to reciprocate but that just isn’t in your mad skill wheelhouse?

I hear you AND I can help you because I but together a guide giving guide for crafters and creative types of things they’ll love to use to make gifts or they are kits with everything included so YOU have everything to make a unique gift for them if you like!


 Pin this gift giving guide for later!

Holiday Gift Giving Guide for People Who Like to Make You Crafts and Stuff

Sunday, October 16, 2016

DIY Victorian Skeleton Halloween Decoration

I have a thing for gazebos. Like a deep down serious love.  I’m not sure why, maybe it is wrapped up in some romantic notion in the books I devoured as a kid about Victorian England. The history is fascinating and so are the clothes!  Fantastic gigantic hats, dangerous and deadly small waists, dresses with flowing trains – it is perfect Halloween attire!

Or in this case, the perfect Halloween decoration.


I can't tell you how much I love this Victorian skeleton couple enjoying the holiday in an iron gazebo

I met this dashing couple in Hotel Breakers when I went to this year’s Bloggy Conference at Cedar Point (you can read about how I spend last year at Cedar Point Halloweekends looking for park Easter eggs on Condo Blues here.)

Tuesday, October 4, 2016

How to Sew Cartridge Pleats the Easy Way!

I’ve made many curtains for past homes but it wasn’t until I started building Elizabethan Renaissance costumes that I learned how to sew cartridge pleats for curtains by using the same technique to make cartridge (also called gauge or gauging) pleat skirts!

Back in merry old Elizabethan England - way before they had central heating - nobility used heavy fabrics similar to our modern upholstery weight fabrics to make clothing. Dresses had voluminous skirts, small waistbands, and the illusion of large child bearing hips were all the rage.

 Pin this sewing tutorial for later!

Cartridge pleats solved the problem because they allow you to attach large amounts of heavy fabric to a small waist band than typical gathering. Gauge pleats also allow the skirt to stand out from the body a bit to create large hips and a booty (with the help of padded bum or hip roll of course.)

Thursday, August 25, 2016

Friday Favorites Linky Party - Week 335

I started sewing when I was 5 years old. I never owned a new sewing machine. I have a 1978 Kenmore that was very fancy pants in its day. It has a monogrammer and dozens of decorative stitch cams. Sure, new machines can now do those things at the touch of a button, but Bessie the sewing machine is as solid as a rock with her all metal parts. She will sew through just about anything. Every time I think her day is done, my sewing machine repair person makes her run like a top again.

Or mostly. At this point, the buttonhole, cams, and monogrammer are DOA. The  things I need to sew a big sewing project.

Meet Eleanor. My first new sewing machine! She is a Brother SE400 Sewing and Embroidery Machine I bought from Amazon (affiliate link for your convenience.)  The upside is it was significantly cheaper to buy the sewing machine from Amazon than from a local store. The downside was waiting three long and agonizing days for it to be delivered!


Eleanor will be a fantastic addition to my sewing and serger machine fleet. Bessie will stay in service sewing the construction work - especially when I work with upholstery fabrics. Eleanore will do the detail work. The two sergers will pitch in as needed to do things that only sergers can do.

Let's celebrate with a party!

Tuesday, March 22, 2016

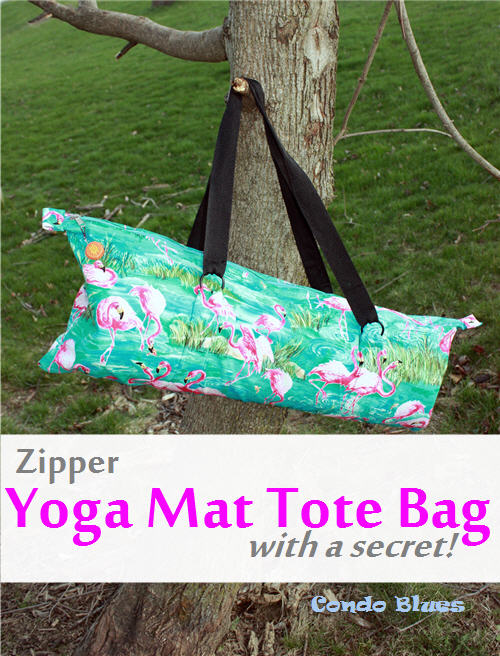
Zipper Yoga Mat Tote Bag Tutorial

Yoga is my favorite form of exercise. Husband thoughtfully gave me a better and slightly thicker sticky yoga mat so I didn’t have to borrow his mat anymore.  Awww. What a guy!

He offered to buy me a new yoga mat bag too. I told him I had all of the materials I need in my craft room to make a yoga mat bag.

Three months later I finally got around to making it.

Pin this post for later!

My bloggy friend Jen Goode from 100 Directions asked me to be part of her National Craft Month celebration.   Jen’s blog collaboration was the kick in the seat I needed to design and sew the yoga mat bag I planned from recycled and stash bust craft materials.

Wednesday, March 16, 2016

Felt Peep Easter Bunting

You know it is Easter season when Peeps start peeping their wee little face at you from rows upon rows of packages in the candy aisle. Love them or hate them - their seems to be no in between - it is full on Peep Season.

I like marshmallows but for some reason, eating marshmallow Peeps is not my thing. But decorating with Peeps? That's something I am into.


Photo courtesy of Make


Monday, February 15, 2016

How to Make a Reversible Valentine’s Day and St Patrick’s Day Garland

I don’t decorate for Valentine's Day or St Patrick’s Day very much, if at all. I’m not hating on either holiday.  I don’t have much room to store extra decorations that will be up for only a few weeks for Valentine's Day only to take them down and put up new decorations that will be up for only a few weeks for Saint Patrick's Day.

I got a flash of inspiration when I saw the servants hall in Downton Abby decorated with colorful cloth pennant garland in a recent episode. I know I’m a little late to the cloth garland party but a Valentine’s Day decoration I can flip over and reuse as a Saint Patrick’s Day decoration will solve my storage and holiday décor problem nicely.

Let’s get our DIY on!

St Patrick’s Day and Valentine’s Day Garland Decor Tutorial

 
Pin this post for later! 
(No dog Project Mangers where harmed in the making of this project.)


Tuesday, January 5, 2016

Our Favorite Condo Blues Craft Projects of 2015

We’re celebrating the New Year by looking back at some of our favorite Condo Blues craft projects and tutorials we published in  2015.

When it comes to crafts, upcycling and recycling materials are the things you crave. 8 out of our most popular craft post tutorials feature reclaimed materials. Woo hoo! Who says green living can’t be cute and creative living too?
 

Our Top 11 Condo Blues Craft Projects in 2015


Make Candle Wax Warmer Melts, Tarts, and Cubes: The Complete DIY Guide!  


How to Make Aluminum Can Coasters 

Sunday, December 27, 2015

Our Top Condo Blues Blog Posts for 2015

 Before we can say hello to 2016 we should take a look back at 2015. It is always interesting to me when I take a look at which Condo Blues projects and blog posts are the most popular posts of the year because I am almost always surprised!

2015 is no exception. I had no idea there were so many readers who want to cut glass bottles without fire or risk of burning down your house. I thought it was just me!
As we say good bye to 2015 and before we say hello to a bright, shiny, and new 2015 let’s take a look at my most popular Condo Blues in 2015.
 

How to Cut a Glass Bottle with Hot Water


Sunday, September 20, 2015

100 Homemade Halloween Costumes!


My absolute favorite, favorite thing about Halloween is costumes! It is the only day of the year you can dress up as weird as you like and no one will think you are a weirdo.

Unless your costume is a Weirdo.


Husband and I as Raving Rabbid Weirdos. Bwaaaaaaaaaaa!

Thursday, July 30, 2015

20 DIY Earphone Cases

I’m more likely to listen to music on my phone if I have earphones with me. Unfortunately most of my earphones sit all by themselves in a drawer. Even the cute painted earphones I made over (read the tutorial here.)


  These earphone case ideas make great gifts too!


My earphone cases are long gone. I need replacements. Yes, replacements.


20 Clever Earphone Holders for Music on the Go

Wednesday, July 1, 2015

12 Favorite Summer Craft Projects

Summer is in full swing. I am loving it! Warm summer days are excellent DIY and craft project weather. Here are a few of my favorite summer craft projects that are not only clever but useful too!


Pin me!

DIY Personalized Insulated Wine Glass Tumblers –  Fun and reusable!

Tuesday, June 16, 2015

25 of the Best Ways to Reuse Old Pill Bottles

Husband and I are relatively healthy people but every once and awhile we get sick enough to require prescription medicine. More often than not the medicine comes comes in a plastic bottle that aren’t always recyclable.

I really hate tossing something like that into the trash and sending it to a landfill to sit on a mountain of garbage for a thousand years.


Pin this post to get organized!


Sunday, May 31, 2015

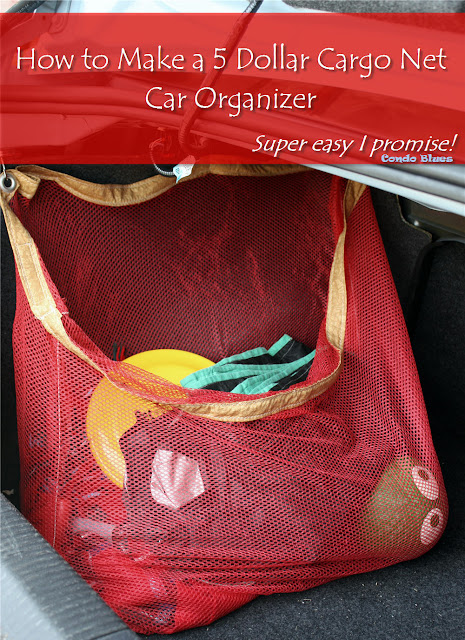
How to Make an Easy Cargo Net Car Organizer

I have a bunch of junk in my trunk.

The trunk of my car, people. Not my badonka donk! Although truthfully….oh never mind.

The biggest mess maker is the stash of reusable shopping bags we keep in the car. They slosh out of the big shopping bag that is supposed to contain them and into everything else in the trunk.

How to make a cargo net car organizer
Pin this tutorial for later!

The last straw was when the mess hid a container of orange juice that popped out of a grocery bag and it sat in a hot car for several days. I still have nightmares about the stench that followed. So. Evil. Horrible. BAD.
Most car organizers I found are not made for sedans, only SUVs. Besides we don’t want a shopping bag and stuff organizer that doesn’t allow us to fold the back seat down. This is mostly an issue during the summer when I’m hauling color guard equipment back and forth to practice.  The flags don’t fit in the trunk unless I fold the seat down.


Would you believe this is what my trunk looks like when it is neat? Sad. I know.

 Dollar Store Cargo Net Car Organizer Tutorial


I gave Lisa my idea to hang her shopping bag organizer on the side of the car trunk instead of the back. She came up with using laundry bags because the mesh is small enough to contain the most important thing in our car (besides snacks) my Frisbee and tennis ball for the dog park!


You will need:

Mesh laundry bag - This mesh laundry bag is similar to the one I used  

Fabric - I used a fat quarter of fabric

Interfacing

Scissors

Large grommet kit (I used this grommet kit from Dritz)

Iron and Ironing board

Thread

Straight pins

Sewing machine

Magnet hooks (I buy my magnetic hooks here)

Hook and loop tape 

A canine project manger – Try to find one who doesn’t sleep on the job.


I am not sleeping on the job! My eyes are open!

Make it:

1. Remove the drawstring from the laundry bag. I cut the end off with a pair of scissors.

2. Use the scissors to cut a horizontal side open from the closed end of the bag to the open end of the bag.

3. Measure the circumference of the horizontal opening in the laundry bag and add 2 inches to that measurement for a seam allowance.

4. Use this measurement to measure and cut a piece of fabric and interfacing that is that long and 4 inches wide.

5. Fold the rough lengthwise edges of the fabric right side (the pretty part) to wrong side (the back of the fabric) in and iron them into place to make smooth edges to your banding.

6. Fold the banding wrong sides together and iron it into place. This will be the banding for the top of your cargo net trunk organizer.

7. Use the straight pins to pin the banding around the top of the open mesh bag.  Use the sewing machine to sew the top and the bottom of the band into place.

I used a zig zag stitch because I forgot to reset my sewing machine back to a straight stitch after a previous project and I figured why not? You can use a straight stitch too.

8. Pin the raw open end of the laundry bag closed. Use the sewing machine to sew the bag closed.


You should use a straight stitch to make this seam.

9. Set two grommets (also called eyelets) into the band of the bag using the grommet tool that comes with the grommets. Read my tutorial How to install grommets if your kit doe not come with clear instructions.
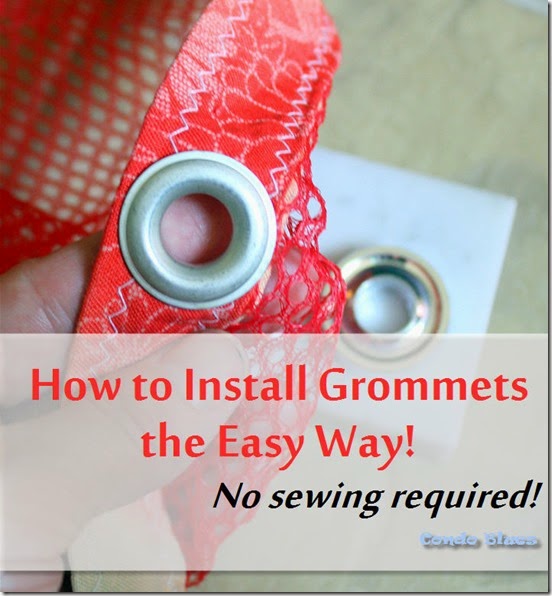


10. Sew a piece of the hook side of hook and loop tape to the back side of the fabric band. This will help keep your trunk organizer in place and against the carpeted wall of your car trunk.

Warning: This will not be strong enough to keep the organizer full of stuff attached to the side of your car trunk. Guess how I know? That’s why we need Step 11.

11. Attach the magnet hooks to the metal sides of your trunk, hang the cargo net up, and get that organize that junk in your trunk!


This is such an easy way to organize the stuff in our car and make sure it stays put! I made two net car organizers for each side of our trunk. One cargo net keeps our reusable shopping bags organized. The other cargo net keeps our picnic blanket, Frisbee and toys, and car seat covers from sliding all and hiding fetid orange juice containers for days on end.

 
Easy organization. Love that!

The net organizers are easy to remove if we need extra room in the trunk for a trip or when I buy something big at the home improvement store.

How do you keep your car organized?


Did you enjoy this post? Get more like it by subscribing to the Condo Blues RSS Feed or to Condo Blues by Email.