


Tiny top hats make Halloween costumes more fun!
The steps in this tutorial are very forgiving. You don’t necessarily need to do the steps in the order I have them listed in this tutorial with the exception of assembling the hat pieces.
How to Make a Top Hat Out of a Paper Cup

My hat’s off to you!
You will need:
Hot glue gun - Upgrading to this fine tipped hot glue gun changed my life - no more big burlps of hot glue ruining my project!
Hot glue gun finger caps - safety first!
Card stock (I’m using pasta boxes)
Fabric (I bought a fat quarter of fabric)
Pencil
Scissors
Hair clip, or plain head band
Mini wood clothes pins
Disclosure: I am including affiliate links in this post for your convenience.
Make it:
1. Make the top of the top hat by tracing the top of the disposable cup with the pencil on your card stock. Cut the circle out with your scissors.

Once again, I am upcycling trash into head wear. How green is that?!
2. Cut a large round circle from card stock to be the brim of your hat. My brim is 5 1/2 inches for no other reason than I traced a round object that looked like it would be the correct size brim for my paper cup top hat and it is 5 1/2 inches in diameter. The size is going to depend on the size of your head, cup, and preference.
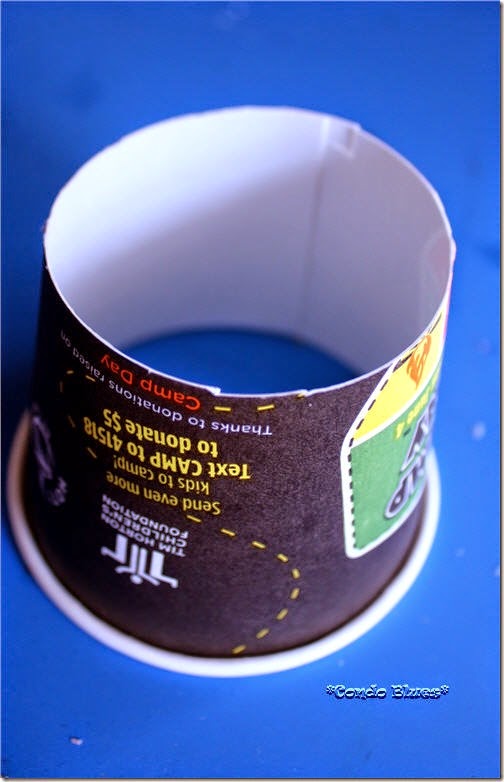
3. Optional: Trim the bottom of the cup to size if need be. I am using a 12 ounce coffee cup and it is a little too tall for my small head. I cut 1 inch from the bottom of the cup to make it a better proportion for me.
If you like you can cut the rolled edge from the top of your cup if you want a smooth top. I like the Mad Hatterish detail the rolled edge gives the top of my mini top hat. It also helps hide the seam where the the top and sides of the hat meet.
If you don’t want a Mad Hatter shaped mini top hat, you can flip the cup over and use the bottom of the cup for the top of your top hat. This will make a Pilgrim or witches shaped top hat.
4. Trace the top of the disposable cup with the pencil on the fabric. Next, add at least a half an inch to the outside of the circle for a seam allowance. 
It is a burden to buy take out coffee in a disposable cup for a Halloween costume project but I persevere.
5. Cut the fabric circle out with your scissors.
6. Use the fabric glue to glue the fabric to the center of the cardboard circle. We are using fabric glue because it will dry clear and not show hard blurps of glue like hot glue will.
Glue the overhanging fabric to the bottom of the cardboard to make a finished edge. This will be the top of your Steampunk top hat.

This is what the top of my hat looks like before I glued the extra fabric to the underside of the hat top to make a smooth fabric edge. Use the mini wood clothes pins to clip the pieces and parts of this project in place as the glue dries as needed.
7. Use the fabric glue to center a rectangle of red fabric around the coffee cup.

I folded and glued the edge of the fabric to make a smooth edge. Sometimes I don’t if I am using a fabric that doesn’t fray or plan on covering the seam with a pin or feathers.
I like the cut my rectangle a little longer than my cup is tall. That way, I can tuck and glue the top an bottom edges of my fabric over the top and bottom of the cup for a more finished look.

You can leave the top and bottom edges raw if you plan on covering them with trim.
8. Use hot glue to glue the top of the top hat (fabric side up to the top of the paper cup.

From the photo above you can see that I glued the top of my hat to the cup before I glued the fabric to the sides. In hindsight, I should have made a more finished top edge to my hat by gluing the top of the hat onto the base after I covered base in fabric. In the end it didn’t matter because I planned to cover the seam with trim but if I make this hat again, I’d follow the steps in the order I listed them here.
Make the Top Hat Brim
9. You will need to trace and cut two circles of fabric to make the hat brim.
- One circle needs to be the same size as your cardboard hat brim. This will be the bottom of the hat brim that sits on your head.
- The second circle needs to be at least a half an inch larger than the cardboard hat brim for a seam allowance like you did for the top of the hat in Steps 4 and 5.
10. Use fabric glue to attach the same size circle of fabric to what will be the bottom of the hat (the side that sits on your head.)
11. Use fabric glue to center and attach the larger fabric fabric on top of the hat brim (the part that will face the sky.) Fold the extra fabric over the edges of the hat brim and glue them into place to make a finished edge like you did in Step 6.

I experimented with sewing this step instead of gluing the fabric to the top of the brim. It isn’t as smooth as I hoped it would be and I’ll be gluing all of my hat brims in the future. Fortunately no one will see this mess because it is the part that sits on my head.
12. Let’s put this hat together! Wearing the hot glue gun finger caps (the greatest safety invention in the universe!) use hot glue to glue the top of the hat to the top of the paper cup and glue the bottom of the paper cup to the top of the hat brim.

It’s like making a hat sandwich.
13. Time to decorate your hat! I used hot glue to glue leftover gimp trim to the top and brim of my hat and cover my seams. You can add a ribbon hat band, button, or even a feather plume. Go crazy. Or not. It is up to you.

See how the trim covers my not so great looking edges? I will hide my over enthusiastic hot glue blob and fabric seam with a tulle hat band and veil in the next step.
14. I made a tulle bow to hide the fabric seam by looping a length of scrap tulle around my hand several times…

Loopy!
… and using a second piece of scrap tool as a hat band tied the tulle loop to the hat with a square knot to make the loops into a bow.

Don’t forget to fluff the ends of the bow!
15. Hot glue a comb,metal hair clip, or hairband to the bottom of the top hat to wear it as a fascinator.
Here’s the complete outfit.

Dancers tip: Wear a pair of flesh colored tights (or pantyhose if you wearing them as part of a Halloween costume) under your fishnet tights. The hose will even out the skin tone of your legs. It also helps the fish nets stay on and from bagging around your ankles with movement.
Dancers tip #2: Don't buy the cheapo fishnet tights at the Halloween store buy professional dancer's fishnet tights (get more info about them here.) Dancer's tights have a flat nylon sole so you aren't painfully walking on painful little ropes all night. They cost a little more but are totally worth it!
Dancers tip #2: Don't buy the cheapo fishnet tights at the Halloween store buy professional dancer's fishnet tights (get more info about them here.) Dancer's tights have a flat nylon sole so you aren't painfully walking on painful little ropes all night. They cost a little more but are totally worth it!
Did you enjoy this post? Get more like it by subscribing to the Condo Blues RSS Feed or to Condo Blues by Email.
No comments :
Post a Comment
I love comments and read them all! If you’re shy and don’t want your opinions made public, you can always email me at condoblues [at] gmail [dot] com.