And that goes double for my sewing room and craft studio.
I eventually learned that if I take 10 minutes of my time to make a label for an item, I will always put it back where it belongs and save an hour of searching for it later. It also keeps family members from asking me to stop what I'm doing to find household items that are staring them in the face. I tell them to read the label to the bin/caddy/pocket/shelf/whatever.
Genius!
I need to label the new storage bins I'm putting in my craft room. I want them to look cute but they also need to be something I can easily update because my supplies rotate in and out. I considered chalkboard labels like these but figure the writing will wear off with handling based on other chalkboard labels I use (Disclosure: I am including affiliate links for your convenience.)
One thing I like about decluttering and organizing a creative space is I often find a long forgotten cache of supplies that I can use to make or build the custom storage solution I need. In this case, the buried treasure is a bunch of discontinued countertop samples a friend gave me. I'm going to craft those countertop samples into storage bin and box labels and show you how to do it!
Public Service Announcement: Please don't take a bunch of lament countertop samples from a store if you don't plan on using them to buy kitchen or bathroom counters. Many stores will give you all the discontinued samples you need if you ask nicely for them. That's how I got mine.
You will need the following craft supplies:
Discontinued countertop samples or wood craft tags like these
Craft paint and paintbrush
Paper craft labels - I used this die set to cut labels on this exact Sizzix Big Shot. If you don't have a die cutting machine these paper labels are a similar shape to what I used .
Tacky glue
E6000 glue - this kind of E6000 is no odor!
Pen, pencil, or markers
Step by Step How to Make it Tutorial
1. Remove any stickers or labels from the wood side of your countertop sample if needed.
2. Use the paint and paint brush to paint the wood side of your countertop sample. I used two coats of paint for mine. You may need more or less depending upon the color of the wood and the color and type of craft paint you are using.
3. Die cut or use a flourish square paper punch like this one to cut a paper label if needed.
4. Use the tacky glue to glue the paper label to the center of the painted countertop sample. I suggest using a firm but light hold glue like tacky or school glue for the paper label. That way you can easily remove the paper label and replace it with a new one when you update the contents of your storage cube.
5. Use the pen/pencil/markers to write the contents of the storage bin on the label.
After I made the first label, I realized it is much easier to write neatly on the label if it doesn't have the cloths pin attached.
6. Turn the label over, apply E6000 glue vertically to the center of the label and glue the centered wood cloth pin into place. Allow the glue to dry. I suggest using E6000 because it is a strong glue that will hold a working clothes pin.
Clip it!
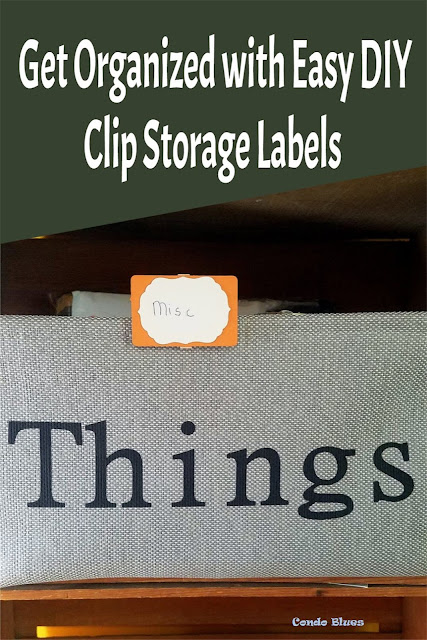
7. Clip the label on your storage basket, bin, or cube and get organized!
Organizing all the things!
Would you rather buy than DIY storage bin labels? Check out the following options - and more! - below!
Did you enjoy this post? Get more like it by subscribing to the Condo Blues RSS Feed .


No comments :
Post a Comment
I love comments and read them all! If you’re shy and don’t want your opinions made public, you can always email me at condoblues [at] gmail [dot] com.