I bought two folding camp stools to use as foot stools on my front porch last year. I like that the folding stools are versatile. I don’t like that Michael's didn’t have two with matching fabric. Not to mention the fabric is pretty cheesy and cheap.
Let’s fix that.
It’s time for a folding camp stool makeover!
You will need:
A folding cloth seat camp stool
Staple puller – To make you life a little easier, I suggest using this furniture stapler remover that is made to reach and remove tricky heavy duty staples rather than an office staple remover
Fabric – use something dutiable like upholstery fabric or canvas. I am using a vinyl backed upholstery fabric remnant.
Coordinating color thread
Seam ripper
Scissors
Screwdriver
Small wood screws
Drill and drill bit
Sewing machine
Sewing clips – I bought these exact sewing clips because they come in two sizes and in a cute tin storage box.
Disclosure: I am including affiliate links in this post for our convenience.
Step by Step Wood Camping Stool Makeover Tutorial
I used a staple remover to carefully remove the cloth seat that was stapled to the folding seat frame and set it aside to use as a pattern for the new fabric seat. I left the support straps on the stool to make sure the new seat was the same size as the original when I attached it to the frame.
Good bye mismatched fabric!
I hand sanded the legs of each stool, paying close attention to the discolored areas and removed all of the discoloration.
I spray painted the wood frame of the chair with 2 coats of this black Krylon 5007 COLORmaxx Spray Paint and Primer. I like to use paint plus primer spray paints because I end up using less due to the primer giving each coat of paint better coverage. The small extra expense is worth it!
While the spray paint dried, I turned my attention to making a new seat for the folding chair. I used a seam ripper to open the side hems of the old seat, ironed it, and used it as a pattern to cut new seats from a remnant of outdoor fabric.
I hemmed both sides of the seat with my sewing machine and coordinating thread.
The ends of the original seat fabric that wrap around and attach to the folding chair frame were not hemmed. Always up for a challenge, I used my serger to finish the ends of the new seat fabric so it would be less likely to fray.
In hindsight I should have skipped this step because the ends of the fabric wrap around the sides of the seat and fold in onto themselves, giving a clean edge. Not a huge issue, but instead it would be easier to apply Fray Check to prevent the fabric from fraying (you can learn more about my epic how to stop fabric from fraying without sewing tool here. )
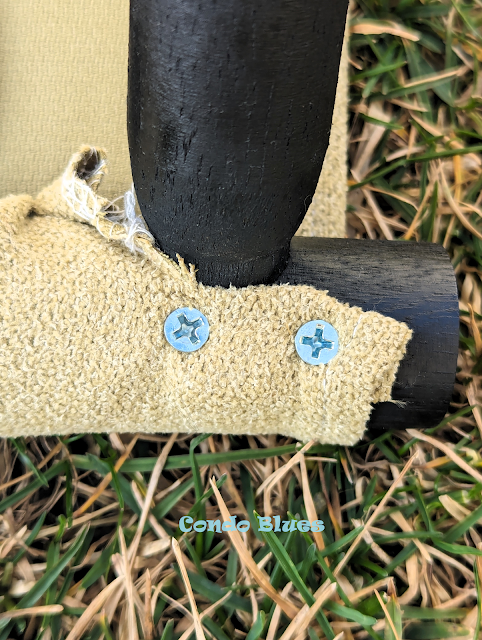
I wrapped the fabric around one end of the folding stool frame and used a drill and drill bit to drill pilot holes through the fabric and into the wood frame. Using a line of quarter inch wood screws (you can buy #4 x ¼ inch woods screws hereand a screwdriver I attached the fabric to the frame. I choose screws because they will allow me to remove the fabric seat more easily if I ever want or need to make a new seat cover in the future.
I used the same technique to attach the other end of the fabric seat to the frame and I was done.
All done!
Have a seat!


No comments :
Post a Comment
I love comments and read them all! If you’re shy and don’t want your opinions made public, you can always email me at condoblues [at] gmail [dot] com.