
When someone asks why we started composting, my husband and I say it’s because we had to because all we had for garden was clay and zero topsoil. We sang the condo blues over how very little would grow in that pretending to be soil, researched how to amend it, and experimented with composting in a DIY compost bin.
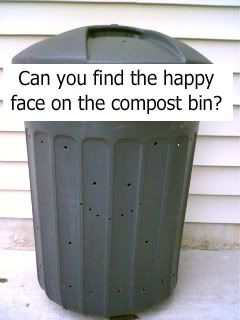
I made our first compost bin by drilling a bazillion holes in a black plastic trash can. We loaded it up with food scraps and paper from our paper shredder and in about a year we had compost! We added the homemade compost to our soil and after awhile our tan clay soil started to turn black with nutrients. I practically dance the first time I dug a hole and found an earthworm – it is another indicator that the soil is improving!
We take our composting very seriously. Why do you ask?
And we’ve been composting ever since.
Eventually we upgraded to a single tumbling compost bin that is easier to turn. It works great but is difficult and smelly to dig through the raw ingredients to remove the finished compost from the bottom of the bin. We upgraded to this exact double tumbling compost bin which made from a solid piece so there isn’t a risk of the stand coming part when we have to move it. (Disclosure: I am including affiliate links in this post for your convenience.) The best feature is that the stand is a reservoir that collects compost tea every time rain saturates the compost in the bin.
Since we upgraded our compost bin I figured it was time to upgrade our compost patio, or station, or spot, or whatever ever you call the place in the yard where stuff goes to rot. Last summer I used cardboard boxes as temporary weed barrier for the currant compost station knowing I’d make it over the following year when we upgraded our bin.

It isn't pretty but it works
It’s a year and an upgrade later. Let’s build stuff!
How to Set Up a Compost Bin
As I suspected before I moved the bricks from the area, the cardboard weed barrier was completely decomposed. I had a weed and grass free dirt patch the lazy way so at least one thing is going to plan so far. I covered the area with a sheet of weed barrier and leveled the area with leveling sand.

I am also a very serious bricklayer
Instead of using crushed stone as a base layer over the sand, I used three paver base panels like these which are one of my favorite things in the world because they are light enough to carry with one hand and I like to avoid hauling heavy bags of crushed stone whenever possible. The panels also make it so much easier to adjust the sand layer if needed to keep things on the level.
Next, I put down vintage bricks and this exact paver edging to keep the lawn service from knocking the bricks out of place with their lawn mowers and swept polymeric sand (you can learn more about it here) in the spaces between the pavers to lock them into place.

Normally you would flip the paver edging to the inside edge of the bricks so you can’t see it. I installed it this way because my used vintage bricks have a habit of flopping all over because they are perfectly worn and imperfect.
Now it’s time to set up the compost station.

I want to elevate the compost bins a bit so I can put a bucket under the compost tea spout. I cut a wood pallet from a delivery in half with a circular saw and stacked the two pallets to make a compost bin stand.

I am thrilled I won't be walking around this beast in my garage anymore
I used Gorilla Glue construction adhesive (you can get it here) to attach the pallets to each other because with my luck I’d they probably come apart when I’m turning the compost bin.
I plunked the new compost bin on top if the pallet stand. The black trash can placed next to it holds the shredded cardboard and this exact wood chip pet bedding we use for brown matter since we don’t have access to leaves or grass clippings.

Looking for more compost bin ideas? Check out the following options – and more! Below!
Did you enjoy this post? Get more like it by subscribing to the Condo Blues RSS Feed or to Condo Blues by Email.
1 comment :
I love that your pallet says do not reuse. HA!!
Post a Comment
I love comments and read them all! If you’re shy and don’t want your opinions made public, you can always email me at condoblues [at] gmail [dot] com.