As much as I would love to jump into my bathroom and start slapping new paint on the walls, the new paint would look awful. I’d make the job ten times harder if I don’t prepare the walls for paint first. I lot of folks don’t bother filling nail holes and such thinking they’ll hang the same stuff in the same place on the walls of the newly painted room. Sometimes that’s the case. More often than not, plans change and the little hole you have to fill and repaint is going to look worse than if you filled it before you started the project.
Trust me. I get it. I’ve had this conversation with myself every time I’m tempted to take a shortcut when my master bathroom renovation throws me another unexpected curve ball.
“Do you want to do it fast or do you want to do right?” is always the last question I ask myself before I make a decision about a task. Then I sigh and say,”I want to do it right.” Sure it may be more of a pain or take longer (hence the internal sigh) but doing it right the first time is better than cheating and having to do it over again.
How much preparation your room will need for paint will depend upon:
- Do you need to fill small holes and dents in the walls?
- Do you need to replace or patch larger areas of drywall in the room?
- Will you need to paint around anything attached to the walls?
- How drastically do you plan on changing the color of the walls in the room?
- The size of the room.
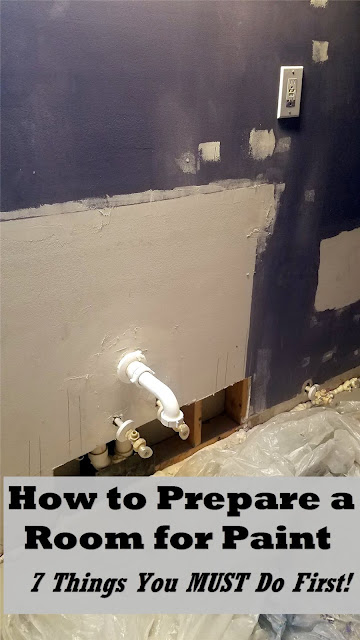
In this example, I’m preparing my master bathroom walls for a new coat of paint on the walls and ceiling. I have nail holes from crown molding I removed, a few dents in the walls, chipped paint, larger areas I had to remove due to black mold, and I changing the paint color from purple to light gray.
How to Prepare a Room for Paint
1. Remove everything hanging on the walls and furniture from the room if possible. If you can’t remove heavy furniture from the room, push it into the center of the room and completely cover it with drop cloths. You may want to attach the drop cloths with strategic strips of painter’s tape to the underside of the furniture to make sure the drop cloths don’t slip off while you are painting the room. This isn’t an issue for my project since I demo’ed everything in my bathroom down to the floor joists but it will be when my husband and I paint the bedroom to match.
2. Cover the floor with as many drop cloths as it takes then add a couple more for insurance. I might get away with only using drop clothes in the shower area because I’m laying the tile floor after I paint. I’m not because using floor cloths will make cleaning spackle dust easier after I sand my drywall patches. Also I don’t want paint drips in my ducts or exposed plumbing. And frankly, after replacing and leveling the entire bathroom floor I am overprotective of the current floor situation because it was a literal and figurative pain to do.
3. Replace or repair larger areas of damaged drywall in the room. I have two places in my bathroom where I removed moldy drywall and had it treated. I like to repair my large areas like this first so it is drying while I move onto Step 4. If the big areas need extra attention (and they usually do) I can take care of that while Step 4 is drying. I recommending using this large hole wall patch kit because it comes with everything you need. (Disclosure: I am including affiliate links for your convenience.)
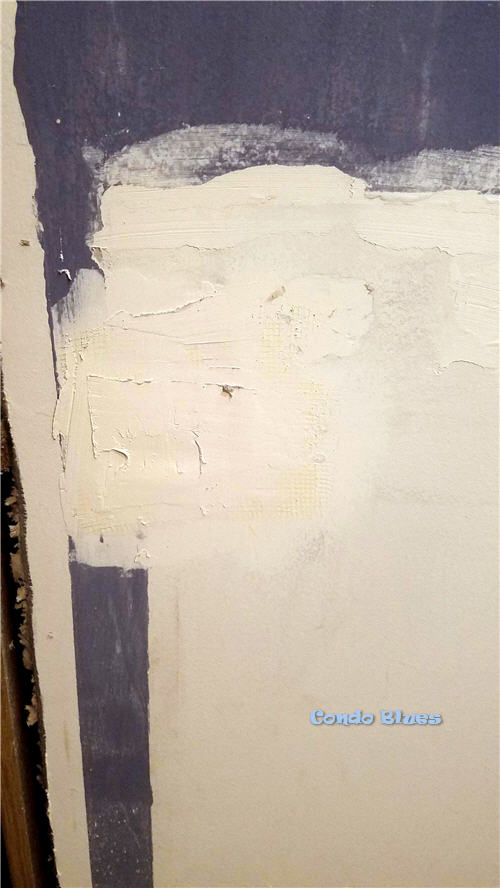
When repairing holes, cracks, and dents in a wall with patches and/or spackle it is always better to do several thin coats of spackle (and sanding them in between coats) than blobbing on one thick coat of spackle. Guess how I know?
4. Fill small nail holes, cracks, and dents in the walls if needed. For small wall repairs I recommend this Wall Mending Agent Kit because it is a formaldehyde free spackle that works on both wood and plaster and comes with everything you need including the sandpaper!
5. Sand any dry spackle with 120 grit sandpaper until it is smooth and flush to the wall. I prefer to use a sanding block that comes with sandpaper like this one because it gives me more control over the finish and its hard surface doesn’t fake me out like a sanding sponge can when it comes to being flat and flush.
6. Dust the walls with a cloth or wash the walls with mild dish detergent diluted in a bucket of water as needed. My walls need it because of all of the patching and sanding my walls needed.
7. Apply painter’s tape to protect baseboards, the base of wall or ceiling light fixtures, etc. to protect those area from brush accidents and spatters. Basically if you don’t want paint on it and you can’t tarp it, tape it!
Now it’s time to paint!
If you have new drywall and patches or are significantly changing the color from light to dark or dark to light you will need to apply a primer to the walls first. If you will be applying a dark color paint, I suggest you ask the paint store to tint your primer otherwise you may will many extra coats of paint to get full coverage.
Truthfully I always prime my walls no matter what so I get clean and even paint coverage in the room. Kilz is my all time favorite low VOC and low to practically no odor primer. Since moisture could still be an issue in this bathroom I will being using this exact Kilz Mold And Mildew Primer so I don’t have to repeat this renovation in the future unless I want to!
After the primer coat dries, it is finally time to break out the brushes and rollers and paint the entire room!
Looking for more wall repair and painting tools, tips, and ideas? Check out the following options – and more! – below!
Did you enjoy this post? Get more like it by subscribing to the Condo Blues RSS Feed .


No comments :
Post a Comment
I love comments and read them all! If you’re shy and don’t want your opinions made public, you can always email me at condoblues [at] gmail [dot] com.