Condo Blues: DIY project
Showing posts with label DIY project. Show all posts

Wednesday, April 19, 2023

Easy Porch Light Update

Now that we are moving on in to warm Spring weather (in theory. This is the Midwest after all. We can experience all 4 seasons in one week just to keep things interesting) it's the perfect opportunity to spiff up, renovate, and decorate our front porch and yard.

Which shoots a long overdue project to the top of our porch project punch list: replace the overhead porch lights!

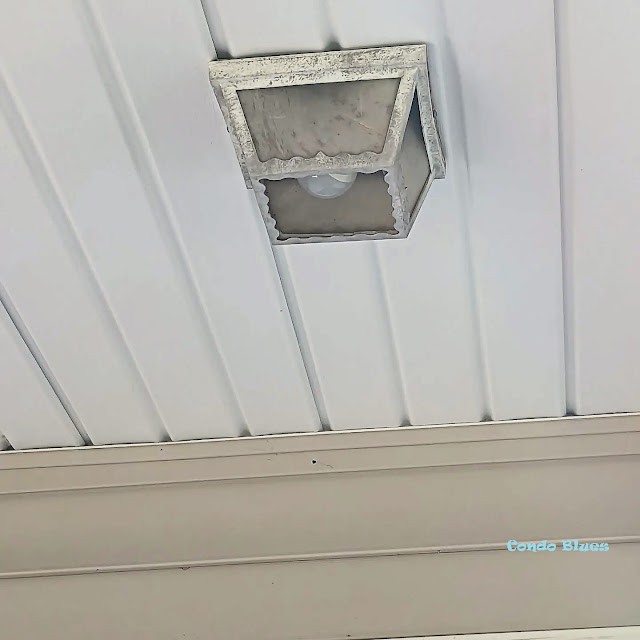
Our porch light fixtures are original to the house and not made to last. The entire fixture is made of plastic and was so brittle it broke apart when I gently shuttled it from the porch ceiling to a waiting garbage can. There was no salvaging any part of this light fixture and truthfully, we didn't want to either. 


front porch light makeover before
Please excuse the dirt and yuck in these photos. Pressure washing the porch is on the list - honest!

 The hunt for new porch lights was on!

Monday, April 3, 2023

How to Drill a Hole in Ceramic, Porcelain, and Stone Tile

One day after refilling the conditioner in this hanging soap and shampoo Dispenser , The pump bottle refused to snap into place, lurched from the wall, and tried to kill me. I bobbed. It weaved. The bottle crashed to the floor and cracked. (Disclosure: I am including affiliate links for your convenience.)

One of the things I like about the Dispenser is that you can buy replacement parts. I did so several times over its lifetime. However, this time I needed so many new parts it ended up costing as much money as if I bought a new wall mounted shampoo and conditioner pump.

Since my Dispenser was looking shabby and I think we got more than our money’s worth out of it considering it was a yard sale purchase, I bought a replacement.

I bought this exact Simple Human Double Wall Mount Shower Pump because we really only use two pumps out of the original four. From reviews, it is sturdier (I see the same dispenser in hotels so it has to be durable to take constant abuse) which means I may not have to replace the pumps over time. I love that!

The only negative according to the reviews is the bracket adhesive is not as strong as the adhesive the Dispenser uses. There were reports of the Simple Human dispenser falling off the wall after all of the instructions were followed. Not a huge deal because the Simple Human dispenser also comes with screws and wall anchors. I grabbed my drill and got ready to answer the question,

How Do you Drill a Hole in Tile?

Thursday, March 2, 2023

How to Light a Room without a Ceiling Light Fixture

For some baffling reason, two bedrooms in my house do not have wiring for ceiling lights. I’m not sure why the builder though that some folks in a house doesn’t deserve overhead lighting like the main bedroom but here we are.

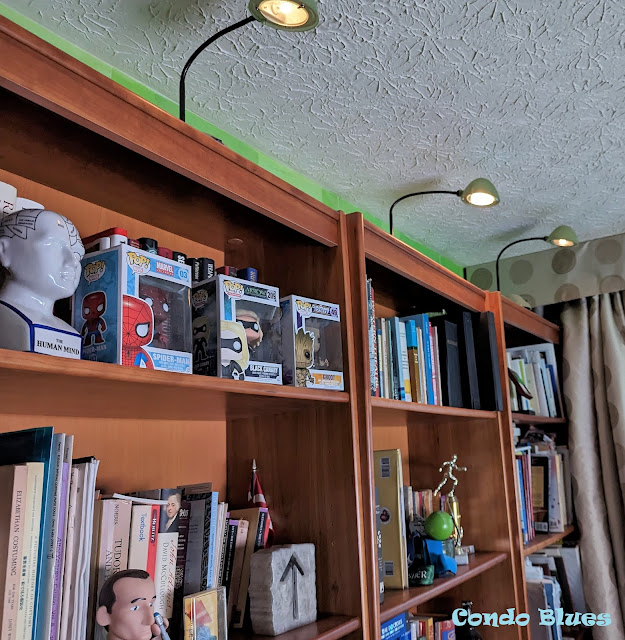
I originally solved our room lighting issue with placing four halogen desk lights on top of the bookshelves that line the wall in our office. This worked well for years until it didn’t. The light bulbs started to burn out more frequently. Replacement light bulbs seemed to burn less brightly (I used the same wattage) and even more puzzling, a random light would blink one day and be fine the next.

 office lights before

Overhead office lights BEFORE

Thursday, April 7, 2022

How to Repair and Replace a Moldy Bathroom Floor

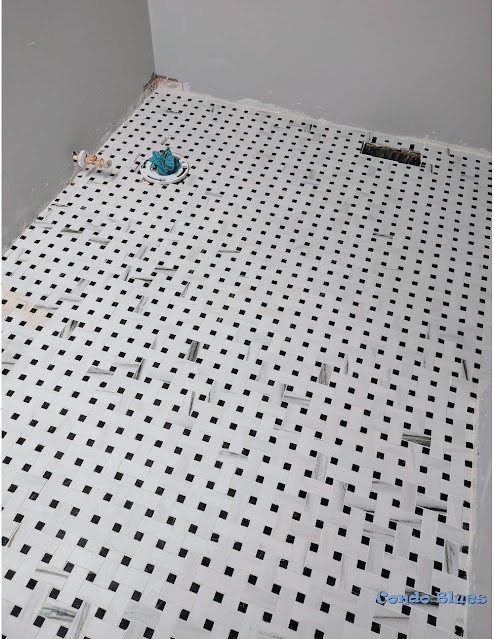
 My master bathroom renovation is coming along at a good clip. We had a leak and a little 5 minute flood in our master bathroom. Everything was just wet enough that we had to call in remediators with giant dryers to dry out what couldn't be removed. After they removed the vinyl flooring, they also found batches of mold around the toilet and recommended ripping out all of the flooring down to the joists. Which gave us an opportunity to replace everything in the bathroom from the ground up - literally!

DIY bathroom floor repair
Save this information to your Pinterest board for later! Share it with your friends!

I found more surprises when I removed the bathroom vanityy More leaks and more mold!


How to Repair a Moldy Floor 
I’m not a doctor, but I have the feeling the cause of my constant ear and sinus infections was living under this sink.
 

Working in sections, I unscrewed the sub-flooring from the joists and used an oscillating multi tool to remove the glued flooring from the joists (you can learn more about my Rockwell Oscillating Tool that uses universal blades here which I chose the Rockwell over other brands, TBH.) (Disclosure: I am including affiliate links for your convenience.)

Once I removed the old moldy subfloor, I realized that there wasn’t anything to screw the new flooring to around the edges of the room. I can’t leave it this way or the new floor could slope over time, the tile will crack, and we’d have to start the process all over again. Trust me, once is more than enough! 

I fixed the issue by using construction adhesive and screwing supports along the existing joists and around the toilet flange (this is called sistering.)  

The wax ring underneath the old toilet was smashed to one side (another unknown water leak!) and the floor flange sat at angle around the plumbing. The toilet didn’t sit level and this caused one of leaks and eventually mold.  I figured that possibly going overboard with sistering and adding framing  in between the joists to keep the toilet level is better than taking a shortcut and regretting it later. Wood is cheap. Mistakes are expensive.


how to sister joists

 I can't tell you how tempted I was to stick a toy skeleton down there before I covered it with plywood.

Cutting the subfloor sections to size wasn't difficult because before I removed the original subflooring I cut the tile underlayment to fit and to used the underlayment pieces as a pattern when it came time to cut the new plywood sub floor.

How to install subflooring

A ton of screws, construction adhesives, and bruises later I installed the new subflooring in the bathroom!

I filled the seams in between the sheets of sub flooring with  Fix It All (you learn about this patching compound that’s made specifically for wood sub-floors here)  put on my dust mask, and hand sanded the seams smooth. There were a few random spots that I couldn’t get perfectly level with sanding. I didn’t want to take a chance on the tile floor cracking over time because of it and started prepping the floor for leveling compound by using spray foam insulation to make an expansion joint around the wall of the room and as a barrier around the furnace duct and toilet flange.

how to patch seams in a wood floor

 Patched!

When you are suing self leveler on a wood floor it is the same technique as using self leveler on an uneven concrete floor. Only the type of products you use is different. You need to use a self leveling compound made for wood floors which requires the extra step of priming the entire floor first.

I filled all of the cracks and seams between sheets of plywood with patching compound first. (learn more about the Henry Pre-Mixed Floor Patch I used here ) – If there is even the tiniest sliver or gap, by its very nature the self leveling concrete will find it and drip down into it and make a huge mess. After the patching compound dried I applied self leveling compound primer for wood floors (you can learn more about find Level Pro Underlayment Primer for wood I used here) with a chip brush.

Once it was dry, it was time to don my super sexy concrete work boots and apply the leveler to the floor. This part if fairly easy (pour stuff from a bucket and push it around the room) but nerve wracking because self leveling compound has a 10 to 15 minute window before it starts to dry and is unmovable. Meaning, if you get it wrong outside of that window, it stays wrong. 


 Given the short working window my husband and I teamed up for this project. He mixed the cement leveler in small batches while I poured and worked it around the room.


Success!

how to use self leveling floor compound cemet  

Don't worry if you have swirling or color variations in the dried concrete underlayment. As long as those parts of the floor are hard, dry, solid, and level, you're ready to go to the next step in your project.


Finally it was tile time! I applied same tile underlayment and seam sealering "tape" as I used in our guest bathroom. Yes the orange stuff is more expensive than other options but it is water resistant and the fact that I can cut it on the fly with scissors or a utility knife makes it worth it in my book. You can learn more about the Schlter Ditra underlayment I used here.


how to install waterproof bathroom tile underlayment
Dry fit time!

Then it was time to get messy installing the tile floor and grout!


how to grout tile and sealant

I'm using ceramic porcelain tile that looks like marble. I don't need to seal the tile itself according to the manufacturer but it won't hurt if I do.
 

The finishing touch was using this exact spray grout sealer  to seal the grout because is made for moisture laden rooms like bathrooms.

Because I never, ever, ever want to replace a moldy sub floor again.

The next step is installing the new plumbing fixtures and lighting!


Looking for more bathroom floor renovation, organizing, and decorating ideas? Check out the following options - and more! - below!

Did you enjoy this post? Get more like it by subscribing to the Condo Blues RSS Feed .

Thursday, February 10, 2022

How to Seal Tile Grout

I get asked all of the time, do I really need to seal grout?

The answer is yes. 

Yes, you do.

Grout is generally made from a mix of water, sand, and cement (unless you are installing tile with small grout lines like mine which required unsanded grout.) Which means the finished product will dry with microscopic spaces in between the sand/cement and is porous. Water and liquids can seep through and cause mold and mildew on your subfloor and trust me when I say this, it is NOT a fun thing to remove and replace.


This is only one small part of the moldy bathroom subfloor I had to remove and replace. 0/10 do not recommend.


Not to mention, even when dry, if the grout is not sealed it is very easy to remove by getting it wet. That's great when you need to clean hazy tile after grouting it but not great for long term wear and tear. This is why you need to add a sealant to protect the grout from liquids and such.

Fortunately, sealing grout lines couldn't be easier. Here's how to do it.

Thursday, September 23, 2021

Fall Chili and Friday Favorites Linky Party 600

 Yesterday was the official start of the Fall Season and the weather decided to cooperate.

With a 20 degree dip in temperature and overcast rainy day. Which makes it a perfect opportunity to brew a cup of tea, break out a cozy afghan, and count the minutes until tonight's chili dinner finishes cooking in the Instant Pot.

Why do they call it chili when it's hot?

Let's get this party started! Time to link up your favorite projects, recipes, and posts! 

Sunday, September 12, 2021

How to Make a Fairy Walking Stick

I will be walking untold miles throughout the day while I’m performing at a 35 acre renaissance festival. I’m thrilled to “people” (with safety precautions) again! 


Until the day after a first rehearsal when my legs reminded me how much time I sat around the house in 2020  instead of being active and out and about. Let’s hear it for Epsom salt baths!


A walking (or more like hiking towards the end of the day) stick should help. Let’s make one!


DIY fairy costume walking staff
Save this costume idea to your Pinterest boards for later! Share it with your friends!

Easy DIY Elf, Fairy, Gnome, or Wizard Staff

Thursday, August 19, 2021

Dutch Wood Shoes and Friday Favorites 595

I'm in rehearsal for a show (all things being equal given the current health climate.) I'm hard at work breaking in my new character shoes!

  how to wear wood clogs 

This is an immediately slapped shoes on my feet after opening the box photo. You are supposed to wear thick socks which makes them more comfortable.


I quickly learned why the Dutch call clogs klompin
.

Thursday, August 12, 2021

How to Buy the Correct Size Backpack and Friday Favorites 594

Many parents are buying school supplies before their children start school (a few schools have already started!) It's much easier to tote that stuff back and forth to school, or anywhere really, in a backpack. 

 I almost always use my old college backpack instead of giant purse to hold our stuff. I almost always end up with a backache and at least one migraine during the trip too. I thought that is just the way it is when wearing backpack and after some research, I realized I couldn't be more wrong!

Once I learned to look for certain strap configurations, where the backpack sits on your back, and the proper size for my height (bigger and tiny small is not always better) I bought a backpack that hasn't given me issues and wrote a guide so you know what to look for too. You can read my comfortable book bag backpack buying guide 7 Tips for Buying a Comfortable Backpack here.


Let's get this party started! Time to link up your favorite projects, recipes, and posts! 

Thursday, August 5, 2021

Saving Tomato Plants from End Rot and Friday Favorites 593

The tomatoes on my plants started to ripen with a bad case end blossom rot last month because there wasn't enough calcium in the soil to allow the tomato plant to grow well (this was news to me.) 

I gave my tomatoes a good dose of this exact organic tomato fertilizer to get the calcium party started. I also started watering my tomato plants with a few teaspoons of powdered milk dissolved into my watering can. (Disclosure: I am including affiliate links in this post for your convenience.) 

The only reason I used powdered not fat milk instead of watering down regular milk is I bought the no fat milk by mistake and didn't realize it until I used to make a batch of failed yogurt. Turns out my yogurt's loss is my tomato's gain.

After a week of having more little fails than successes laying bathroom tile and sourcing material for a new costume commission, I finally have a big, fat, huge win! My tomatoes are ripening and there isn't any black rot eating away at the end of the tomato! 

how to save tomato plants from end blossom rot
My tomatoes are on the small side for Roma tomatoes but that probably has to do to the lack of calcium in the soil from the time I planted them. At least I know what not to do next year!


Sunday, June 27, 2021

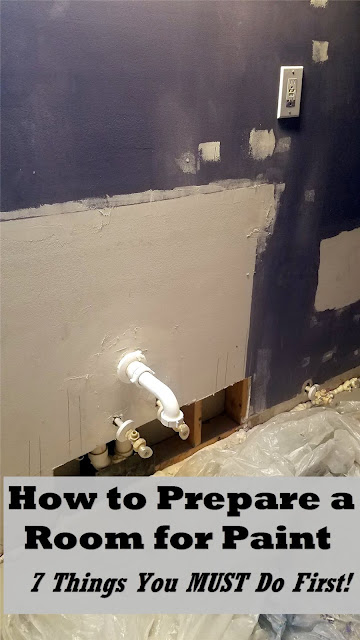
How to Prepare Walls for Painting

As much as I would love to jump into my bathroom and start slapping new paint on the walls, the new paint would look awful. I’d make the job ten times harder if I don’t prepare the walls for paint first. I lot of folks  don’t bother filling nail holes and such thinking they’ll hang the same stuff in the same place on the walls of the newly painted room. Sometimes that’s the case. More often than not, plans change and the little hole you have to fill and repaint is going to look worse than if you filled it before you started the project.

Trust me. I get it. I’ve had this conversation with myself every time I’m tempted to take a shortcut when my master bathroom renovation throws me another unexpected curve ball.

“Do you want to do it fast or do you want to do right?” is always the last question I ask myself before I make a decision about a task. Then I sigh and say,”I want to do it right.” Sure it may be more of a pain or take longer (hence the internal sigh) but doing it right the first time is better than cheating and having to do it over again.


how prepare a room for painting
Save these painting tips to your Pinterest boards for later! Share them with your friends!

How much preparation your room will need for paint will depend upon:

Sunday, June 13, 2021

Ten Things You Need to Know to Level and Repair an Uneven Floor

After  I replaced the moldy wood subfloor in my master bathroom, I checked it with a torpedo level (a torpedo level looks like this,) declared it level, and promptly passed out in bed from exhaustion. (Disclosure: I am including affiliate links for your convenience.) The next day, I double checked the new subfloor with the correct tool for the job, a large I-beam level (an I-beam level looks like this.)

The new wood subfloor is not level.

There are a few random areas where the floor isn’t flat, mainly where some of the seams of plywood sheets meet - a pretty common thing when you are replacing a subfloor (especially if it is the first time you’ve removed and replaced a subfloor.)

You can’t lay tile on an uneven floor. Well, you could, but the grout and tile will eventually crack and break in those areas and you’ll curse the day you were born when you have to rip everything out (probably) and do what you should have done in the first place. Fix the uneven wood subfloor with a self leveling underlayment coating for floors.

how to fix an uneven sloping floor

Save this post to your Pinterest boards for later! Share it with your friends!

Thursday, June 10, 2021

Giant Lawn Flamingos and Friday Favorites Week 585

How do you know it is officially summer?

  • It is after Memorial Day?
  • The lavender is starting bloom in my garden?
  • The weather is warm and kids are playing in neighborhood spinklers?
NO!

At my house it isn't officially summer until Divine my metal lawn flamingo takes residence in my garden  (much to the chagrin of my husband.)


She's no Frank the Christmas Gargoyle but she's 6 feet tall and I love her.


Time to link up your favorite projects, recipes, and posts! 

Tuesday, May 18, 2021

7 Beginner Resin Casting Mistakes and How to Avoid Them

I was able to salvage the last builder grade vanity  from my bathroom renovation for my workshop. I want to make it into the miter saw cabinet I desperately need – on wheels!

how to turn a cabinet into a rolling miter saw stand
I love that standard bathroom vanities are the perfect Lisa height work bench

I had to make some repairs to the cabinet to fix the damage I made to it when I removed it. I added a few reinforcements to ensure the cabinet  will take stand up to a heavy saw and before I added four locking casters just like these to the bottom. (Disclosure: I am including affiliate links for your convenience.) I chose casters I can lock in place to reduce the chance of the miter saw stand rolling backwards when I use the saw. I don’t think that would be a pleasant experience.

Tuesday, May 11, 2021

Easy DIY Wood Crate Storage and Drawer Organizers

In our early just bought a new house and need new stuff to store our old stuff days I turned some vintage fruit crates I discovered neglected in the basement of our old rental into a down and dirty wood crate storage dresser by slapping the drawers from an old  cardboard night stand into the crates and calling it a day. The storage boxes aren’t very pretty but it worked at the time. I had every intension of upgrading to a better solution later.

 You can probably guess that Later never came.

This version of my fruit crate storage dresser is not working for me any more. The supplies inside quickly turn into a jumble that I have to paw through to find the thing I need. The final straw was finding feathers turning up here, there, and everywhere in the drawers and room except in the drawer that is supposed to store them with my hat making supplies. Gah! I need an organization makeover – stat!


 vintage wood crate dresser

I used a hodge podge of baby food jars and such to store beads and jewelry findings that barfed out their drawers. This isn't pretty, but it is honest. An honest hot mess!

Thursday, April 1, 2021

DIY Harlequin Jester Costume and Friday Favorites Week 575

Happy April Fool's Day!!!

As a professional jester in the Before Times, I consider April 1st to be My Day.  I don't play tricks or jokes on people, I just walk around extra happy and foolish. See?

how to make a harlequin jester costume
This costume is my first and probably last quilting project because it took four months to build!

Time to link up your favorite projects, recipes, and posts! 

Thursday, March 25, 2021

DIY Replacement Lawn Chair Bag and Friday Favorites Linky Party Week 572

Ah Spring! Where it is sunny and tempting but still too cold to play outside. 

And by play I mean, dig in the garden or build stuff in the yard.

Instead, I ramp up the Spring Cleaning, reorganizing, and repairing. That way it gives me plenty of time to repair our toys and gear for summer fun. For example, the bags our folding lawn chairs can in ripped beyond repair and I sewed this quick and easy camp chair replacement bag from a jaunty nautical fabric.

how to make a replacement folding camp chair bag


Time to link up your favorite projects, recipes, and posts! 

Monday, March 22, 2021

DIY Compost Station

When someone asks why we started composting, my husband and I say it’s because we had to because all we had for garden was clay and zero topsoil. We sang the condo blues over how very little would grow in that pretending to be soil, researched how to amend it, and experimented with composting in a DIY compost bin.

I made our first compost bin by drilling a bazillion holes in a black plastic trash can. We loaded it up with food scraps and paper from our paper shredder and in about a year we had compost! We added the homemade compost to our soil and after awhile our tan clay soil started to turn black with nutrients. I practically dance the first time I dug a hole and found an earthworm – it is another indicator that the soil is improving!


We take our composting very seriously. Why do you ask?


And we’ve been composting ever since.

Thursday, March 18, 2021

Fabric Storage Idea and Friday Favorites Linky Party Week 571

One of my small 2020 victories was actually starting/finishing a ton of UFPs (Unfinished Projects) and fabric stash bust projects.  I didn't realize exactly how much fabric I used until I started reorganizing my craft room. The fabric storage box I built was so full it barely fit under the bed. 

DIY storage box
I didn't take a Before photo. Imagine even more fabric than this and a 100% untidy mess that looks like a hurricane blew through. 

After The Year of Sewing All the Things three quarters of this storage box that is as long as a double bed is wide is EMPTY and I'm doing my happy dance. 

Time to link up your favorite projects, recipes, and posts! 

Thursday, March 11, 2021

30 Best Sustainable Living Blogs and Friday Favorites Linky Party Week 570

When you are doing a live performance you get immediate feedback on how people like, or don't like what you are doing. Blogging isn't like that. I'm grateful for all of your comments and emails but the only thing I have to see if folks are reading and hopefully liking what I do here on Condo Blues is a bunch of tools that give me cold, hard, numbers. Readership fluctuates naturally during different seasons and holidays. Even thought I know why, it makes me think if I'm making any sort of difference or creating something people like to read.

It's always nice to get feedback, especially when I'm in a writing slump, and this week I got it with stars, exclamation points, and biodegradable glitter. I am included in Shaman's Market's list of 30 Best Sustainable Living Blogs for 2021 as their Number 1 pick!

Best Sustainable Living Blogs

I'm thrilled and grateful. Here's what they have to say about little ol' me and Condo Blues:

 "A blog about green living, crafts, decor, and dogs by self-described “Frugal Green DIY Diva” Lisa Nelsen-Woods, Condo Blues is filled with quirky humor and style that’s sure to make you smile. From DIY home renovation, and crafts to countless painless frugal life hacks and healthy, delicious cooking recipes, Condo Blues is a great all-around blog for anyone interested in living differently."

They called me quirky! Quirky is good.

Time to link up your favorite projects, recipes, and posts!