Condo Blues: bathroom
Showing posts with label bathroom. Show all posts

Monday, April 3, 2023

How to Drill a Hole in Ceramic, Porcelain, and Stone Tile

One day after refilling the conditioner in this hanging soap and shampoo Dispenser , The pump bottle refused to snap into place, lurched from the wall, and tried to kill me. I bobbed. It weaved. The bottle crashed to the floor and cracked. (Disclosure: I am including affiliate links for your convenience.)

One of the things I like about the Dispenser is that you can buy replacement parts. I did so several times over its lifetime. However, this time I needed so many new parts it ended up costing as much money as if I bought a new wall mounted shampoo and conditioner pump.

Since my Dispenser was looking shabby and I think we got more than our money’s worth out of it considering it was a yard sale purchase, I bought a replacement.

I bought this exact Simple Human Double Wall Mount Shower Pump because we really only use two pumps out of the original four. From reviews, it is sturdier (I see the same dispenser in hotels so it has to be durable to take constant abuse) which means I may not have to replace the pumps over time. I love that!

The only negative according to the reviews is the bracket adhesive is not as strong as the adhesive the Dispenser uses. There were reports of the Simple Human dispenser falling off the wall after all of the instructions were followed. Not a huge deal because the Simple Human dispenser also comes with screws and wall anchors. I grabbed my drill and got ready to answer the question,

How Do you Drill a Hole in Tile?

Friday, March 10, 2023

DIY Bathroom Vanity Upgrade

I found patches of black mold on our bathroom vanity, wall, and subfloor due to several micro leaks and needed to replace everything in the bathroom.

Which is totally fine because we hated the builder grade bathroom vanity with a passion.

I demoed, replaced and leveled the subfloor, and laid new tile. Now it’s time to update and upgrade the bathroom vanity. 

how to install a double sink bathroom vanity
Save this idea to your Pinterest boards for later! Share it with your friends!

Wednesday, June 8, 2022

How to Make Decor Decisions without Arguing

To try to keep the costs down where we could, replacing the bathroom vanity lights was not in the plan. I don’t love them but I don’t completely hate them either. The plan was to try to repair the light with a socket that would not stay lit and if it can’t be fixed we replace the lights.

We need to replace the lights.

Which is fine by me because I hoped to update those Restore bargain lights in one way or another. (Actually the working light will get a little update and installed in another bathroom in our house.)

As much as I love the thrill of the hunt, my husband HATES shopping, comparison shopping in particular, with a white hot fiery passion but wants input because this is his house too. I learned early on in our relationship that the best way to satisfy both of the ways we like to work is to treat my husband as I would working with a client. I search to my heart’s desire. I present my top three (at most) selections to my husband and we make our decision together. If we can’t agree on the top three, I usually have others to chose from or I look for something that fits what we discussed.

Do I always get my number one choice? No. Does he? Also no. But more often than not, our favorite of the three is the same which makes it easy. (We also unknowingly do the same thing in restaurants.)

As a refresher, these are the bathroom vanity lights we need to replace.

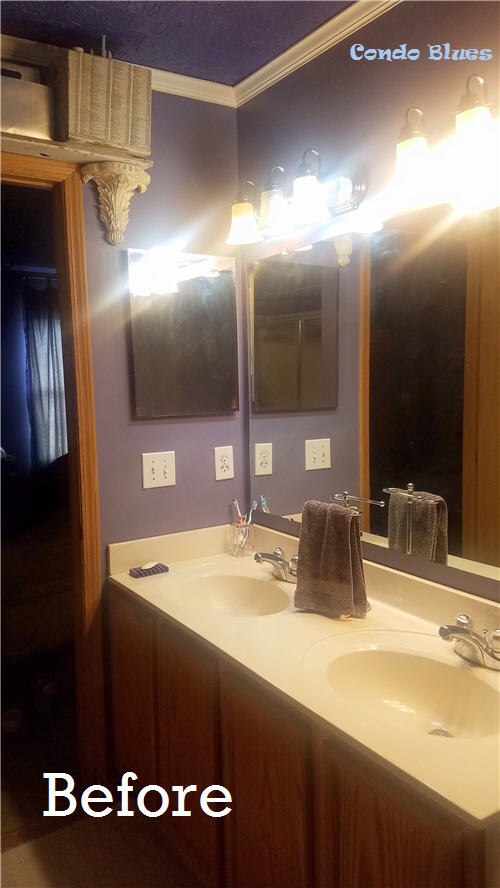
condo bathroom remodel before
I sold the medicine cabinet, mirror, shower doors, counter top and faucets on Marketplace.
 

Here are our top three replacement vanity wall lights.


how to buy bathroom vanity lights

Drum roll

I installed the Quoizel Grant Vanity Bath Light (learn more about it here)! (Disclosure: I am including affiliate links for your convenience.)


how to make decisions without steamrolling

 Save this idea to your Pinterest boards for later! Share it with your friends!


This wall sconce is a combination of two of my favorite design styles: modern with an old world flair. I installed the sconces with the lights pointing down but if I want a new look later I can flip them to point up for a new zero dollar look.

This fixture does not include the light bulbs which is one of the things my husband and I like about it most. I bought these exact Edison light bulbs which really make these wall lights sing.

Looking for more bathroom decoration ideas? Check out the following options – and more!- Below!

Did you enjoy this post? Get more like it by subscribing to the Condo Blues RSS Feed .

Monday, May 2, 2022

How to Install Electrical Boxes Without a Wall Stud

Every once and awhile someone asks me why I named this blog Condo Blues, when in reality, I actually like my house.

Oh gentle reader, I will say that after a steady diet of every DIY, home renovation, and decorating TV show imaginable my sweet, simple, naive self quickly found that some basic home projects are not as simple as they appear on TV once I bought a house. My most recent big, glaring smack in the face turned out not to be easy as I thought was replacing a set of bathroom vanity lights in an hour or two.

Because I found this hiding under the old vanity lights. 

how to put electric junction boxes in a wall

 Surprise! My one hour project will now take two days at the least!


There aren’t any electrical boxes installed in the wall for the wiring like there should be. I’m also pretty sure that is a crack in the fabric of space and time on the right. I better patch that before Weeping Angels, Daleks, and all sorts of bad things seep though and ruin the progress I’ve made on my bathroom renovation.

The most electrical boxes (especially when you need to hang a wall light off it) are installed by attaching the electrical box to a stud when the wall is being built. This is not the case with the wiring for my bathroom wall lights because the electricians ran the wiring in the center of the wall stud because of the plumbing for the sinks sharing that space in the framing. The builders could have installed a number of electrical boxes to work around this but apparently took the easy and possibly not building code complicate (based on a huge discussion on the Condo Blues Facebook page ) way out with bare wiring poking through a hole in the drywall.

Tsk. Tsk.

How to Install a Wall Sconce Electrical Box

Thursday, April 7, 2022

How to Repair and Replace a Moldy Bathroom Floor

 My master bathroom renovation is coming along at a good clip. We had a leak and a little 5 minute flood in our master bathroom. Everything was just wet enough that we had to call in remediators with giant dryers to dry out what couldn't be removed. After they removed the vinyl flooring, they also found batches of mold around the toilet and recommended ripping out all of the flooring down to the joists. Which gave us an opportunity to replace everything in the bathroom from the ground up - literally!

DIY bathroom floor repair
Save this information to your Pinterest board for later! Share it with your friends!

I found more surprises when I removed the bathroom vanityy More leaks and more mold!


How to Repair a Moldy Floor 
I’m not a doctor, but I have the feeling the cause of my constant ear and sinus infections was living under this sink.
 

Working in sections, I unscrewed the sub-flooring from the joists and used an oscillating multi tool to remove the glued flooring from the joists (you can learn more about my Rockwell Oscillating Tool that uses universal blades here which I chose the Rockwell over other brands, TBH.) (Disclosure: I am including affiliate links for your convenience.)

Once I removed the old moldy subfloor, I realized that there wasn’t anything to screw the new flooring to around the edges of the room. I can’t leave it this way or the new floor could slope over time, the tile will crack, and we’d have to start the process all over again. Trust me, once is more than enough! 

I fixed the issue by using construction adhesive and screwing supports along the existing joists and around the toilet flange (this is called sistering.)  

The wax ring underneath the old toilet was smashed to one side (another unknown water leak!) and the floor flange sat at angle around the plumbing. The toilet didn’t sit level and this caused one of leaks and eventually mold.  I figured that possibly going overboard with sistering and adding framing  in between the joists to keep the toilet level is better than taking a shortcut and regretting it later. Wood is cheap. Mistakes are expensive.


how to sister joists

 I can't tell you how tempted I was to stick a toy skeleton down there before I covered it with plywood.

Cutting the subfloor sections to size wasn't difficult because before I removed the original subflooring I cut the tile underlayment to fit and to used the underlayment pieces as a pattern when it came time to cut the new plywood sub floor.

How to install subflooring

A ton of screws, construction adhesives, and bruises later I installed the new subflooring in the bathroom!

I filled the seams in between the sheets of sub flooring with  Fix It All (you learn about this patching compound that’s made specifically for wood sub-floors here)  put on my dust mask, and hand sanded the seams smooth. There were a few random spots that I couldn’t get perfectly level with sanding. I didn’t want to take a chance on the tile floor cracking over time because of it and started prepping the floor for leveling compound by using spray foam insulation to make an expansion joint around the wall of the room and as a barrier around the furnace duct and toilet flange.

how to patch seams in a wood floor

 Patched!

When you are suing self leveler on a wood floor it is the same technique as using self leveler on an uneven concrete floor. Only the type of products you use is different. You need to use a self leveling compound made for wood floors which requires the extra step of priming the entire floor first.

I filled all of the cracks and seams between sheets of plywood with patching compound first. (learn more about the Henry Pre-Mixed Floor Patch I used here ) – If there is even the tiniest sliver or gap, by its very nature the self leveling concrete will find it and drip down into it and make a huge mess. After the patching compound dried I applied self leveling compound primer for wood floors (you can learn more about find Level Pro Underlayment Primer for wood I used here) with a chip brush.

Once it was dry, it was time to don my super sexy concrete work boots and apply the leveler to the floor. This part if fairly easy (pour stuff from a bucket and push it around the room) but nerve wracking because self leveling compound has a 10 to 15 minute window before it starts to dry and is unmovable. Meaning, if you get it wrong outside of that window, it stays wrong. 


 Given the short working window my husband and I teamed up for this project. He mixed the cement leveler in small batches while I poured and worked it around the room.


Success!

how to use self leveling floor compound cemet  

Don't worry if you have swirling or color variations in the dried concrete underlayment. As long as those parts of the floor are hard, dry, solid, and level, you're ready to go to the next step in your project.


Finally it was tile time! I applied same tile underlayment and seam sealering "tape" as I used in our guest bathroom. Yes the orange stuff is more expensive than other options but it is water resistant and the fact that I can cut it on the fly with scissors or a utility knife makes it worth it in my book. You can learn more about the Schlter Ditra underlayment I used here.


how to install waterproof bathroom tile underlayment
Dry fit time!

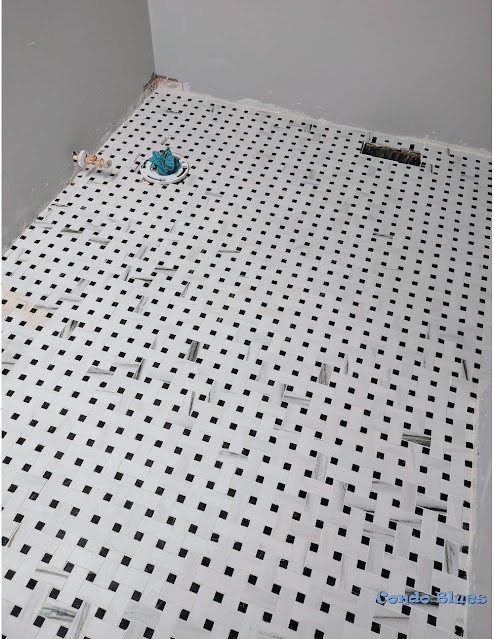
Then it was time to get messy installing the tile floor and grout!


how to grout tile and sealant

I'm using ceramic porcelain tile that looks like marble. I don't need to seal the tile itself according to the manufacturer but it won't hurt if I do.
 

The finishing touch was using this exact spray grout sealer  to seal the grout because is made for moisture laden rooms like bathrooms.

Because I never, ever, ever want to replace a moldy sub floor again.

The next step is installing the new plumbing fixtures and lighting!


Looking for more bathroom floor renovation, organizing, and decorating ideas? Check out the following options - and more! - below!

Did you enjoy this post? Get more like it by subscribing to the Condo Blues RSS Feed .

Wednesday, March 23, 2022

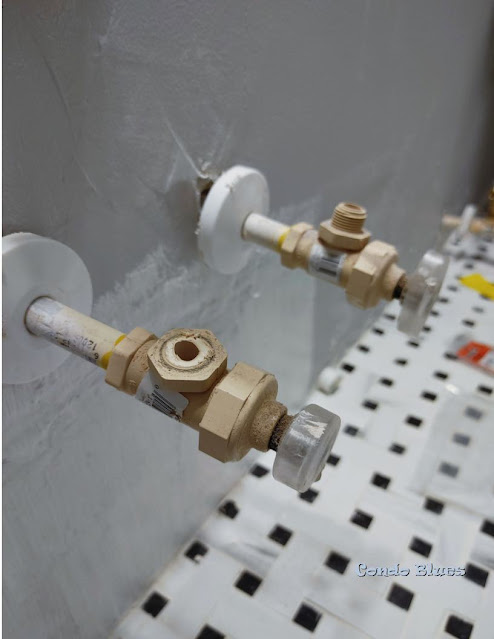
How to Replace Plumbing Valves Without Soldering

The CPVC water shutoff valves that came with my house are prone to leaking. I always give them an extra tight twist with my wrench which usually solves the problem.

Or makes a bigger problem when I accidentally snapped the threads off a bathroom valve when I installed our bidet (I bought this exact Lux Bidet attachment – it is life changing!) (Disclosure: I am including affiliate links for your convenience.


how to replace broken water shut off valve
The broken bathroom water shut off valve.

I jumped in the car and grumbled my way down to Lowes that I’m now in a situation where I have to wait on a plumber to replace the valve buy instead of finishing the bidet installation like I planned. Well, at least I have the chance to replace all of the cruddy PVC shutoffs with sturdy metal water valves we’ve been talking about.

I figure I can make the plumber’s job a little easier (and a little cheaper for me) if I buy replacement stop valves before I made the appointment. I’m not confident enough in my soldering skills to do the job myself and not burn down the house in the process.

Friday, March 11, 2022

Help Me Pick a Bathroom Vanity Light!

I planned to repair and reuse our bathroom vanity lights that had a wonky socket that wouldn’t stay lit for our master bathroom renovation. After shutting off the electric to the room (very important!) removing, and tinkering the light, it was a no go. I can’t fix it which means I need to replace both bathroom vanity lights.

And for added unexpected fun, I found what I’m sure is a big hole (which I suspect is crack in Space and Time) in the wall when I uninstalled the vanity lights and oh, yeah, no electrical boxes whatsoever.

Honestly, I wouldn’t mind the change. I’m more annoyed than anything because the task I thought I was going to complete in a day is now going to take much longer. It’s not a project budget buster because this is the exact reason why I always add extra money to my big project budgets. If I don’t have to use those funds for something unexpected – great! If I do, well, that’s why it’s there.


how to buy bathroom vanity lights


As a refresher, this is the bathroom renovation and decor plan I created.

Thursday, February 10, 2022

How to Seal Tile Grout

I get asked all of the time, do I really need to seal grout?

The answer is yes. 

Yes, you do.

Grout is generally made from a mix of water, sand, and cement (unless you are installing tile with small grout lines like mine which required unsanded grout.) Which means the finished product will dry with microscopic spaces in between the sand/cement and is porous. Water and liquids can seep through and cause mold and mildew on your subfloor and trust me when I say this, it is NOT a fun thing to remove and replace.


This is only one small part of the moldy bathroom subfloor I had to remove and replace. 0/10 do not recommend.


Not to mention, even when dry, if the grout is not sealed it is very easy to remove by getting it wet. That's great when you need to clean hazy tile after grouting it but not great for long term wear and tear. This is why you need to add a sealant to protect the grout from liquids and such.

Fortunately, sealing grout lines couldn't be easier. Here's how to do it.

Sunday, June 27, 2021

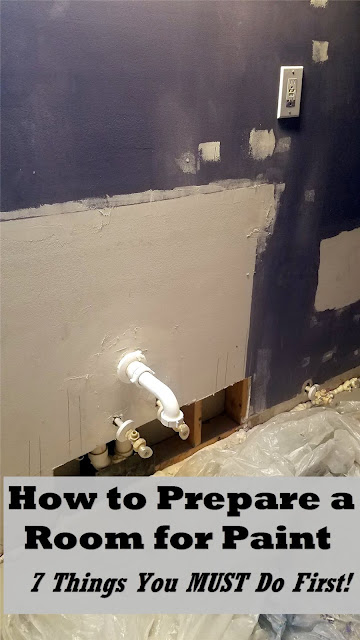
How to Prepare Walls for Painting

As much as I would love to jump into my bathroom and start slapping new paint on the walls, the new paint would look awful. I’d make the job ten times harder if I don’t prepare the walls for paint first. I lot of folks  don’t bother filling nail holes and such thinking they’ll hang the same stuff in the same place on the walls of the newly painted room. Sometimes that’s the case. More often than not, plans change and the little hole you have to fill and repaint is going to look worse than if you filled it before you started the project.

Trust me. I get it. I’ve had this conversation with myself every time I’m tempted to take a shortcut when my master bathroom renovation throws me another unexpected curve ball.

“Do you want to do it fast or do you want to do right?” is always the last question I ask myself before I make a decision about a task. Then I sigh and say,”I want to do it right.” Sure it may be more of a pain or take longer (hence the internal sigh) but doing it right the first time is better than cheating and having to do it over again.


how prepare a room for painting
Save these painting tips to your Pinterest boards for later! Share them with your friends!

How much preparation your room will need for paint will depend upon:

Sunday, June 13, 2021

Ten Things You Need to Know to Level and Repair an Uneven Floor

After  I replaced the moldy wood subfloor in my master bathroom, I checked it with a torpedo level (a torpedo level looks like this,) declared it level, and promptly passed out in bed from exhaustion. (Disclosure: I am including affiliate links for your convenience.) The next day, I double checked the new subfloor with the correct tool for the job, a large I-beam level (an I-beam level looks like this.)

The new wood subfloor is not level.

There are a few random areas where the floor isn’t flat, mainly where some of the seams of plywood sheets meet - a pretty common thing when you are replacing a subfloor (especially if it is the first time you’ve removed and replaced a subfloor.)

You can’t lay tile on an uneven floor. Well, you could, but the grout and tile will eventually crack and break in those areas and you’ll curse the day you were born when you have to rip everything out (probably) and do what you should have done in the first place. Fix the uneven wood subfloor with a self leveling underlayment coating for floors.

how to fix an uneven sloping floor

Save this post to your Pinterest boards for later! Share it with your friends!

Monday, February 8, 2021

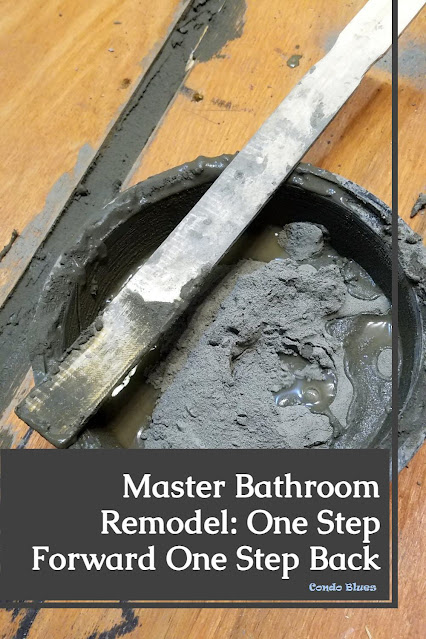
Master Bathroom Remodel One Step Forward One Step Back

I've said it before and I'll say it again: home improvement isn't always as easy as they show it on TV. Anyone who tells you that you can do a quality renovation in a couple of days just like on TV is a big, fat lair who hasn't spent a week in an editing bay cutting weeks of construction footage into something that looks like it only took hours without taking basic things into consideration things like drying or delivery times.

In other words, after demolishing and installing a new subfloor I hit a snag. Drat!
Bathroom remodel snags they don't tell you on TV
Save this post to your Pinterest boards for later! Share it with your friends!

Sunday, January 24, 2021

Master Bathroom Renovation: I Replaced the Subfloor!

Removing and replacing the entire master bathroom subfloor is a job that I haven’t been looking forward to and is the reason why we put the renovation off for so long. Everything hinges on the subflooring is cut perfectly to size and level.  Once I removed the old moldy subfloor, I realized that there wasn’t anything to screw the new flooring to around the edges of the room. I can’t leave it this way or the new floor could slope over time and we’d have to start the process all over again. Trust me, once is more than enough! 

how to replace subflooring
Save this guide to your Pinterest boards for later! Share it with your friends!

 I  nicked a couple of joists when I was cut the floor to remove it  with my circular saw by accident. This might create a weak spot where the flooring could squeak, crack, or sag or it might not because the cuts are not too deep. 

Monday, January 11, 2021

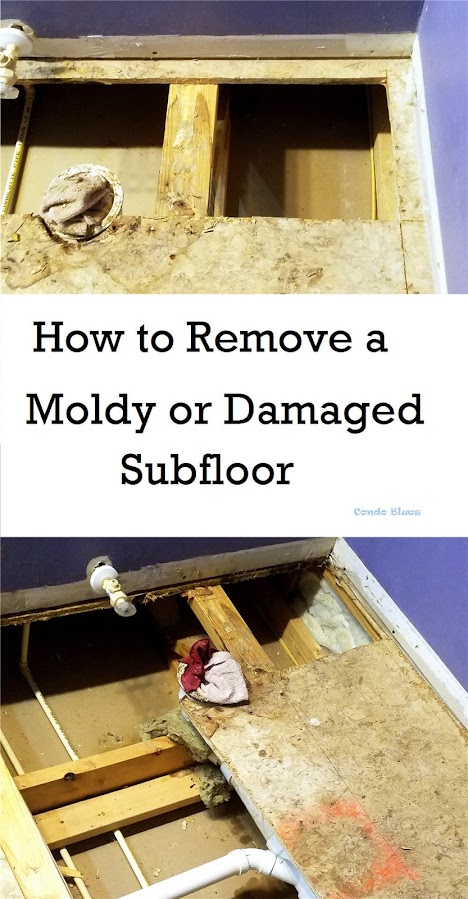
How to Remove a Damaged or Moldy Subfloor

On Master Bathroom Demo Day I found black mold on a chunk of the wall and on several areas of the subfloor.


how to remove and replace subflooring
Save this tutorial to your Pinterest boards for later! Share it with your friends!

After removing the damaged drywall, the next step in the process is to remove the bathroom subflooring, check for  mold or water damage, have it treated if necessary (and crossing my fingers I don’t,) and replace the subflooring. 

Thursday, November 5, 2020

DIY Cotton Bath Puff and Friday Favorites Linky Party 554

While everyone else was baking sourdough bread during quarantine, I was making hot process soap. I took notes on what I did right and wrong and while I can't quite get it as thick as commercial liquid soap like I want, it cleans and lathers beautifully especially when I use a plastic bath puff. While a loofah is zero waste because I can compost it, it doesn't perform as well as a mesh bath poof that has to be tossed after awhile due to bacteria buildup. I tried washing one once and it fell apart.

I hadn't crocheted since I was a kid and recently picked up a hook to make a dishcloth. I looked for more quick beginner crocket projects on Pinterest (follow me @condoblues on Pinterest pretty please?) and found the answer to my zero waste bath puff problem - crochet a bath puff from cotton yarn!

how to crochet a bath puff

I followed this crochet shower puff pattern from Hooked on Patterns and it was pretty easy once I got the hang of it. My shower puff isn't perfect but still not too shabby for the third thing I crocheted as an adult. Best of all, I can wash it in a mesh lingerie bag in the washing machine when I need to - no more bath puffs in my trash can ever again!

Time to link up your best projects, home improvements, recipes, and creative ideas!

Please support and follow our lovely blog party hostesses:

Jerri at Simply Sweet Home - Twitter | FB | G+ | Pin | Inst

Lisa at Condo Blues - Twitter | FB | G+ | Pin | Inst

Amy at A Day of Small Things - Pin

Penny at Penny's Passion - Twitter | FB | G+ | Pin | Inst

Jennifer at Busy Being Jennifer - Twitter | FB | Pin | Inst

If you are featured this week, be sure and grab a featured button for your blog!

You can show your love for this week's favorites by going over and commenting on the posts and by pinning or sharing!

And if you love all of this week's favorites, please pin, share, and invite your friends to this week's linky party!

Thursday, October 1, 2020

Marble Look Porcelain Bathroom Tile and Friday Favorites Linky Party 549

After waiting, waiting, and waiting some more I can finally start working on my next big DIY project - remodeling the Owner's Bathroom in my house because the tile finally came in! Isn't it lovely?

porcelain bathroom tile that looks like marble
I fell in love with this tile pattern in marble but didn't want such a soft and slippery tile in a bathroom. After much hunting, I found this porcelain version with a slight texture to hopefully prevent slipping at a local tile shop.

The Condo Blues World Headquarters and Thunderdome has turned into an Obstacle Course with cabinetry and fixtures stored all around the house for the last two months waiting for the tile to clear customs and Covid quarantine.  Odd because I thought the thing that would hold up this rennovation would be the cabinetry and not the flooring.

I showed you my project! Let's see your fantastic DIY projects, crafting, recipes, and tutorials!

Sunday, August 2, 2020

Blah Builder Condo Bathroom Remodeling Plan

After putting it off for too long, I am planning the end of the Bathroom Remodel Trilogy with Master Bathroom: Revenge of the Leak.

This time around I am not even going to even try to consider reusing the bathroom vanity. We learned from Bathroom Remodel 2: Mold Sneak Attack the micro leak around the sink shutoff vales may have caused the vanity to mold like it did on the subfloor.

This isn’t a great loss because when we removed the guest bathroom vanity we found just how cheaply it was made. We realized that all of the cabinets in our condo would eventually need replacing. Then we sang the Condo Blues because part of the reason of we bought a new build is the expectation of quality cabinetry – ha!

On the upside, since we knew ahead of time that everything needs to be replaced in the main bathroom, I was able to do a little scouting while I was sourcing a new vanity for the guest bathroom last year.


condo bathroom remodel before
Good bye builder bathroom!

Sunday, May 31, 2020

How to Hang a Hook on a Hollow Core Door

I want to add a robe hook to my guest bathroom.  The logical place to hang it is on the bathroom door.

Unfortunately it, like all of the doors in my condo is a hollow core door. Can you hang towel bars and hooks on a hollow core door?

Yes you can!

The secret to hanging towel bars and hooks on hollow door without them crashing to the ground is all in the type of wall anchor you use – in this case Molly Bolts!

 Save this easy tutorial to your Pinterest boards for later! Share it with your friends!

Sunday, April 26, 2020

How to Build Recessed Bathroom Storage Shelves

I never liked the cheap plastic medicine cabinets that came with my condo. I was even more perturbed when I removed the medicine cabinet to paint the walls and found the hole and framing for the cabinet less than square - to put it mildly.

 I figure I better replace it and poked around window shopping while I was searching and pricing every thing else I needed for the guest bathroom remodel.

Have you ever priced medicine cabinets?

Be prepared for some sticker shock. Even the cheaply made medicine cabinets like the one I have are a couple of hundred bucks. The medicine cabinets  made from actual wood are even more expensive while still lacking style. That’s more that I wanted to pay for a medicine cabinet in a second bathroom we don’t use often.

I really don’t need a medicine cabinet with a mirror door because there is a mirror hanging over the sink.  Actually I really don’t need a door either because the way it was installed, the current medicine cabinet door smacks into the bathroom vanity light if we’re not careful. Open bathroom storage shelves are the only answer.

how to replace a medicine cabinet with recessed shelves in a bathroom
Pin this post to your Pinterest boards for later! Share it with your friends!

I stood in the guest bathroom staring at the wall and trying to visualize how to turn the medicine cabinet hole into an open storage niche as pretty yet affordable as possible when I realized I was standing on my answer – use leftover tile from the bathroom floor!

Monday, March 30, 2020

How to Caulk Around a Toilet

After tiling the guest bathroom and replacing the boring builder molding with something a little more interesting, It is time to make this bathroom look and function like a bathroom by installing a working toilet – a luxury we haven’t had in quite a while since the builder toilet went on strike.


I went with a Watersense rated Delta Faucet Company toilet (you can find similar toilets here.)  (Disclosure: I am including affiliate links in this post for your convenience.) I had such a good experience installing one in my powder room because every single thing you need to install the toilet comes in the box down to a screwdriver and the Watersense rating means it is water efficient (I think of it as the Energy Star rating for plumbing) without the hit or miss of not quite flushing everything that needs to be flushed like a duel flush toilet. 

the easy way to caulk a toilet and bathtub
Save this tutorial to your Pinterest boards for later! Share it with your friends!


But before I can completely cross Install New Toilet off my punch list, I need to caulk around it (and also along the new tile next to the bathtub. Fortunately, you caulk around a bathtub the same way you caulk a toilet. Let’s do this!

Why Should I Caulk Around the Toilet?

Sunday, March 8, 2020

How to Install a Bidet Attachment

Disclosure: Tushy supplied product to facilitate this tutorial and review. It had no influence on my opinion because all opinions are my own. This post contains an affiliate links for your convenience.

I’m working on the details of the guest bathroom renovation while looking forward to the master bathroom renovation. Well planning actually. I’m not looking forward to this even more involved project where are water leak began.

Anyway.

I would have liked to add a bidet in the bathroom to save on toilet paper because according to Tushy it takes 37 gallons of water to make a roll of toilet paper and most people use 1.5 toilet rolls a week! That is a lot of water to flush down the drain, which doesn't include the amount of water it takes to flush it all down the drain.

But more importantly, with a bidet, even if you run out of toilet paper at the time you need it most, you have an option.

Share this tutorial to your Pinterest boards for later! Share it with your friends!


Unfortunately all of our condo bathrooms are too small to add a free standing bidet. I didn’t think much more of it until friends raved about just installing a bidet toilet seat. I was  intrigued. A bidet toilet seat attachment I can do. Then I promptly forgot about it because I'm awesome like that.