Condo Blues

Thursday, April 7, 2022

How to Repair and Replace a Moldy Bathroom Floor

 My master bathroom renovation is coming along at a good clip. We had a leak and a little 5 minute flood in our master bathroom. Everything was just wet enough that we had to call in remediators with giant dryers to dry out what couldn't be removed. After they removed the vinyl flooring, they also found batches of mold around the toilet and recommended ripping out all of the flooring down to the joists. Which gave us an opportunity to replace everything in the bathroom from the ground up - literally!

DIY bathroom floor repair
Save this information to your Pinterest board for later! Share it with your friends!

I found more surprises when I removed the bathroom vanityy More leaks and more mold!


How to Repair a Moldy Floor 
I’m not a doctor, but I have the feeling the cause of my constant ear and sinus infections was living under this sink.
 

Working in sections, I unscrewed the sub-flooring from the joists and used an oscillating multi tool to remove the glued flooring from the joists (you can learn more about my Rockwell Oscillating Tool that uses universal blades here which I chose the Rockwell over other brands, TBH.) (Disclosure: I am including affiliate links for your convenience.)

Once I removed the old moldy subfloor, I realized that there wasn’t anything to screw the new flooring to around the edges of the room. I can’t leave it this way or the new floor could slope over time, the tile will crack, and we’d have to start the process all over again. Trust me, once is more than enough! 

I fixed the issue by using construction adhesive and screwing supports along the existing joists and around the toilet flange (this is called sistering.)  

The wax ring underneath the old toilet was smashed to one side (another unknown water leak!) and the floor flange sat at angle around the plumbing. The toilet didn’t sit level and this caused one of leaks and eventually mold.  I figured that possibly going overboard with sistering and adding framing  in between the joists to keep the toilet level is better than taking a shortcut and regretting it later. Wood is cheap. Mistakes are expensive.


how to sister joists

 I can't tell you how tempted I was to stick a toy skeleton down there before I covered it with plywood.

Cutting the subfloor sections to size wasn't difficult because before I removed the original subflooring I cut the tile underlayment to fit and to used the underlayment pieces as a pattern when it came time to cut the new plywood sub floor.

How to install subflooring

A ton of screws, construction adhesives, and bruises later I installed the new subflooring in the bathroom!

I filled the seams in between the sheets of sub flooring with  Fix It All (you learn about this patching compound that’s made specifically for wood sub-floors here)  put on my dust mask, and hand sanded the seams smooth. There were a few random spots that I couldn’t get perfectly level with sanding. I didn’t want to take a chance on the tile floor cracking over time because of it and started prepping the floor for leveling compound by using spray foam insulation to make an expansion joint around the wall of the room and as a barrier around the furnace duct and toilet flange.

how to patch seams in a wood floor

 Patched!

When you are suing self leveler on a wood floor it is the same technique as using self leveler on an uneven concrete floor. Only the type of products you use is different. You need to use a self leveling compound made for wood floors which requires the extra step of priming the entire floor first.

I filled all of the cracks and seams between sheets of plywood with patching compound first. (learn more about the Henry Pre-Mixed Floor Patch I used here ) – If there is even the tiniest sliver or gap, by its very nature the self leveling concrete will find it and drip down into it and make a huge mess. After the patching compound dried I applied self leveling compound primer for wood floors (you can learn more about find Level Pro Underlayment Primer for wood I used here) with a chip brush.

Once it was dry, it was time to don my super sexy concrete work boots and apply the leveler to the floor. This part if fairly easy (pour stuff from a bucket and push it around the room) but nerve wracking because self leveling compound has a 10 to 15 minute window before it starts to dry and is unmovable. Meaning, if you get it wrong outside of that window, it stays wrong. 


 Given the short working window my husband and I teamed up for this project. He mixed the cement leveler in small batches while I poured and worked it around the room.


Success!

how to use self leveling floor compound cemet  

Don't worry if you have swirling or color variations in the dried concrete underlayment. As long as those parts of the floor are hard, dry, solid, and level, you're ready to go to the next step in your project.


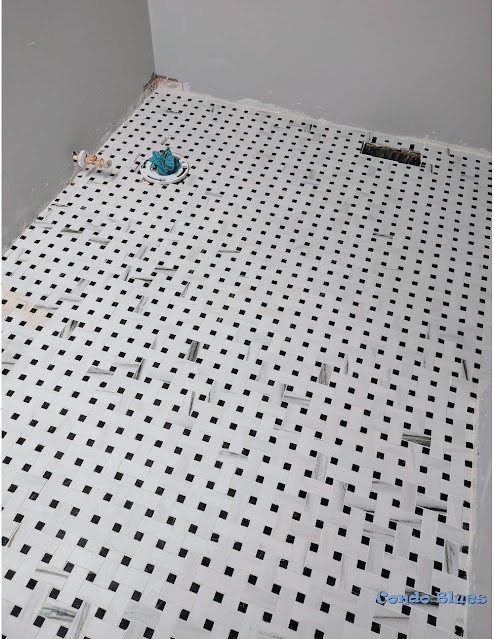
Finally it was tile time! I applied same tile underlayment and seam sealering "tape" as I used in our guest bathroom. Yes the orange stuff is more expensive than other options but it is water resistant and the fact that I can cut it on the fly with scissors or a utility knife makes it worth it in my book. You can learn more about the Schlter Ditra underlayment I used here.


how to install waterproof bathroom tile underlayment
Dry fit time!

Then it was time to get messy installing the tile floor and grout!


how to grout tile and sealant

I'm using ceramic porcelain tile that looks like marble. I don't need to seal the tile itself according to the manufacturer but it won't hurt if I do.
 

The finishing touch was using this exact spray grout sealer  to seal the grout because is made for moisture laden rooms like bathrooms.

Because I never, ever, ever want to replace a moldy sub floor again.

The next step is installing the new plumbing fixtures and lighting!


Looking for more bathroom floor renovation, organizing, and decorating ideas? Check out the following options - and more! - below!

Did you enjoy this post? Get more like it by subscribing to the Condo Blues RSS Feed .

Wednesday, March 30, 2022

Quick and Easy DIY Nautical Stitch Markers

I’m still very new to the whole crocheting hobby thing. I’m still fumbling around and losing count of stitches on simple projects which usually means I have to rip out sections and stitch them over (and over and over) again. I can’t tell you how many months it took me to make a simple hat. I had to switch patterns  at least three times before I could find one that I could understand how to follow it all the way through.

The key to my success (other than using a top down pattern with 2 stitches) is the instructions used stitch markers at various parts of the process.

Huh.

OK, I guess I could use some stitch markers then!

Naturally all of the stores were closed by this time. I poked around on line and saw that the only stitch markers I could by locally and immediately are really just bulb safety pins, which fortunately, I had leftover from a previous project.

I finished the hat and a few little projects before jumping into crocheting a Faeroe style shawl. After ripping out a section for the sixth time (I lost count) I figured a stitch marker would help me identify where I need to make transition stitches.

So I guess I need to keep removable crochet stitch markers in my little pouch of crochet tools.

Save this stitch marker (and gift idea) to your Pinterest boards for later! Share it with your friends!

Wednesday, March 23, 2022

How to Replace Plumbing Valves Without Soldering

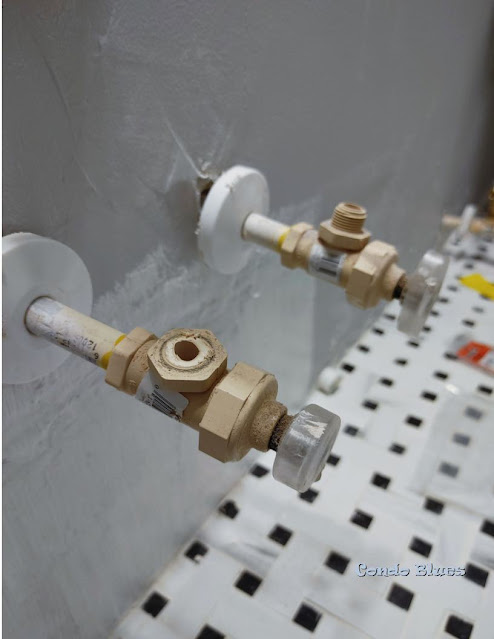
The CPVC water shutoff valves that came with my house are prone to leaking. I always give them an extra tight twist with my wrench which usually solves the problem.

Or makes a bigger problem when I accidentally snapped the threads off a bathroom valve when I installed our bidet (I bought this exact Lux Bidet attachment – it is life changing!) (Disclosure: I am including affiliate links for your convenience.


how to replace broken water shut off valve
The broken bathroom water shut off valve.

I jumped in the car and grumbled my way down to Lowes that I’m now in a situation where I have to wait on a plumber to replace the valve buy instead of finishing the bidet installation like I planned. Well, at least I have the chance to replace all of the cruddy PVC shutoffs with sturdy metal water valves we’ve been talking about.

I figure I can make the plumber’s job a little easier (and a little cheaper for me) if I buy replacement stop valves before I made the appointment. I’m not confident enough in my soldering skills to do the job myself and not burn down the house in the process.

Wednesday, March 16, 2022

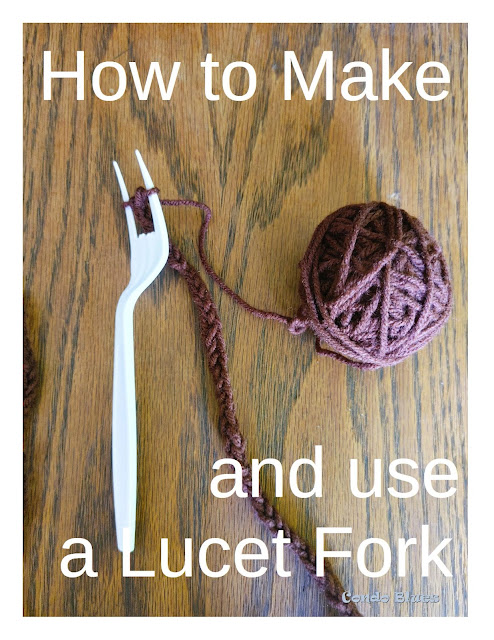
How to Make an Upcycled Lucet Crochet Fork

While drooling over wood crochet hooks and doodads on line (talk to me folks about yarn bowls. Are they good for large skeins of yarn?) I came across this weird sling shot shaped thing called a lucet (it is also called a lucet fork) that has been used since the Viking era to make cords and I-cords.

I didn’t think much about it other than a lucet looks like a cool tool (a lucet looks like this ) I may not use often enough to justify it taking up space in my cramped craft room. (Disclosure: I am including affiliate links in this post for your convenience.)

Until later on when I needed a drawstring for a crochet project and wanted something less bumpy than a row or two of traditional crochet stitches.

how to make an use a lucet fork
 Save this tutorial to your Pinterest boards for later! Share it with your friends!

You can braid/crochet/knit the round style cord that I wanted to use as a drawstring on a lucet. Which I didn’t have, couldn’t buy locally, and really didn’t want to wait for it to be delivered because I really wanted to finish this quick little bit and call the project done.

Friday, March 11, 2022

Help Me Pick a Bathroom Vanity Light!

I planned to repair and reuse our bathroom vanity lights that had a wonky socket that wouldn’t stay lit for our master bathroom renovation. After shutting off the electric to the room (very important!) removing, and tinkering the light, it was a no go. I can’t fix it which means I need to replace both bathroom vanity lights.

And for added unexpected fun, I found what I’m sure is a big hole (which I suspect is crack in Space and Time) in the wall when I uninstalled the vanity lights and oh, yeah, no electrical boxes whatsoever.

Honestly, I wouldn’t mind the change. I’m more annoyed than anything because the task I thought I was going to complete in a day is now going to take much longer. It’s not a project budget buster because this is the exact reason why I always add extra money to my big project budgets. If I don’t have to use those funds for something unexpected – great! If I do, well, that’s why it’s there.


how to buy bathroom vanity lights


As a refresher, this is the bathroom renovation and decor plan I created.

Wednesday, March 2, 2022

How to Lower High Utility Bills

When I moved into my first apartment it was in the Spring. My water, electric, and heating bills were low and manageable since the apartment didn't have air conditioning.

That changed drastically during the Winter. My natural gas bill in particular jumped to crazy high proportions even though my roommate and I wore layers and kept the thermostat at a reasonable temperature. Of course the first time we had a storm and the windows shook because they had so many air leaks you could see daylight through parts of the window and frame, we realized that our heating money was literally going out the windows. 

We tried to seal the air leaks with window insulation kits like this kind. It helped a little but the windows were so far gone that the windows AND the plastic violently shook in the wind as our natural gas bill started to climb. (Disclosure: I am including affiliate links in this post for your convenience,)

Welcome to paying bills as an adult. High heating bills in the winter, high electric and water bills in the summer (if you have air conditioning and a garden.)

I learned my lesson and after some research, learned how to lower my water, gas, and electric bills for the year with a phone call.

how to budget and save money on utilities
Save this budget making tip to your Pinterest boards for later! Share it with your friends!


The One Easy Thing You are Not Doing to Lower Utility Bills