Condo Blues: make
Showing posts with label make. Show all posts

Thursday, May 19, 2022

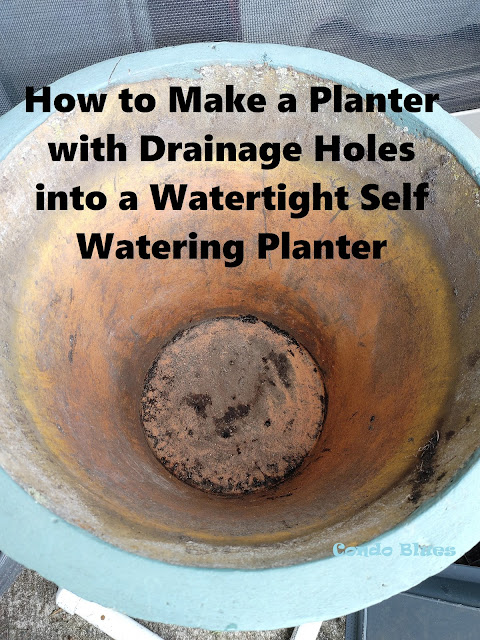
How to Make Flower Pots with Drainage Holes into Self Watering Planters

I have two large planters in my patio garden that have drainage holes in the bottom of the pot. I grow vegetables in them but they they need a little more attention in the watering department than the rest of my container garden that is planted in self watering flower pots.

I tried using these terra cotta watering stakes   to get the drainage pots on the same watering schedule as the self watering pots with varying degrees of success. I think the watering stakes work better when I’m going to be away from the house for a bit than as a full time self watering solution. (Disclosure: I am including affiliate links in this post for your convenience.)

I’m redesigning and adding more space to grow herbs and vegetables on my patio. Since I am removing and remixing the current potting soil with new in all of my planters, I figure it is a good time to plug the drainage holes in the green planters and convert them into self watering planters.

How to Make a Self Watering Container Garden

how to make easy self watering garden planters

Save this tutorial to your Pinterest boards for later! Share this idea with your friends!

Wednesday, March 16, 2022

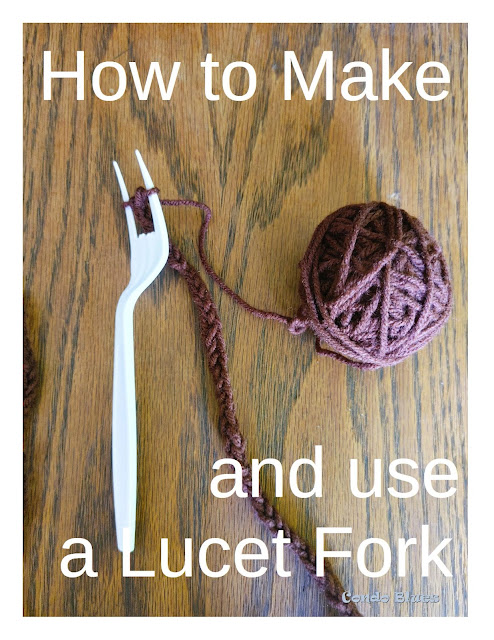
How to Make an Upcycled Lucet Crochet Fork

While drooling over wood crochet hooks and doodads on line (talk to me folks about yarn bowls. Are they good for large skeins of yarn?) I came across this weird sling shot shaped thing called a lucet (it is also called a lucet fork) that has been used since the Viking era to make cords and I-cords.

I didn’t think much about it other than a lucet looks like a cool tool (a lucet looks like this ) I may not use often enough to justify it taking up space in my cramped craft room. (Disclosure: I am including affiliate links in this post for your convenience.)

Until later on when I needed a drawstring for a crochet project and wanted something less bumpy than a row or two of traditional crochet stitches.

how to make an use a lucet fork
 Save this tutorial to your Pinterest boards for later! Share it with your friends!

You can braid/crochet/knit the round style cord that I wanted to use as a drawstring on a lucet. Which I didn’t have, couldn’t buy locally, and really didn’t want to wait for it to be delivered because I really wanted to finish this quick little bit and call the project done.

Thursday, April 1, 2021

DIY Harlequin Jester Costume and Friday Favorites Week 575

Happy April Fool's Day!!!

As a professional jester in the Before Times, I consider April 1st to be My Day.  I don't play tricks or jokes on people, I just walk around extra happy and foolish. See?

how to make a harlequin jester costume
This costume is my first and probably last quilting project because it took four months to build!

Time to link up your favorite projects, recipes, and posts! 

Sunday, November 24, 2019

How to Make Tomato Cage Christmas Gnome Decorations

I saw a big Christmas gnome decorations on line at IKEA and knew two of them would look perfect decorating both sides of my front door this Christmas. Unfortunately they were already sold out of them by the first few days of November!

I was severely bummed.

It was all the encouragement I needed to shop IKEA for the materials and go with my original plan of making a set of outdoor Christmas gnomes built around tomato cages.  Since storage space is at a premium in my condo, I made my Christmas gnomes (which we Scandinavians call Tomte or Nisser) as a temporary slipcover. That way I can use the cages in my summer garden, clean them, and use them again during the Christmas decorating season.  If you have the storage space you can permanently hot glue the fabric to your tomato cage instead of holding it in place with clothes pins like I did.

how to make outdoor Scandinavian Christmas gnome decorations
Save this tutorial to your Pinterest boards for later! Share this decorating idea with your friends!


How to Make Scandinavian Christmas Gnomes


Monday, September 16, 2019

How to Make an All Weather Elizabethan Jiffy Pop Hat

I need a new jester hat for my renaissance festival character that will still hold its shape when it gets wet in the rain or snow. In the past I have used the traditional buckram (learn what buckram is here) which unfortunately can quickly lose its shape and not really recover it when it gets wet in a thunderstorm. (Disclosure: I am including affiliate links in this post for your convenience.)

I’d like to make something a little different than the traditional jester asses ears I’ve worn in the past. (Asses ears are the name of the jester’s hat with the points and bells on the end.) Since Elizabethan jesters and fools often made fun of their betters and sometimes wore parodies of the style of the nobility to mock them, I decided to make a HUGE British bonnet as an homage to my jester mentor who wore a GIANT flat cap.

But most importantly, I want a hat with a brim to keep the sun out of my eyes.


 Save this Halloween costume hat tutorial to your Pinterest boards for later! Share it with your friends! 

This style of brimmed hat with a poufy top goes by many names: British toque or bonnet, Spanish toque or bonnet, Italian toque or bonnet, or by the modern nick name The Jiffy Pop Hat because it looks like a Jiffy Pop pan after it has popped (learn more about Jiffy Pop here if you are unfamiliar with this treat that’s fun to eat.)

Elizabethan men and women wore this style of hat. The poofy hat in the sepia photo is made with buckram. The hats in the color photos are made with plastic canvas. As you can see you can't tell from looking what the hat form is made from. the only difference is the plastic canvas is weatherproof and also stands up any and all abuse an actor may put it through.

How to Make a Hat with Plastic Canvas Instead of Buckram

Monday, August 19, 2019

How to Make a Pendent Necklace into a Pin Brooch

I was going though my costume jewelry collection to bling out my Husband’s and my Halloween costumes. I have more costume jewelry necklaces than I do pins in my princess treasure chest. Naturally I actually need the opposite.

No worries! It is super quick and easy to turn a necklace charm or pendant into a pin brooch!


how to upcycle a necklace into a pin brooch
Pin this easy tutorial to your Pinterest boards for later! Share it with your friends!


Tuesday, July 16, 2019

How to Make Embroidered Insulated Can Koozies

Somewhere along this road we call life, we ended up with several matching  promotional insulated can and bottle drink holders.* 
*Or can Koozie.Or coosie (cozy, cosie.) Or huggie. Or bottle hugger. Or beer sleeve. Or bottle jacket. Or the so awesome I can’t decide which name is my favorite: coldy holdy or the Australian stubby holder.
I didn’t think they were very useful at the time and tossed them into the back of a kitchen cupboard that is so close to the ceiling I never use it.

It was only after I learned you can ripen avocados in a neoprene can Koozie like the avocado bag I don’t have (an avocado ripening bag looks like this for reference) that I put those now deemed useful beer huggies into a lower cupboard where I can easily find and use them to ripen avocados.  (Disclosure: I am including some affiliate links in this post for your convenience.)

If the insulated bottle holders didn’t all match I could pull the drink cozies and use them as drink marker charms when we treat ourselves or guest to our recent retro soda pop (check them out here!) obsession.

Let’s fix that and make embroidered insulated bottle koozies!


how to sew a unique embroider can beer bottle insulated sleeve
Save this tutorial to your Pinterest boards for later! Share it with your friends!

How to Machine Embroider Insulated Bottle Sleeves


You can easily sew insulated beer Koozies from scratch (you can buy the insulating fabric here) or machine embroider on a plan insulated neoprene can sleeve (you can buy plain can cooler sleeves here ) if you like.

In my case, I wanted to upcycle the  free promotional insulated beer coolies I have into something cuter than a walking advertisement for a company I’m not going to use.

You will need the following supplies for this craft project:


Insulated foam drink holder

Jersey fabric – I tried covering a soda pop sleeve with cute cotton fabric and it didn’t have enough give to put a can inside it. A few experiments later, jersey fabric worked the best as a functional can holder. I used plain t shirts I bought on clearance at the craft store.

Embroidery sewing machine – I have this sewing and embroidery machine and love its versatility!

Machine embroidery stabilizer

Embroidery machine thread

Sewing machine thread – yes, there really is a difference between machine embroidery and sewing thread

Seam ripper – I have a handmade seam ripper necklace similar to this one and never lose it while I’m in the middle of a sewing project !

Scissors

Sewing gage

Tailor’s chalk or pencil

Straight pins

Step by Step How to Make it Tutorial


1.  Hoop your stretchy fabric and embroidery stabilizer and use the embroidery machine to machine embroider a design onto the fabric with embroidery thread, if desired. You can hand embroider the design if you desire.


how to embroider an insulated foam can bottle beer koozie sleeve


Caution: It is better to pick an embroidery design that is light on thread that will allow your fabric and cozy to stretch around a can or bottle than a more dense and thread intensive design that doesn’t allow fabric movement.
2. Use the seam ripper to open the sides of the foam drink huggie and lay it flat. We will use this as our pattern in Step 3.


how to sew a can bottle beer huggie holder
Hey! It looks like a Tie Fighter! Pew! Pew!


3.  Using the flat bottle cozy as a pattern, trace it with the tailor’s pattern onto your embroidered fabric.
Tip: Make sure you trace your pattern slightly larger than the cosie on to leave a seam allowance on the sides and enough fabric to fold over the top of the coozie and sew into place to make a neat top hem. The sewing gauge will help you measure and mark a consistent seam allowance.

4. Pin the fabric to the bottle snuggie. Use a stretch stitch to sew the bottom sides of the fabric to the snuggie. If you do not have a stretch over lock (serger type) stitch on yours sewing machine like I do, you can use a stretch zig zag stitch.
Tip: You want to use a stretch stitch when sewing your beer cozy so it will allow the neoprene to contour to the bottle or can you put in it.
upcycle and sew a free promotional can bottle beer jacket


Tip 2: To keep the embroidered stretch fabric from slipping and otherwise trying to go wonky when removing the pins to sew it, I use a quick spritz of textile spray adhesive like this kind to keep the fabric and neoprene in place while I remove the pins as I sew.

5. Fold the the fabric over the top edge of the beer coolie, pin it into place, use a stretch straight stitch to sew the hem into place. Repeat this on the other side of the coolie. Trim the excess fabric with a pair of scissors if needed after sewing the hems.

how to personalize a bottle can beer cozy holder

You might want all of your pins to go in the same direction - unlike me - oops!


6. Fold the koozie in half, right sides (the pretty part) together and pin into place. Use a use a stretch straight stitch on each side to sew the koozie back together again. Trim the excess fabric with a pair of scissors if needed after sewing the side seams
Tip: To make sure you don’t sew the bottle holdy too small to hold a can or bottle, you can try sewing just over the foam and onto the fabric. Or not. It’s up to you.
7. Turn the koozie right out, pop your favorite drink inside, and enjoy
If you’d rather buy than DIY, check out the following options –and more! – below!

Check out these unique can cooler hacks on my food blog Lazy Budget Chef!

12 Ways to Reuse and Recycle Can Koozies

Did you enjoy this post? Get more like it by subscribing to the Condo Blues RSS Feed or to Condo Blues by Email.


Sunday, May 19, 2019

How to Make a Grill Cover

The four seasons have taken their toll on the cover on my outdoor gas grill. I need a replacement grill cover. 

I don’t want to buy a vinyl grill cover because they rarely last more than two years in the elements. Fabric seems the best way to go since the BBQ cover I made from a drop cloth lasted seven years.
I planned to scope out the heavy duty outdoor fabric at the fabric store after a stop at Homegoods when I found a cheaper and cuter outdoor fabric option – an indoor /outdoor tablecloth.

Which also just so happens to go with this majestic beauty that I also picked up for the front yard.

Her name is Divine.

She is 6 feet tall.

And I love her.

Yes, I am THAT neighbor. You know the one.

How to Make an Outdoor Grill Cover from a Tablecloth

Sunday, January 27, 2019

How to Make a Bed with Folded Hospital Corners

Apparently it is a huge big deal whether or not you make your bed and use a top sheet. This something that is totally out of my frame of reference because if you don’t use a top sheet, you need to clean blankets and/or duvet weekly and is way too hot and gross to use during the hot and humid summer.

In other words, not making a bed without a top sheet is gross! Don't do it!

Stuffing a king size top sheet in a washing machine on the regular is way easier than trying to cram king size anything thicker than a sheet in a washing machine. If you have a smaller size bed than I do I guess it might be easier but nonetheless I’m rather replace a worn top sheet than shell out the extra bucks to replace s spendy duvet

I understand the argument of the to sheet getting all twisted up and becoming tucked itself when tossing and turning while you are sleeping. I get it. That used to happen to me until I found an easy fix: Make your bed with hospital corners. Problem solved!

How to Keep Sheets from Slipping off the bed


Save this tutorial to your Pinterest boards for later! Share it with your friends!


Tuesday, September 4, 2018

How to Make a Statement Ring from Old Earrings and Pendants

I broke the back off one of my favorite earrings. You know the kind of costume jewelry you wear to death because it goes with practically everything you have to wear in your closet? Yeah, that.

I didn’t mourn the loss for long. I need a bunch of big ol’ princess rings for my Halloween and renaissance festival costumes and with a little crafty DIY I made my broken earring into a statement ring.

how to make renaissance rings

Parading around the grounds with the Queen and court!


How to Make Costume Jewelry Rings the Easy Way!

Wednesday, April 25, 2018

How to Make Reusable Zero Waste Makeup Remover Pads

I have a very bad habit of by passing the wash cloth by the bathroom sink at night and not washing the makeup off my face before I go to bed.

Why? Laziness I guess.

The only time I remember to do it at night is when I have leftover disposable face wipes I use when I travel for the convenience.  I try to limit the amount of one time use disposables I use on a regular basis and let’s face it, wash cloths are reusable and paper face wipes are not.


How to Sew Super Soft Flannel Cloth Makeup Remover Pads


Sunday, October 29, 2017

DIY Hand Blown Glass Pumpkins

As a kid, my family and I always watched glass blowing demos at living history museums, Cedar Point, etc. when they crossed our path. I always wanted to learn how to blow glass and put it on my Bucket List but the thing is I’m not sure what I’d do with the thing after I made it. (I am including some affiliate links in this post for your convenience.)

I appreciate glass artistry and would dearly love to buy, use, or display hand blown glass creations but condo living isn’t the most spacious when it comes to displaying doo dads (all of our art collection hangs on walls.)  Not to mention, I’m not a fussy doo dad displaying kind of girl except in September when my pumpkin decorations dot the house inside and out.

I like to decorate with pumpkins because you can start displaying them in September for fall harvest, to Halloween and right on through to Thanksgiving at the end of November.  So it makes sense that I am obsessed with browsing handcrafted glass pumpkins at glass blowing shops. That’s when it hit me.

Blow a glass pumpkin and display it for Thanksgiving? That I can do.

I  decided that Today is SOMEDAY and I’m going to learn how to blow glass!

 Keep reading to learn about the process and to see what I made!

Sunday, August 6, 2017

How to Make a Folding Cloth Fan

We are in the sweltering hot Dog Days of Summer. Ohio likes to add a little extra misery to the mix with humidity. Hazy, Hot, and Humid is a phrase all Ohioans face with sweaty dread and air conditioning.

Until you have to go outside – yuck.

Fortunately, there is an easy, eco friendly, and cute solution – use a hand fan to keep cool!

 Pin this tutorial for later!

Monday, July 24, 2017

How to Sew an Easy One Seam Sundress

We’re deep into what I call Three H Summer Weather – Hazy, Hot, and Humid.

Ugh.

The type of weather that makes a sun dress the most appropriate way to stay cool (while still looking cute!) which you can barely find in a store because it is full of Fall Back to School clothes and gear.

Double ugh.

Fortunately, while shopping for costume fabric, some pre- shirred and pre-smocked with elastic flamingo fabric caught my eye. I adore flamingos! Most of work was done for me and the kids maxi length fabric is just the right length for my wee 4’11 frame to be a sundress to the knee. I popped the bolt in my cart and starting shopping for the actual reason I went to the fabric store in the first place.

As I shopped, I put the fabric back on the shelf since I was drawn to it only because I have a made crazy love of all things flamingo. It’s an impulse item and I’m trying to stick to my shopping list.

Later I went over and put the bolt in my cart. I do need some summer clothes. I can wear to the annual luau!

Again, I put the fabric back. Would I have time to make an unplanned sewing project or will the fabric sit and take up space until I forgot why I bought it in the first place? Not that there is already any cut fabric like that in my stash already…

I stood there looking at the fabric I put back and though,”Oh for Pete’s sake you are TOTALLY overthinking this! It is a quick and easy one seam sundress. You can sew in less than an hour because most of the work is done for you.. Life is short!  BUY THE FABRIC!”

So I did.

How to Make a Sundress in an Hour or Less

Tuesday, June 27, 2017

How to a Make Tomato Cage Plant Stand

This year’s Tabasco and Habanero pepper plants aren’t doing as well as they could planted discretely in our front flower bed as they could on the sunny backyard patio. They only way to do that is to eek out space for two more plants on my small patio container garden with  four plant stands.

Which was a fantastic excuse to check out our new IKEA store! I saw a self watering planter and stand on the IKEA website that would do the job nicely.


Until I got to the store and an associate told me they were discontinued. *sad face*

No worries! I swung by Home Depot on my way home to buy tomatoes cages to make into a quick and easy modern plant stand.

Quick and Easy DIY Modern Plant Stands


Pin this idea for later and to share with your friends!

You will need:

Tuesday, June 6, 2017

How to Make a Hanging Self Watering Herb Garden

Husband and I like to cook with fresh herbs and the easiest and cheapest way to do that is to grow them on the patio off our kitchen. Unfortunately for my herb garden to be, most of the patio space has already been claimed by tomato and pepper plants.

No problem -  if you can’t go out, go up!

I made last fall’s hanging flower pots into a self watering hanging herb garden. I hung them on hanging plant pulleys I bought from Amazon here so I can water then more easily using the pulley to lower the pots to Lisa height and then raise the planters so no one else bonks their head on a low hanging plant. (Disclosure: I am including affiliate links in this post for your convenience)

Easy DIY Self Watering Hanging Planter


Pin this post for later! Share this clever planter idea with your friends! 

Tuesday, May 30, 2017

How to Make a Folding Camp Chair Carry Bag

Last summer I upgraded our first generation arm less quad chairs (they look like this) to these captain's camping chair with arm rests. (I am including affiliate links in this post for your convenience) I didn’t go nuts with the bells and whistles because the two most important things to us are:

  • The chair has a study carrying and storage bag
  • The folding chair and bag are lightweight. We’re often carting a cooler, picnic basket, chairs, and an overly excited dog from a parking area which always seems like a million miles from where we want to be.
Oddly the more money you spend on a quality lightweight camping chair the cheaper and more flimsy the nylon chair bag that comes with it..

After barely two years of service, the seams of the bags are barely holding  together. The nylon fabric is so shredded I can’t repair it. The chairs are in great shape but the carrying cases are not.

I want a sturdy replacement camp chair bag.When I can’t buy, I DIY! I made one myself.

DIY Replacement Camping Chair Carrying and Storage Bag

Sunday, May 21, 2017

How to Make a Self Watering Flower Pot

Last summer Husband and I planted green and Apache peppers in my DIY self watering planter box the Mark 2. Self watering planters are fantastic for nightshades like tomatoes and peppers because they looooooooove being watered from their roots.

There are other benefits to growing vegetables in self watering containers: you conserve water by only watering the plant and not the surrounding sidewalk or patio with the sprinkler (or is that just me?) and may be less likely to kill the plant if you forget to water it every day (also me.)

I built the Mark 2 in the Earthbox style (learn more about it herewith a plastic aeration screen making a false bottom to fill with water. Unfortunately the aeration screen collapsed during the winter under the weight of snow and heavy wet soil. (Disclosure: I am including affiliate links in this post for your convenience.)

There is another style of self wicking planter that creates the water chamber with gravel and allows the water to wick to the plant roots using a layer of  landscaping fabric as a wick. Both water conserving planter ideas work well but I want to to reduce potential spring maintenance of replacing aeration screens that collapse under weight of wet soil or decomposing cloth wicks on a yearly basis.

I combined the two styles to make self wicking and watering tomato planters from pretty flower pots for my container garden.


How to Make a Pretty Self Watering Container Garden

Friday, May 12, 2017

Easy DIY Three Pocket Zipper Coin Pouch

 I don’t like my wallet because the dividers and padding make it quite thick when it is empty and worse when I put dollar bills in it. Which is an issue because that’s what wallets are supposed to do – hold money.

I’ve been hunting for the perfect wallet off and on for quite awhile. Ideally, I want something the same size and thickness as a coin pouch. Alas, those I like don’t have slim interior pockets for my ID and debit cards.

 Keep reading to learn how to more pockets than you could ever hope to fill to a coin purse!

Monday, May 8, 2017

How to make an Embroidered Dog Poop Bag Dispenser

When you have a dog, poop happens.

Being responsible pet parents means we need to carry potty bags to clean up after Lacey when she does her her business outside and on walks.

Being the green minded people that we are, I keep and fill two grocery bag holder for the stray plastic bags that cross my path.  I keep the empty grocery bag holder hanging in the kitchen to fill with random bread, frozen vegetable, and the occasional plastic grocery bag when I forget my canvas grocery bags when running a quick errand. When it is full I swap it out with the grocery bag holder I have hanging in the closet by the front door so we can reuse the bags for doggie duty. It isn’t perfect green solution but it works for us.

The big grocery bag dispenser in the closet is too big to take with us on walks. I sewed a small plastic grocery bag holder that attaches to Lacey’s leash to fill with repurposed bags from hall closet holder.


How to Sew a Clip on Dog Waste Bag Holder