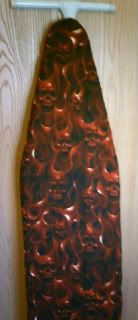
Here's how I made my ironing board cover.
1. Measure the existing ironing board cover and purchase that amount of fabric and padding.
- I used some terrycloth I had in my fabric stash for padding.
- If you’re a creative recycler, you can sew a couple of old bath towels together and use that as your padding layer.
- I had ended up with 2 pieces. The long part that sits on top of the ironing board and a short bottom piece that sits under the pointy part of the ironing board.
- I added a 1-inch boarder to my pattern as I cut out the pattern pieces for seams and the drawstring.
5. Pin the long piece and bottom piece right sides together and sew.
6. Press the seam (If I didn’t, my Mom would find out, hunt me down, and smack me.) Turn the pieces right side out and press the seam (again see Mom note.)
7. Make a channel for the drawstring to go around your ironing board by folding over the fabric, pining it, and sewing it into place.
8. Feed a piece of cording through the channel with a safety pin.
- I used the cord from my old ironing board cover. Again, creative recycling in action.
- I added a couple of cording ties on the each bottom side of the ironing board cover to tie into place for added stability when I was ironing.
If you'd rather buy than DIY, check out the following options - and more! - below!
Did you enjoy this post? Get more like it by subscribing to the Condo Blues RSS Feed or to Condo Blues by Email.


4 comments :
HA! That is fabulous! I love it! Great idea!
That cover rocks!
Wow! That is so creative. The cover sounds awesome. :)
How clever! Flaming skulls seem to make all things better! Grin. Love it.
Post a Comment
I love comments and read them all! If you’re shy and don’t want your opinions made public, you can always email me at condoblues [at] gmail [dot] com.