Condo Blues: How to
Showing posts with label How to. Show all posts

Tuesday, January 19, 2021

12 Real World Ways I Went Zero Waste This Week

Some of the things they don’t tell you about trying to reduce your household trash with zero waste living is that it depends a lot on where and how you want to live. Most of the year’s worth of garbage in jar folks have access to big fill your own container stores, year round farm markets, or huge gardens where they can grow almost everything  they need. Not all of us are that lucky,  would rather not drive all over the place, or crunched the numbers and found some the prices in those shops sky high. *raises hand*


But’s not to say that zero waste is impossible!  Instead try the more realistic goal of concentrating on reducing your household waste than making it absolute zero. By focusing on reusing, the Rule of Half, recycling, reducing, and composting (when the bin isn’t frozen shut) my family has reduced our weekly household waste to approximately one grocery store size shopping bag (ish. We reuse any packaging, dog food, etc.  bags for garbage which means the size varies) a week. We average a 3/4 full recycling bin every two weeks. We also give ourselves a break if our output is more than that because we have seasons and that can determine what we can do and how we do it.


To give you some realistic ways to reduce your household waste (and possibly save some money doing it) I made a list of the zero waste practices, tips, and tricks I do in a normal week to give you some ideas and jump start your thinking machines to find a zero waste solution that works for you!


12 real world zero waste tips
Save this list of ides to your Pinterest boards for later! Share it with your friends!

Sunday, November 8, 2020

How to Make Bottle Gnome Christmas Decorations

Many folks in the Scandinavian countries like to decorate their homes with gnomes for Christmas. There is a tradition where they enjoy an appetizer of rice porridge for Christmas Eve dinner and put a small bowl of it outside for the gnomes to thank them for protecting the family and helping them prosper during the year. 

The gnomes get very upset  and will play tricks on you if they are not rewarded with their Christmas porridge!

So personally, I think it is best to decorate with the not so fickle recycled variety and make quick and easy bottle Christmas gnome decorations. Although, just like the Irish leprechaun,  gnomes don’t go away after the holiday and you can decorate with gnomes all year round if you like.


how to make Christmas gnome decorations
Save this gnome decorating idea to your Pinterest boards for later! Share it with your friends!


This is a very forgiving Christmas craft project because the way you make your gnome is only limited to your imagination and what craft supplies you have on hand or want to use for this project.

Monday, October 19, 2020

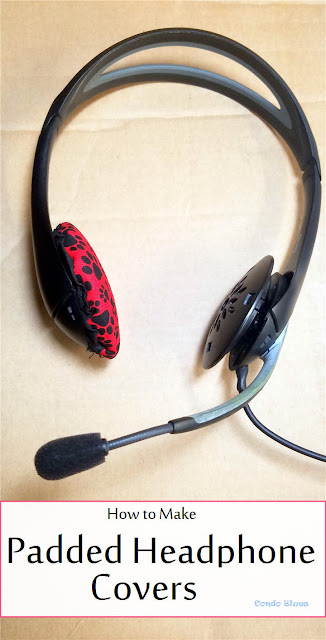
How to Make Comfortable Padded Headphone Covers

I found a set of headphones with a microphone I forgot I had in that random box of cords you’re supposed to have when you hit 30. The foam ear covers where deteriorated but the microphone windscreen was fine. What good luck I thought! I don’t have to by a new pair! I used them for my next Zoom meeting. 

Of which, the last half an hour was the longest of my life because the bare headphones hurt my ears. OW!


how to make replacement headphone covers
Save this post to your Pinterest boards for later! Share it with your friends!


I  went into my craft studio, gathered materials, popped on an audiobook (I use Audible. You can Try Audible and Get Two FREE Audiobooks here,) and started to play. In the end I had new cute and comfortable ear covers for my headphones. (Disclosure: I am including affiliate links in this post for your convenience.)


Let’ do this!

How to Make Replacement Headphone Covers

Wednesday, August 26, 2020

How to Sew a Skeleton Skirt with POCKETS

I plunked a bolt of skeleton print fabric on the store’s cutting table.


Fabric cutting lady: what are you making?


Me: A skirt


Fabric cutting lady: Oh! Are you getting ready for Halloween early?


Me: No. Just making something fun to wear for every day.


Fabric cutting lady: (Gives me a blank stare because she doesn’t know what to do with this information and says nothing. This isn’t the first time I’ve gotten this response from her about one of my weirdo projects.)


That doesn’t matter because I made a cute, twirly dirndl skirt that has pockets!
 

how to make an A line skirt with pockets

Save this sewing idea to your Pinterest boards for later! Share it with your friends!


And you know what?

 You can make one too!

Sunday, July 26, 2020

3 Quick and Easy DIY Face Mask Lanyards

When I have to go out and about on a necessary errand to two, I'm required to wear a cloth face mask.

  As always, I try to batch my errands to save gas (eco friendlier and all) and most importantly, time. 

 Which means, I usually take off my mask by the ear loops when I get back into the car. Then I hunt to find where it shifted around while I was driving to my next stop when it is time to put the mask back on again (always using the ear loops as recommended!) I need a better way to keep track of my cloth face mask in between the short times I remove it and need to put it back on again.

 I took my inspiration from the floating sunglasses strap similar to this one  I use when I’m at a water park or pool to keep my sunglasses from sinking if they are accidentally knocked off my face. In no time at all I a cloth face mask lanyard. (Disclosure: I am including affiliate links for your convenience.)

 Well, actually I made 3. Two handmade face mask lanyards and one cloth face mask chain because it is such a quick and easy project to do.

 Let’s make stuff!

  3 quick easy face mask lanyard tutorials

Save this idea to your Pinterest boards for later! Share it with your friends!

Thursday, July 16, 2020

Soapmaking and Friday Favorites Linky Party 538

Well, there is one thing I have to say about our social distancing summer, I'm getting a lot of projects done that I've been putting off (repeatedly.) For example just this morning I finally played that game of Sock Concentration (although you may call it  matching up and reorganizing your sock drawer) in a desperate attempt to find a pair of matching no show socks to wear today.

Although I briefly considered wearing a pair missing mates, because no show socks, amiright? But hey, it's done, I'm wearing matching socks (also I'm wearing an actual shoe that requires a sock) and in a Marie Kondo fashion that I revised after the first go round to work a little better for me - I hope.

My last batch of liquid hot process soap came out with the consistency of Flubber and I've been putting off trying again since its failure. Projects have been keeping me sane since this whole mess started and soap making was the only thing left on this list. Also, the summer heat in the garage already melted my coconut oil for me and since melting my oils at too high a temperature was Step 1 in my last comedy of errors, I gave it another go.

melted coconut oil
Soapmaking is easier when the summer heat melts your oils for you!

Monday, July 13, 2020

How to Make a Recycled Aluminum Can Butterfly Necklace

  I don’t drink a lot of soda but every once and awhile a pop can will cross my path. Once I finish the beverage I have two choices:

1. Recycle the can in the recycling bin.

2. Recycle the can into a cute necklace.


Today I am going with Option 2 because it will make a much more entertaining tutorial than Option 1 and it will give me a chance to answer I often get: How do you smooth the edges of a cut aluminum can?

 It’s easy! Let’s get started. 

How to Smooth and File the Sharp Edges of a Cut Aluminum Can

How to make a recycled soda pop can butterfly necklace
Save this project to your Pinterest boards for later! Share it with you friends!

Monday, May 18, 2020

How to Clean Caulk Off Clothing

I had a quick little caulking project I needed to do and didn’t bother changing into paint clothes because I didn’t think I’d get messy.

 Which of course meant I got several big smears of caulk on one of my few pairs of good jeans.

 It. Never. Fails. Why won’t I learn?

 How to remove caulk from clothing

Pin this hack to your Pinterest boards for later! Share it with your friends! 

Can these jeans be saved? Yes they can! It is very easy to remove caulk spills from clothing. here’s how.


How to Remove Caulk From Clothing

Monday, March 30, 2020

How to Caulk Around a Toilet

After tiling the guest bathroom and replacing the boring builder molding with something a little more interesting, It is time to make this bathroom look and function like a bathroom by installing a working toilet – a luxury we haven’t had in quite a while since the builder toilet went on strike.


I went with a Watersense rated Delta Faucet Company toilet (you can find similar toilets here.)  (Disclosure: I am including affiliate links in this post for your convenience.) I had such a good experience installing one in my powder room because every single thing you need to install the toilet comes in the box down to a screwdriver and the Watersense rating means it is water efficient (I think of it as the Energy Star rating for plumbing) without the hit or miss of not quite flushing everything that needs to be flushed like a duel flush toilet. 

the easy way to caulk a toilet and bathtub
Save this tutorial to your Pinterest boards for later! Share it with your friends!


But before I can completely cross Install New Toilet off my punch list, I need to caulk around it (and also along the new tile next to the bathtub. Fortunately, you caulk around a bathtub the same way you caulk a toilet. Let’s do this!

Why Should I Caulk Around the Toilet?

Tuesday, March 17, 2020

How to Plant an Indoor Hydroponic Herb Garden the Easy Way!

I have more time to grow a garden during the winter and spring than during the summer. Unfortunately it is way too cold outside and I just don’t get enough sunlight inside of my house to grow even a tiny herb garden. Trust me. We tried. 

Also there is the whole I forget plants need water to grow thing. The only reason I can keep a succulent alive is that they thrive on low light and neglect.

I’ve been interested in hydroponic gardening (growing plants in water instead of soil) ever since my husband and I saw an exhibit on aquaponic gardening (similar to hydroponics except fish in a tank fertilize the plants.) I looked at several of them off and on but most of them needed preparatory (and spendy) seed pods that weren’t always what we were interested in growing or eating. Fortunately, on Christmas morning my husband unwrapped our gift and learned that you can use your own seeds to grow whatever you like in an AeroGarden.

how to set up and troubleshoot an AeroGarden indoor hydroponic herb garden
Save this tutorial and troubleshooting tips to your Pinterest boards for later! Share it with your friends!

We set up our indoor hydroponic herb garden and have been enjoying cooking with fresh herbs all winter which feels decadent because up until now, that as been a summer only thing.

How to Set Up an AeroGarden Indoor Hydroponic Herb Garden

Sunday, February 16, 2020

11 Floor Tiling Mistakes and How to Avoid Them

Tiling a floor is a pretty easy DIY job.

It is also a DIY job that is easy to mess up if you don’t follow a few precautions first. You really don’t want to put in all of the work of tiling a floor only for the tiles to eventually come loose or crack after the job is done.

how to tile a bathroom floor
Save these handy floor tile tips to your Pinterest boards for later! Share them with your friends!


1. Not adding an extra 10% of tile to your tile order – Depending upon the design, you may need extra to match up the pattern in the room. It is also good to have extra tile on hand just in case you cut one incorrectly or worse drop one and break it.

Friday, February 7, 2020

How to Make a Teapot Cozy

Sometimes when I want to drink more than one cup of tea on a leisurely afternoon, I’ll make it in a teapot. Unfortunately, leisurely drinking the tea in my cup usually means the  tea in the pot turns cold by the time I’m ready for a refill.

Which pretty much negates the reason for making a small pot of tea.

The solution is to put an insulated tea pot warmer on my hot little pot to keep the tea inside it nice and warm as I slowly sip the day away...

Oh, who I am I kidding? I’m usually sewing and forget I made the pot of tea that is sitting on a table across from my sewing machine until hours later.

Either way, a tea cozy is a super simple sewing project to make and is a fantastic fabric stash bust project. I added machine embroidery from a file that came with my machine to get a little more practice in on hooping the embroidery fabric – easily the most tedious, difficult to get right, and important step in machine embroidery.

Let’ s make something!

How to Sew a Simple Tea Cozy


how to make a quick and easy teapot cozy
Save this tutorial to your Pinterest boards for later! Share it with your friends!

Sunday, November 24, 2019

How to Make Tomato Cage Christmas Gnome Decorations

I saw a big Christmas gnome decorations on line at IKEA and knew two of them would look perfect decorating both sides of my front door this Christmas. Unfortunately they were already sold out of them by the first few days of November!

I was severely bummed.

It was all the encouragement I needed to shop IKEA for the materials and go with my original plan of making a set of outdoor Christmas gnomes built around tomato cages.  Since storage space is at a premium in my condo, I made my Christmas gnomes (which we Scandinavians call Tomte or Nisser) as a temporary slipcover. That way I can use the cages in my summer garden, clean them, and use them again during the Christmas decorating season.  If you have the storage space you can permanently hot glue the fabric to your tomato cage instead of holding it in place with clothes pins like I did.

how to make outdoor Scandinavian Christmas gnome decorations
Save this tutorial to your Pinterest boards for later! Share this decorating idea with your friends!


How to Make Scandinavian Christmas Gnomes


Sunday, September 29, 2019

How to Dye Suede Shoes

I bought a pair of cream suede oxford shoes similar to these thinking they would look cute with jeans but didn’t wear them very often because of the color. Changing the color is easy as dying the shoe. Since these are basically an extra I have and don’t’ wear I decided to go with something fun and dye my suede shoes blue with this exact suede shoe dye. *Cue Elvis joke here* (Disclosure: I am including affiliate links in this post for your convenience)

I was very nervous about messing up this project and put it aside for quite awhile after I bought the dye. Once I got up the nerve to do it I learned dying shoes a new color isn’t hard, just a little messy so make sure you protect your work surface and you’ll be fine.

how to redye suede shoes a new color
 Pin this tutorial to your Pinterest boards for later! Share it with your friends!

How to Dye Shoes a New Color

Sunday, September 22, 2019

How to Make a Jester Costume

One of the things I love about sewing costumes is the challenge and I try to do that with every jester dress I make. Normally I cut each piece of my sewing pattern out of a different color fabric to create a color block jester costume, I load it up with jingle bells, and I’m good to go with a costume that’s close to jester’s motley.

I need a new jester costume for renaissance festival and historical performances and when I want to dress to empress on Halloween.

This time, I went for the Crazy Person Challenge of sewing a jester costume with a homemade diamond pattern quilted fabric. I made new everything from the skin out:bloomers, hoop skirt, skirt, bodice, and hat. This project took four months to complete.

Which just goes to show you I don’t just play a fool on weekends, it’s more of a 24/7 lifestyle. I’ve never quilted before and after this project I may never quilt again!

how to sew a jester costume
Pin this costume tutorial to your Pinterest boards for later! Share it with your friends! 
Photos by Jay Robinson and Checkmate Photography

How to Make a Female Renaissance Jester Costume

Monday, September 16, 2019

How to Make an All Weather Elizabethan Jiffy Pop Hat

I need a new jester hat for my renaissance festival character that will still hold its shape when it gets wet in the rain or snow. In the past I have used the traditional buckram (learn what buckram is here) which unfortunately can quickly lose its shape and not really recover it when it gets wet in a thunderstorm. (Disclosure: I am including affiliate links in this post for your convenience.)

I’d like to make something a little different than the traditional jester asses ears I’ve worn in the past. (Asses ears are the name of the jester’s hat with the points and bells on the end.) Since Elizabethan jesters and fools often made fun of their betters and sometimes wore parodies of the style of the nobility to mock them, I decided to make a HUGE British bonnet as an homage to my jester mentor who wore a GIANT flat cap.

But most importantly, I want a hat with a brim to keep the sun out of my eyes.


 Save this Halloween costume hat tutorial to your Pinterest boards for later! Share it with your friends! 

This style of brimmed hat with a poufy top goes by many names: British toque or bonnet, Spanish toque or bonnet, Italian toque or bonnet, or by the modern nick name The Jiffy Pop Hat because it looks like a Jiffy Pop pan after it has popped (learn more about Jiffy Pop here if you are unfamiliar with this treat that’s fun to eat.)

Elizabethan men and women wore this style of hat. The poofy hat in the sepia photo is made with buckram. The hats in the color photos are made with plastic canvas. As you can see you can't tell from looking what the hat form is made from. the only difference is the plastic canvas is weatherproof and also stands up any and all abuse an actor may put it through.

How to Make a Hat with Plastic Canvas Instead of Buckram

Sunday, September 8, 2019

How to Clean Rusty Chrome the Non Toxic Way!

Taking my bathroom décor que from hotels I stayed in I hung a chrome towel rack shelf in the Master Bathroom shower. It is handy as a towel rack and even better when I need a place to hang some hand washing up to dry. I popped a little plastic tray on top so I can use it as a storage shelf for shampoo and such.


how to clean chrome the quick and easy way
Save this cleaning hack to your Pinterest boards for later! Share it with your friends!


Unfortunately, the chrome is developing tiny rust spots.


Fortunately there is a quick, easy, cheap and non toxic way to remove rust from metal chrome.

Sunday, August 25, 2019

How to Wash a Baseball Cap the Easy Way

I like to wear hats. Hats keep your head warm during the winter and jazz up your outfit any time of the year.

Not to mention, putting on a hat = instant good hair day!

Baseball caps are my casual hat go to. I often wear one when I am working in my workshop to keep my hair out of my face and out of the way of power tools.

Which means over time, my baseball hats can get sweaty, yucky dirty.

How do you wash a baseball cap without ruining it?


how do you wash a baseball cap
Pin this baseball cleaning hack to your Pinterest boards for later! Share it with your friends


There is no way I am ruining my favorite baseball cap by using one of these ball cap washing things to wash my hat in the dishwasher. Washing dirty clothing in the same place and time I wash the dishes I eat off of skeeves me out. (Disclosure: I am including affiliate links in this post for your convenience.)

More importantly, most dishwasher detergents aren’t made to clean fabrics and have ingredients that fade fabric.

But mostly it’s the heebie jeebie skeeved out thing.

Fortunately there is a very easy and non toxic way to clean a baseball cap that doesn’t involve doing dishes or ruining your hat in the dishwasher or washing machine. Here’s how.

Monday, August 19, 2019

How to Make a Pendent Necklace into a Pin Brooch

I was going though my costume jewelry collection to bling out my Husband’s and my Halloween costumes. I have more costume jewelry necklaces than I do pins in my princess treasure chest. Naturally I actually need the opposite.

No worries! It is super quick and easy to turn a necklace charm or pendant into a pin brooch!


how to upcycle a necklace into a pin brooch
Pin this easy tutorial to your Pinterest boards for later! Share it with your friends!


Tuesday, July 16, 2019

How to Make Embroidered Insulated Can Koozies

Somewhere along this road we call life, we ended up with several matching  promotional insulated can and bottle drink holders.* 
*Or can Koozie.Or coosie (cozy, cosie.) Or huggie. Or bottle hugger. Or beer sleeve. Or bottle jacket. Or the so awesome I can’t decide which name is my favorite: coldy holdy or the Australian stubby holder.
I didn’t think they were very useful at the time and tossed them into the back of a kitchen cupboard that is so close to the ceiling I never use it.

It was only after I learned you can ripen avocados in a neoprene can Koozie like the avocado bag I don’t have (an avocado ripening bag looks like this for reference) that I put those now deemed useful beer huggies into a lower cupboard where I can easily find and use them to ripen avocados.  (Disclosure: I am including some affiliate links in this post for your convenience.)

If the insulated bottle holders didn’t all match I could pull the drink cozies and use them as drink marker charms when we treat ourselves or guest to our recent retro soda pop (check them out here!) obsession.

Let’s fix that and make embroidered insulated bottle koozies!


how to sew a unique embroider can beer bottle insulated sleeve
Save this tutorial to your Pinterest boards for later! Share it with your friends!

How to Machine Embroider Insulated Bottle Sleeves


You can easily sew insulated beer Koozies from scratch (you can buy the insulating fabric here) or machine embroider on a plan insulated neoprene can sleeve (you can buy plain can cooler sleeves here ) if you like.

In my case, I wanted to upcycle the  free promotional insulated beer coolies I have into something cuter than a walking advertisement for a company I’m not going to use.

You will need the following supplies for this craft project:


Insulated foam drink holder

Jersey fabric – I tried covering a soda pop sleeve with cute cotton fabric and it didn’t have enough give to put a can inside it. A few experiments later, jersey fabric worked the best as a functional can holder. I used plain t shirts I bought on clearance at the craft store.

Embroidery sewing machine – I have this sewing and embroidery machine and love its versatility!

Machine embroidery stabilizer

Embroidery machine thread

Sewing machine thread – yes, there really is a difference between machine embroidery and sewing thread

Seam ripper – I have a handmade seam ripper necklace similar to this one and never lose it while I’m in the middle of a sewing project !

Scissors

Sewing gage

Tailor’s chalk or pencil

Straight pins

Step by Step How to Make it Tutorial


1.  Hoop your stretchy fabric and embroidery stabilizer and use the embroidery machine to machine embroider a design onto the fabric with embroidery thread, if desired. You can hand embroider the design if you desire.


how to embroider an insulated foam can bottle beer koozie sleeve


Caution: It is better to pick an embroidery design that is light on thread that will allow your fabric and cozy to stretch around a can or bottle than a more dense and thread intensive design that doesn’t allow fabric movement.
2. Use the seam ripper to open the sides of the foam drink huggie and lay it flat. We will use this as our pattern in Step 3.


how to sew a can bottle beer huggie holder
Hey! It looks like a Tie Fighter! Pew! Pew!


3.  Using the flat bottle cozy as a pattern, trace it with the tailor’s pattern onto your embroidered fabric.
Tip: Make sure you trace your pattern slightly larger than the cosie on to leave a seam allowance on the sides and enough fabric to fold over the top of the coozie and sew into place to make a neat top hem. The sewing gauge will help you measure and mark a consistent seam allowance.

4. Pin the fabric to the bottle snuggie. Use a stretch stitch to sew the bottom sides of the fabric to the snuggie. If you do not have a stretch over lock (serger type) stitch on yours sewing machine like I do, you can use a stretch zig zag stitch.
Tip: You want to use a stretch stitch when sewing your beer cozy so it will allow the neoprene to contour to the bottle or can you put in it.
upcycle and sew a free promotional can bottle beer jacket


Tip 2: To keep the embroidered stretch fabric from slipping and otherwise trying to go wonky when removing the pins to sew it, I use a quick spritz of textile spray adhesive like this kind to keep the fabric and neoprene in place while I remove the pins as I sew.

5. Fold the the fabric over the top edge of the beer coolie, pin it into place, use a stretch straight stitch to sew the hem into place. Repeat this on the other side of the coolie. Trim the excess fabric with a pair of scissors if needed after sewing the hems.

how to personalize a bottle can beer cozy holder

You might want all of your pins to go in the same direction - unlike me - oops!


6. Fold the koozie in half, right sides (the pretty part) together and pin into place. Use a use a stretch straight stitch on each side to sew the koozie back together again. Trim the excess fabric with a pair of scissors if needed after sewing the side seams
Tip: To make sure you don’t sew the bottle holdy too small to hold a can or bottle, you can try sewing just over the foam and onto the fabric. Or not. It’s up to you.
7. Turn the koozie right out, pop your favorite drink inside, and enjoy
If you’d rather buy than DIY, check out the following options –and more! – below!

Check out these unique can cooler hacks on my food blog Lazy Budget Chef!

12 Ways to Reuse and Recycle Can Koozies

Did you enjoy this post? Get more like it by subscribing to the Condo Blues RSS Feed or to Condo Blues by Email.