Condo Blues: compost
Showing posts with label compost. Show all posts

Thursday, July 15, 2021

How to Make Easy DIY Compost Tea and Friday Favorites 590

If you garden, one of the best zero waste ways to deal with food scraps is to compost them. 

So what do you do when everything breaks down into a lovely full bin of compost? 

Make compost tea and fertilize your lawn and garden the natural way! My husband and I couldn't have turned the sad chunk of clay pretending to be our yard into dark, rich soil without adding compost to the soil when we plant and compost tea fertilizer later in the season to keep them growing.


If you can steep a tea bag in a cup of hot water you have all of the skills necessary to brew compost tea. You can read my How to Make Compost Tea Fertilizer the Easy Way tutorial here. Your plants will thank you for it!

Time to link up your favorite projects, recipes, and posts!

Sunday, April 18, 2021

10 Zero Waste Craft Projects that also Save Money

I recently read an article claiming that zero waste living doesn’t have to be expensive.

That immediately said to an interviewed college student who said that they couldn’t afford a $20 zero waste made from adopted unicorn tears deodorant that the student just needs to change their attitude because they are buying better and more expensive stuff. 

Because apparently the superior feeling of spending more money on low waste deodorant outweighs the reality of the starving student   having enough money for school books, tuition, food, and shelter I guess?

The author also said that no one who wants to go low waste (which is a more accurate description than the search engine friendly term zero waste) does it to save money.  It really burns my cookies that when confronted with the reality of price, a zero waste expert ignores it and tells you to buy it anyway when they are claiming zero waste living doesn't have to be expensive. That's how zero and low waste living gets the (wrong) perception that its only for the privileged!

10 ways to make zero waste save money

Save these ideas to your Pinterest boards for later! Share them with your friends!

My family is practically debt free because we don’t waste things. As we started switching from disposables to reusables the amount of trash we make plummeted and extra dollars accumulated in the bank.

For example it cost zero dollars to stop using plastic zipper baggies and plastic wrap for sandwiches and leftovers and start using the containers with lids (many repurposed) I already had. I had no idea how much money we wasted on that stuff until we didn’t need to buy it anymore - and you could see a serious dent in how much landfill trash it kept out of our bin.

Sunday, March 28, 2021

Why and How to Sift Compost

I recently upgraded our single tumbling compost bin to this exact double tumbling compost bin hoping to correct some mistakes we made when we started our first compost pile. (Disclosure: I am including affiliate links for your convenience.)

The mistakes we made weren’t horrible and we did create usable compost that turned our practically all clay tan colored garden beds to earthworm rich dark black soil. But the compost coming out of the bin has always been soggy. It was also full of plastic bits we thought would compost but didn’t break down.

How did this happen? Well for one, since we don’t have access to grass clippings or leaves we used shredded paper and cardboard for brown matter (and any sawdust I made in the garage) and we simply didn’t add enough. The fix for wet or smelly compost is to always have more dry brown matter in your compost pile than green matter (vegetable and fruit peels, coffee grounds, etc.) As for the plastic bits, we’d just empty the entire contents of our home office paper shredder into the compost bin and all of those window envelopes I shredded thinking they would break down because they are made from cellulose where actually some sort of plastic.

There was finished compost  in the bottom of the single compost bin but because it stopped turning and we couldn’t mix it very well with one of those compost turner things that look like this. Our compost was a big wet clump full of unwanted bits that I could easily save by sifting the almost finished compost and chucking a ton of this exact wood chip pet bedding into one side of the new compost bin and let it break down. Adding more shredded paper and cardboard boxes would also do the trick but I didn’t have enough of either in the quantity I needed at the time.

how to fix wet smelly compost

Save this idea to your Pinterest boards for later! Share it with your friends!


Monday, March 22, 2021

DIY Compost Station

When someone asks why we started composting, my husband and I say it’s because we had to because all we had for garden was clay and zero topsoil. We sang the condo blues over how very little would grow in that pretending to be soil, researched how to amend it, and experimented with composting in a DIY compost bin.

I made our first compost bin by drilling a bazillion holes in a black plastic trash can. We loaded it up with food scraps and paper from our paper shredder and in about a year we had compost! We added the homemade compost to our soil and after awhile our tan clay soil started to turn black with nutrients. I practically dance the first time I dug a hole and found an earthworm – it is another indicator that the soil is improving!


We take our composting very seriously. Why do you ask?


And we’ve been composting ever since.

Sunday, June 25, 2017

How to Make Compost Tea Fertilizer

Every evening as part of my post dinner cleanup,  I try to dump our kitchen compost collector into the big tumbling compost bin outside to keep the little guy from stinking up the joint.

This particular evening I gave the compost bin a crank like I have done so many evenings before only for the half full bin to suddenly become much easier to turn, like it was practically empty – because it was.

The hinges and latch on the door to the compost bin failed and dumped compost all over the yard.
For the third time.

I didn’t have enough finished compost to fertilize my garden but instead of singing the Condo Blues, I used it to make compost tea. Compost tea is an excellent plant food and fertilizer and well earns its nickname – Black Gold.

How to Brew Compost Tea Concentrate the Easy Way

Pin this post for later!


Thursday, May 8, 2014

A Fun and Frugal Summer Table with Dollar Tree #DTSummerFun #ad

 I’m thrilled to be partnering with Dollar Tree to share their Summer Fun products with you. This did not influence my opinion in any way because all opinions are 100% my own. 

Summer is my favorite season of the year. We have lots of impromptu gatherings with friends and family. The warm weather and sunny days allow Husband and I to host some of the events with his large family because we can move the party outside. To make sure our guests can tell which house is ours in a neighborhood of small lookalike houses, I hang something cute, like paper lanterns, on the front porch.


 Striped LED hanging paper lanterns? Yes Please! 

Sunday, May 4, 2014

12 Natural Gardening Tips for Beginners

Now that I have a house with a yard, I’ve been forced into this gardening thing. Some days I like it. Other days, my fails remind me why I named this blog Condo Blues!

I want to keep our gardening habits as green and eco-friendly as possible because Lacey likes to run into our flower beds even though she knows she shouldn’t. The last thing I want is for her to be covered with or ingest some chemical concoction of unknown origin we put on our plants or in our soil. Frankly, I’m not crazy about Husband and I doing that either.


Husband and I need to rework the front yard a bit after a series of windstorms pelted our bushes and plants. I asked a bunch of blogger friends if they had any green gardening tips that I can learn from and share with you.

Tuesday, March 4, 2014

How to Make Bone Meal from Turkey Bones

The soil in my yard is so bad it makes me sing the Condo Blues. The builder sold the lovely topsoil that should be surrounding my house before they built the neighborhood.

The thing is, they didn’t put it back after building our condo. We are stuck with thick clay soil that kills almost everything I try to grow in it.

Cue up the blues. Whoomp. whoomp. Sad trombone.

We added compost and new top soil to the front yard. Our soil can use some bone meal too. Bone meal is an excellent source of phosphorous and helps plants grow a healthy root system.

 This also keeps poultry bones from stinking up the kitchen trash. 

Wednesday, January 1, 2014

One Small Green Change 2013 Resolution Wrap Up


Happy New Year 2014!

I find that I’m better at keeping my New Years Resolutions if I make them when I need them instead of making up a resolution on New Year’s Eve for the sake of making a New Year’s resolution.

During 2013, I made one small green change each month. My changes weren’t necessarily Earth shattering or big. I focused on the small stuff. The easy stuff. The hey-I-should-probably-do-that stuff.

This way, I can evaluate whether it works for me or not. I'm more likely to keep monthly resolutions because some green changes are seasonal where I live. If you look at all of those little changes that became permanent, it can make a big, huge difference.

Here's the 2012 One Small Green Change New Year’s Resolution wrap up.


January

Thursday, November 7, 2013

Shredded Cardboard Mulch

Husband and I are so occupied with an interior house wide, declutter and donate mission that we haven’t paid much attention to the outside of the house.

howtomakeshreddedcardboardmulch
By the time we realized we should keep our lovely compost and spendy topsoil from eroding during the winter with mulch, the stores replaced their garden supplies with Christmas decorations.

True story.

Last year I thought I was being a smarty smart when I raked all of the fallen leaves from the front yard into the flower beds to use as leaf mulch.

That didn’t work very well. I didn’t shred the leaves. The first big gust of wind blew my leaf mulch out of the flower beds and back into the yard.

Sunday, January 15, 2012

What is the Strangest Thing You Do to Save Money?

I watched the Extreme Cheapskates special on TLC. True to reality TV, they presented and edited the people featured as weird in the lengths they go to save money even though I read many of those tips, like washing and reusing plastic zipper baggies (heck! I do it myself) on blogs and in The Tightwad Gazette books long before this show was a twinkle in a producer's eye.

Our green and frugal ways mean the amount of our weekly household trash is usually one small plastic bag of trash. 

Frugality, just like green living, is all about balance. What works and is normal for some, others just can’t go there. I’m all for boxing up and taking my restaurant leftovers home with me (a quick, easy, and cheap lunch option for the following day!) but I personally draw the line at asking other people for their leftovers at the restaurant, while one guy on the show does it all the time – to his wife’s embarrassment which makes good TV.

If I left these amazing homemade tortillas at the restaurant it would have been a crime!

Sunday, June 12, 2011

Compost WIN and FAIL

Last summer I made two compost bins fromRubbermaid tubs and violated the warranties on the tubs to do it 'cuz I'm Danger Girl.


I threw in a shovelful of dirt in to prime the bins and diligently added a layer of shredded paper from our paper shredder to the bin for every layer of vegetable scraps that hit the bin.

Every once and awhile I locked the handles on the compost bin and turned it end over end to mix the contents. Since I use paper for my ‘browns’ everything stuck together and required breaking it up by poking at it with a shovel before I flipped the contents to mix it.

It’s a year later. Let’s see how my Compost Experiment is doing.

Wednesday, December 22, 2010

11 Green Ways to Clean for the Holidays

One of the last things I do before the holiday gathering starts is clean my house. I suspect you might too. Or at the very least will need to do a through cleaning AFTER the holiday hordes have invaded your home.

You can still have a clean house and keep it a green house. Here are 11 tips for green cleaning from some of the coolest bloggers around. If you look closely at timestamp 0:40, you’ll see little ol’ me!

Thursday, August 5, 2010

Good Green Fun at the Ohio State Fair

Husband and I spent a day at the Ohio State Fair. When we were not eating local food – which is crazy easy to do at the State Fair, we were checking out the sites and acting silly.

There were things to do for kids of all ages. Even goat kids! I thought of Nanny Goats in Panties and snapped a photo of the goat playground for Margaret.

The goats weren’t feeling playful because it was early
 in the morning when we visited them.

The animal, food, and craft judging were all in full swing. We saw and were allowed to pet many animals. Our favorite was the Highland cows. Husband and I call them McMoos because we are convinced that they moo with a Scottish accent. Mac-moooooo.

Sunday, June 6, 2010

How to use a Rototiller

My in laws do a big garden every year. Husband says that they have had a garden for as long as he can remember.

Father in law had a heath situation. He is recovering and on physical restrictions for the rest of the year. (Since I did not ask if I could write about it, I am not going to mention the details, only to say things got scary and surgery was involved.) My in laws did not think they would put in a garden this year because Father in law should not till the garden bed with the rototiller. Husband is still recovering from his running injury, so he is out too.

While farming and country life is not for me because I am allergic to everything that is green (oh the irony!) it is Mother and Father in law’s Little Slice of Heaven. I will do everything I can to make sure that they keep it for as long as they want.

I volunteered to till their garden with this monster.

Told you the garden was big!

What I don’t have in rototiller knowledge, I make up for in enthusiasm.

I was very enthusiastic.

I took off my safety equipment for the photo.

Have I mentioned I have never actually used a rototiller before? But I have gardened with a jackjammer how hard could this be?

I needed help getting the big thing started because it has a pull cord like a lawn mower and I have arm muscles made out of macaroni. There are two hand controls on the rototiller I used one for forward and other is for reverse. Each control has a safety feature - if you let go of either control the rototiller stops so you are less likely to chop off your feet if the thing backs up into you too fast.

My plan was push it in front of me like a lawn mower and let the rotating blades churn up the soil. Then we could easily hand pick the weeds and Mother in law could start planting.

Mother in law called these carrot seeds imbedded in paper strips “stripper carrots.” Husband got mad because he thought I was using salty language in front of his Mom because she is a saint (she is.) They cost a little more than loose seeds, but you do not have to thin the plants out later like with planting loose carrot seeds. They are worth the extra money.

My plan worked well until the farmer who rents Mom and Dad’s fields for extra planting stopped by and watched as I tried to churn up the soil and avoid some volunteer lettuce, a row of growing garlic and rhubarb. The obstacle course made this Advanced Rototilling when I clearly was supposed to be in the Beginner’s Course. No pressure trying to learn how to use a tiller in front of a professional farmer!

A few things I learned:
  • Wear ear protection because gas powered rototillers are LOUD!
  • You may need to do one than one pass with the tiller in your garden. I did the first pass just walking through the garden with the tiller in front of me to break the soil into bigger chunks. Those are the photos you see here. I did a longer second pass to break the big dirt chunks into little chunks the next day. 
  • If we wanted to add soil amendments like compost it is best to add them after the first full pass with the tiller and work them into the soil with the rototiller on the second pass. I didn’t do this because well, look at that naturally dark, rich soil! (And their compost heap is still composting.) 
  • To break the big dirt clods into wee little dirt clods, I pushed down slightly on the rototiller handles so the tiller was at a slight angle. This way, the blades are working the dirt clods I tilled on the top of the soil and the blades are not digging deeper into the soil and making a deeper ditch. 
  • If you have adjustable blades on the rototiller you are using, you can set them to till deeper on the first pass and shallower in the second pass to avoid the angle thing I had to do. Shut the machine down when you reset the blades for safety’s sake please! 
  • To turn corners in tight spaces (and to avoid the garlic) I found it better to put the tiller in reverse, take a few steps back, and then do a pivot turn in the direction I wanted to go instead of trying to heft the tiller with brute force – which I lack. 
  • If you are in a situation where someone wants to micromanage or Armchair Quarterback you through a project like Father in Law and the farmer were trying to do, use a very loud tool so you cannot hear them! As Mother in law and the Mennonite lady neighbor (who was duly impressed I took on such a task), commented, “Like they did it perfectly the first time.” Nah. Solidarity my sisters! Girl Power!
Why yes I AM pretty darn pleased with myself!

Mother in law rewarded my efforts with some rhubarb that I miraculously did not till under.

Rhubarb crumble hot from the oven and plopped on vanilla ice cream!

I used the rhubarb to make The Green Phone Booth’s Rhubarb Crumble. While it was baking Husband insisted that we serve it over vanilla ice cream and ran off to the store to buy Ohio made ice cream. He was right. The ice cream was the perfect compliment to a very delicious end. I love it when a plan comes together!


Did you enjoy this post? Get more like it by subscribing to the Condo Blues RSS Feed  or to Condo Blues by Email.

If you are joining us from Something I Whipped Up Monday, Metamorphosis Monday, The Persimmon Perch, Market Yourself Monday, Made By You Monday, Marketing Mondays, Craftastic MondaysTrash to Treasure TuesdayToday's Creative Blog,  The Girl Creative, Toot Your Horn Tuesday, Second Time Around Tuesday Show and Tell, Tools are for Women TooTip Me Tuesday, or  Penny Pinching Party Welcome!

Sunday, May 23, 2010

How to Make a Compost Bin Out of a Plastic Storage Tub

My Home Owners Association (HOA)  lawn service killed the compost bin I made from a garbage can with a lawn mower last summer.

A moment of silence please.

During the winter I researched and pseudo-shopped for a replacement. A Bokashi Bin like this one looked interesting but higher maintenance than my old college boyfriend. (Disclosure: I am including affiliate links for your convenience.)

A worm compost bin (learn more about it here) would freeze in my garage. I didn’t want to be known as a Stewart of the Earth and Mass Worm Murderer. A tumbling compost would work best for us, and if it was smaller than the garbage can model that would be perfect.

I had my heart set on an electric composter similar to these because I liked that it did all of the mixing and tumbling for me and you got a batch of compost every few weeks instead of my year long wait till it rots method.

But before I make the spendy investment I vowed that if I can get the green to brown ratio right, don’t have slime mold or maggots, and get at least one batch of compost out of a new homemade compost bin then I will consider buying the electric composter. Don’t judge me Internet. I know I’m a little more than pathetic because I dream of compost bins instead something important like world peace.

 
Pin this tutorial for reference!

Wednesday, April 28, 2010

Coconut Shrimp with Thai Peanut Dipping Sauce

I’ve been dealing with an itchy flaking scalp for the last six months and tag teaming the problem with my hairstylist and my family doctor. Two shampoos and a new prescription later both suggested I add more Omega 3’s to my diet. Translation: eat more fish.

I settled in on shrimp because it is most of the affordable (AKA frozen) type of fish I can get in land locked Columbus that is environmentally OK.  That and I really like to eat shrimp. Cooking shrimp is a slightly different story because it’s easy to overcook. I’m not a fan of stir fried rubbery shrimp bits. I did some poking around the internet and found a recipe for coconut shrimp. Husband is a big fan of all things coconut. However I’m not a fan of the mess involved with hand breading things.

So I cheated. I bought SeaPak Coconut Shrimp.  I wanted to do something a little different and took a recipe suggestion off of the SeaPak site to serve it with Thai peanut dipping sauce instead of using the marmalade dipping sauce that came with the shrimp. I put the marmalade sauce aside and will get clever with that later.

To prove that I’m not completely useless in the kitchen I made a Thai peanut dipping sauce  with natural peanut butter instead of buying a premade sauce. I served the coconut shrimp with brown rice and steamed broccoli. The rice was the most difficult part of the meal because it has the longest cooking time, which really isn’t saying much because it only took 30 minutes. The shrimp took about 12 minutes to bake – let’s hear it for quick food!.

Pardon my plating. I don't know how food bloggers do it. I really just wanted to hurry up and eat dinner, not style photos.

The taste? Pretty darn good. Husband said, "It was light. It was crispy. It was yummy, even better with your dipping sauce."

Pros

  • Mighty tasty and not soggy like our control - Kroger brand coconut shrimp (purchased with my own money), and this comes from someone who routinely and weirdly prefers the taste of generic food over the name brands. 
  • The SeaPak coconut shrimp were butterflied unlike the Kroger brand coconut shrimp they were tiny and sad looking.
  • Not too bad on the packaging. The only thing I threw away is the small plastic bag holding the marmalade dipping sauce. I shredded and composted the paper box. I rinsed and reused the small plastic bag holding the shrimp for Blitzkrieg doggie duty.
Cons

  • The marmalade dipping sauce has high fructose corn syrup in it. That was easily avoided by making my own Thai peanut dipping sauce or just going without the dipping sauce. 
  • The Kroger brand coconut shrimp had 5 more shrimp in the box for the same price as the SeaPak coconut shrimp. Although there was a definite difference in the taste – the SeaPak tasted much better.

This is definitely a you get what you pay for situation. The Kroger brand shrimp was slightly less money per shrimp but failed the taste test in comparison to the SeaPak Shrimp. The SeaPak shrimp are a better tasting product.


Did you enjoy this post? Get more like it by subscribing to the Condo Blues RSS Feed  or to Condo Blues by Email.

Disclosure: SeaPak provided me with a free sample to facilitate this review because I probably wouldn't have considered this product otherwise and now I'm glad they did. They did not compensate me in any way and all opinions are my own. SeaPak didn’t ask me to compare their product to a store brand. I did that on my own which I purchased with my own money if you were reading this post carefully.

Sunday, April 11, 2010

Telephone Book Wreath

I have a bunch of telephone books lying around the house. I don’t know how this happens - we don’t have a land line! We’re a cell phone as home phone family.

I figure I could do one of two things with those phone books.

  1. Complain about them – which isn’t very productive and not really worth the energy.
  2. Find a way to use them - beyond the obvious because that's why Al Gore invented Internet - so we could use it to look up telephone numbers :)
I wanted a new wreath for the door to celebrate spring. I had a wreath form from a failed project. "What if I married my telephone books and my wreath form it would be the perfect project to enter in Dollar Store Crafts April Stash Bust Challenge?" says I. Not to mention it's an ultra cheap - and green! - way to get a new door decoration because I’m using what I already have on hand.

*Enter the Condo Blues Whammy*

I opened the wreath storage bag and found this.


Once upon a time this was all in one piece.


Nuts.

Looks like I lost of the Stash Bust Challenge even before I started. *Sad face*

I decided to try to piece the form back together. If I got something workable I’d move on from there. If not, I’d ditch it and hop on down to the store and buy a new wreath form.

I removed the Christmas balls with a pair of needle nose pliers and put them aside for another day.

Can this wreath be saved?

I snapped the tops off of some plastic forks that have been wallowing in the utility closet so long they are practically family heirlooms. I used them as supports to hot glue the form back together.

Trash or treasure to be?

I cut a piece of leftover cardboard from I don’t-know-what to the size of the frame to stabilize it. I attached the cardboard to the chewed up side of the Styrofoam with hot glue and floral tape. I think the floral tape might be from when I did the flowers for Christina from A Mommy’s Story’s wedding. I hot glued the floral tape into place because it wasn’t sticky anymore. I also made a note to use more of this stuff up because the floral tape has to be a least 6 years old – older than Christina’s kids.


I ripped the white pages from the telephone book into approximately one inch strips. I used the business white pages because I wanted black and white paper. I tried to rip down the telephone number columns of the page for privacy’s sake.

 I shredded the leftover paper scraps and put them in my compost bin.

I used by very good friend Modge Podge to attach the paper strips to the wreath form and let it dry over night. The Modge Podge will also protect the paper from the elements. The Modge Podge is leftover from my books as wallpaper bathroom remodel. Is it just me or is this post playing out like an episode of Horders? Yipe!


Modge Podge rules!

I painted an empty toilet paper tube orange as an homage to How about orange… and let it dry overnight too.

Orange you going to say it's pretty?

The next morning, I smashed the toilet paper roll tube flat and cut it with scissors.

 I eyeballed the cuts 'cuz I'm a rebel.

I hot glued the leaf shaped rings to the wreath form and added some scrap ribbon to the back as a hanger upper thingie.

The finished wreath!

TA DA! My telephone book and paper tube wreath idea actually worked! Yay me!


Did you enjoy this post? Get more like it by subscribing to the Condo Blues RSS Feed or to Condo Blues by Email.

Visit thecsiproject.com


Monday, August 17, 2009

How to Cook Edamame (Soybeans)

“Mom and Dad said their soybeans are ready and we can have some if we want,” Husband said.

“Why in the world would we want soybeans?” I said, thinking of all the things we buy that are made from soybeans like soy foam insulation (hey, I’m still tinkering with sealing air leaks in The Condo) and not thinking about actually cooking and eating the soybeans, like, well, beans. Ironic, because we regularly eat a large variety of beans.

Husband gives me an exasperated look, “Soybeans are edamame Lisa!”

Oh. I didn’t know that.

Did I ever mention that edamame are one of my favorite snacks and something I introduced Husband to early in our relationship?

I feel stupid. Oops.


Needless to say, I made it a point to steal as many soybeans from my in-law’s garden as possible visit my adoring in-laws. Actually the adoring part is true. They are lovely people. And my father in-law buys me power tools for Christmas. That puts them at the top of Santa’s Nice list. No lie.

So now I have a big bunch of fresh edamame – how do I cook them?

How to Cook Fresh Edamame (Soybeans)

Monday, May 11, 2009

What’s this Yellow Mold Doing in My Compost?

As with most newly built homes, my developer sold off all of the wonderfully fertile topsoil in my neighborhood and built our homes on the clay subsoil residing underneath. Unfortunately the builder didn’t put any topsoil back into the planting areas. Ever try to grow anything in clay soil? It doesn’t work very well.


Photobucket


Before I can even consider turning this dirt patch into a raised garden bed I need to mix organic material into the clay soil – preferable compost. Fortunately, sneaky person that I am I have a big ol’ composter making some fertilizer for me by way of a garbage can I made into a compost bin that fully complies with my Homeowner’s Association Rules. My first batch of compost came out well. After feeding the Covert Urban Composter food scraps all winter it was time to check how much Gardner’s Gold I had to work with this spring.

I mosey on over to the compost bin in the backyard. I take a look. I see this.


Photobucket
I get grossed out.

After some research I discovered that this yellow spongy, foamy and phallic looking blob is a slime mold. Specifically, Dog Vomit Slime Mold .


Photobucket
Aptly named don’t you think?

Dog Vomit Slime mold (gosh you just don’t get to type that several times in one sitting do you?) usually develops in damp, shady areas where there is a lot of decaying organic matter like soggy flower beds that use bark mulch.

This makes perfect sense because we’ve had a very rainy Spring. When I took the lid off of the compost bin everything was water logged. There was slime mold all over the top and sides of my compost. And boy did it ever stink! Bad.


How Do You Get Rid of Dog Vomit Slime Mold?

Easy. You don’t.

First off Dog Vomit Slime mold is not harmful to people, plants, or pets. In fact, some people in Mexico eat slime mold.

No thanks, I’ll pass.

It’s lifecycle is very short. When slime mold first appears it’s usually bright yellow and can grow as it chows down on the decaying wet leaves and whatnot (legend has it that slime molds were the inspiration for the kitschy 1958 sci-fi movie The Blob.) Next, the slime mold turns light brown and finally dries into dark, powdery spores. The whole process can take a couple of hours or a couple of days.

If this slime mold grew in the mulch in my flower beds I could just leave it and it would go away on its own. In this case I was advised to throw the moldy compost out.

Oh and just to you gross you out a little further, when I emptied the bin I found a nice big family of maggots in my compost.

Yummy.

Once the compost bin was empty I was told to clean it with either bleach (no thanks) or hydrogen peroxide (yes, please.) I mixed up a solution of hydrogen peroxide based “oxygen” bleach and water and used that to clean the compost bin inside and out, including the lid. I let the clean bin dry in the sun.

I emailed Gardener's Supply Ask an Expert and asked them how I could prevent my compost from molding again. This is what they said.


If you're developing mold in your compost pile it certainly sounds like the materials are too wet most of the time. Drilling more aeration holes would definitely help the ability of the pile to receive more air and should keep the materials more dry. Too much moisture will drown the microorganisms, and too little will dehydrate them. A general rule of thumb is to keep the material in your compost pile as moist as a well-wrung sponge.

To do their work most efficiently, microorganisms require a lot of oxygen. When your pile is first assembled, there will probably be plenty of air between the layers of materials. But as the microorganisms begin to work, they will start consuming oxygen. Unless you turn or in some way aerate your compost pile, they will run out of oxygen and become sluggish.


When your pile is very wet, try adding materials to sock up some of the moisture, such as paper, dried leaves, sawdust, or straw. Keeping a good balance between these "brown" ingredients, and the "green" ingredients such as grass clippings and food waste is very important
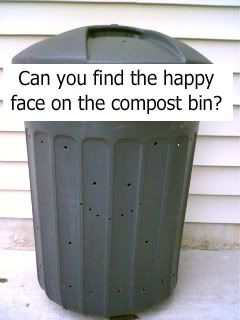
To make sure that I didn’t have moldy, soggy, maggoty compost again, I drilled more aeration holes in the bottom and sides of the Covert Urban Compost Bin. This last batch of compost was mostly kitchen scraps so I’m going to concentrate on adding more paper from my paper shredder for "browns." I’m also going to ask the lawn service to leave the grass clippings on our lawn so I can rake them up and put them in my compost bin. Oh, and this time I’ll try to turn the compost more often because last time I didn’t mix my compost at all - oops.

Looking for more compost options? Check out the following options - and more! - below!
Did you enjoy this post? Get more like it by subscribing to Condo Blues.

This is Condo Blues’ submission for the May Green Moms Carnival where our topic is gardening. The Carnival will be held at Green and Clean Mom. Please check it out after May 18th!