Condo Blues: compost
Showing posts with label compost. Show all posts

Monday, May 11, 2009

What’s this Yellow Mold Doing in My Compost?

As with most newly built homes, my developer sold off all of the wonderfully fertile topsoil in my neighborhood and built our homes on the clay subsoil residing underneath. Unfortunately the builder didn’t put any topsoil back into the planting areas. Ever try to grow anything in clay soil? It doesn’t work very well.


Photobucket


Before I can even consider turning this dirt patch into a raised garden bed I need to mix organic material into the clay soil – preferable compost. Fortunately, sneaky person that I am I have a big ol’ composter making some fertilizer for me by way of a garbage can I made into a compost bin that fully complies with my Homeowner’s Association Rules. My first batch of compost came out well. After feeding the Covert Urban Composter food scraps all winter it was time to check how much Gardner’s Gold I had to work with this spring.

I mosey on over to the compost bin in the backyard. I take a look. I see this.


Photobucket
I get grossed out.

After some research I discovered that this yellow spongy, foamy and phallic looking blob is a slime mold. Specifically, Dog Vomit Slime Mold .


Photobucket
Aptly named don’t you think?

Dog Vomit Slime mold (gosh you just don’t get to type that several times in one sitting do you?) usually develops in damp, shady areas where there is a lot of decaying organic matter like soggy flower beds that use bark mulch.

This makes perfect sense because we’ve had a very rainy Spring. When I took the lid off of the compost bin everything was water logged. There was slime mold all over the top and sides of my compost. And boy did it ever stink! Bad.


How Do You Get Rid of Dog Vomit Slime Mold?

Easy. You don’t.

First off Dog Vomit Slime mold is not harmful to people, plants, or pets. In fact, some people in Mexico eat slime mold.

No thanks, I’ll pass.

It’s lifecycle is very short. When slime mold first appears it’s usually bright yellow and can grow as it chows down on the decaying wet leaves and whatnot (legend has it that slime molds were the inspiration for the kitschy 1958 sci-fi movie The Blob.) Next, the slime mold turns light brown and finally dries into dark, powdery spores. The whole process can take a couple of hours or a couple of days.

If this slime mold grew in the mulch in my flower beds I could just leave it and it would go away on its own. In this case I was advised to throw the moldy compost out.

Oh and just to you gross you out a little further, when I emptied the bin I found a nice big family of maggots in my compost.

Yummy.

Once the compost bin was empty I was told to clean it with either bleach (no thanks) or hydrogen peroxide (yes, please.) I mixed up a solution of hydrogen peroxide based “oxygen” bleach and water and used that to clean the compost bin inside and out, including the lid. I let the clean bin dry in the sun.

I emailed Gardener's Supply Ask an Expert and asked them how I could prevent my compost from molding again. This is what they said.


If you're developing mold in your compost pile it certainly sounds like the materials are too wet most of the time. Drilling more aeration holes would definitely help the ability of the pile to receive more air and should keep the materials more dry. Too much moisture will drown the microorganisms, and too little will dehydrate them. A general rule of thumb is to keep the material in your compost pile as moist as a well-wrung sponge.

To do their work most efficiently, microorganisms require a lot of oxygen. When your pile is first assembled, there will probably be plenty of air between the layers of materials. But as the microorganisms begin to work, they will start consuming oxygen. Unless you turn or in some way aerate your compost pile, they will run out of oxygen and become sluggish.


When your pile is very wet, try adding materials to sock up some of the moisture, such as paper, dried leaves, sawdust, or straw. Keeping a good balance between these "brown" ingredients, and the "green" ingredients such as grass clippings and food waste is very important
To make sure that I didn’t have moldy, soggy, maggoty compost again, I drilled more aeration holes in the bottom and sides of the Covert Urban Compost Bin. This last batch of compost was mostly kitchen scraps so I’m going to concentrate on adding more paper from my paper shredder for "browns." I’m also going to ask the lawn service to leave the grass clippings on our lawn so I can rake them up and put them in my compost bin. Oh, and this time I’ll try to turn the compost more often because last time I didn’t mix my compost at all - oops.

Looking for more compost options? Check out the following options - and more! - below!
Did you enjoy this post? Get more like it by subscribing to Condo Blues.

This is Condo Blues’ submission for the May Green Moms Carnival where our topic is gardening. The Carnival will be held at Green and Clean Mom. Please check it out after May 18th!

Tuesday, March 31, 2009

How Do You Plan Landscaping When You Suck At Gardening?

After watching our “easy to care for landscaping” die a little less than two years after buying The Condo I replanted those seven little solders all standing in a row…


Photobucket
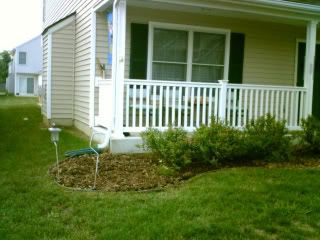
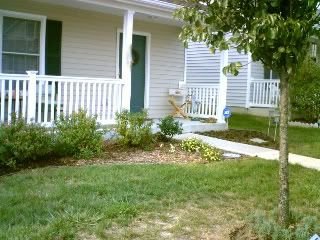
…with my first attempt at grub resistant gardening. This is what my front flower beds looked like early last summer.

Photobucket

Photobucket
Mother Nature pulled a nice big April Fools Day prank on me (clever how I worked April Fool’s Day into today's post, huh?) Japanese Beetles took out my replanted bushes and white leaf mold took out the rest of the plants in the beds. Now I’m stuck with this:


Photobucket
Last fall I took all of the plants out of the flower bed, treated it with Milky Spore, and let the whole thing go dormant. Oh yeah, I put in a garden border with reclaimed bricks while I was at it, but that’s another post.

Photobucket
Apparently Blitzkrieg has a little rule that I can’t take photos for the blog unless he’s in them. What can I say? My dog loves the camera.


Now it’s time for planning the landscaping for those flower beds. The problem is I suck at landscaping. I have no idea what plant or how to decide.
I know that The Condo is in Zone 5, the front yard gets partial morning sun. The soil is clay and we are going to spend a bucket load of our budget on soil amendments. I know I don’t want to plant plants that attract Japanese Beetles (I know I'll never fully rid my yard of Japanese Beetles. I just want to encourage them to fly by my yard and eat at the neighbors) but other than that I don’t know what I want to plant other than some more lavender (it grows well in my crappy soil), perennials that that look pretty and are food/pest deterrent, and possibly a tea bush (Camellia Sinensis) but I don’t know if that will grow in my area. Will it?

How do you decide what to plant and where to put it in your landscaping? What resources do you use? Once you decide what you want to plant where do you get your plants? At the nursery or mail order? Any help or resources where you can point me to would be greatly appreciated.


This post is part of Works for Me Wednesday.

............................................
In other Blog Business:
Are you going to BlogHer this year? If so, could you please login to BlogHer and vote for two Rooms of Our Own that I’m involved in and that aren’t getting a lot of votes? The Rooms of Our Own are causal meet up/networking opportunities held during lunch and are different than the panel discussions.

You don’t have to attend the sessions if you vote for them, but you’re welcome to!

Green Bloggers Room of Our Own (this is separate from the Green Blogger panel.)

When Your Family is Your Blogstalker/Troll Room of Our Own (fortunately I don’t have this issue, I’m promoting it for a blogger who obviously can’t mention it on her own blog.)

Thanks!

Wednesday, September 24, 2008

Save Travel Time and Money with a Zero Waste Road Trip

Husband, Blitzkrieg, and I took off for an 8-hour road trip from Ohio to a tiny mountain town in Northern Georgia. When we travel with our dog, we bring a picnic lunch because we don’t want to leave the dog alone in a hot car for health and safety reasons. I wondered if we could do it as a Zero Waste or Low Waste road trip beause depending up whom you read on the Web or watch on TV (hello Planet Green!), doing something the Green Way is always:

· More expensive
· More time consuming
· More difficult
· but better for the environment


Long story short – we did it! And guess what?

Friday, June 13, 2008

Six Strange Things You Can and Cannot Compost

We have a new kooky little game we play here now that we know that the covert  composter works. We call it Will It Compost?

Six Weird Things That Will Compost


1. Dog fur tumbleweeds from Blitzkrieg’s hairbrush.

2. Dryer lint.


3. Dirt from the Roomba.


4. A 100% white cotton sock.


5. Corn-based plastic coffee lid from a paper take out cup of coffee. Husband and I threw it into the compost bin just to see if it would compost - it did!

6. Wine Corks. Obviously, I'm talking about composting wine corks made from real cork instead of the fake corks that are made from plastic.

Six Weird Things I Will Not Compost

Friday, June 6, 2008

How to Grow Upside Down Tomato Plants

I wasn’t a big gardener. In my rental, I tried growing tomato plants in pots. I was too cheap and  lazy. I
didn’t buy tomato cages and tried using a wooden dowel rod and yarn as a plant stake.

 That experiment in cheapatoode didn’t work out as well as I planned because the plant grew taller than the dowel rod. Then big heavy tomato vine overloaded the stake and constantly flopped fruits of my labor over the side of the pot and onto the ground where it became bug lunch. I relied on Mother in Law for homegrown tomatoes after that fiasco.

At 4’11”, I’m still not a big gardener, but I’m coming around to the whole stick-a-plant-in-dirt-and-hope-it-lives thing. For now, I figure that any plant that I grow better do something more than just look pretty, like be food or insect-deterrent.

Given my limited food-growing space on my teeny tiny patio, and the fact that the former tomato plant pot now is chock full of basil plants, I thought that I’d give an upside down tomato planter a try. I got my planter as a gift.  

Photobucket


How to Plant an Upside Down Tomatoes


Materials

Power Drill (if you need to install a plant hanger)
Potting Soil
Fertilizer/compost
Tomato plant (duh)
Dirt (double duh)
Epsom salt
Water
Small shovel/trowel
Gardening gloves (if you don’t want to get your hands dirty)


Do It

1. If needed, use the power drill to drill a pilot hole in a stud in your porch, overhang, etc. and install a hook/plant hanger so you can hang up your planter.

2. Dump a healthy dose of fertilizer/compost (do not use Quickie Compost for this project. Tomatoes don’t like nitrogen-based fertilizers.) into the bag of potting soil and mix it up with the small shovel/trowel. You can skip this step if you cheat like I did and buy potting soil that has a natural fertilizer already mixed into the potting soil.

3. Add a dash of Epsom salt into the potting soil and mix it up with the small shovel/trowel.* For some reason, tomatoes love, love, love Epsom salts in their soil and will grow like gangbusters. Maybe they like to soak their roots in a soothing Epsom salt bath after a tough day just like us humans. Come to think of it, how tough a day can a tomato have leisurely basking the sun and slowly growing?! I digress, on to Step 4.

4. Remove the tomato plant from the nursery’s plant pot and break up the root ball of the plant a bit with your fingers.

5. Put the tomato plant in the planter with the roots inside the planter.

6. Fill the planter with dirt using the small shovel/trowel/your hands.

7. Hang the planter up. Be careful, the planter will be heavy.

8. Water the planter daily because the upsides down planters tend to dry out more quickly than traditionally potted tomato plants.

9. Watch it grow!

*If you’ve already planted tomatoes and forgotten to add some Epsom salt to the soil, not to worry. Dissolve a dash of Epsom salt in the water and water your tomato plants with the Epsom salt water. Do not use table salt for this step of the project. However, feel free to sprinkle table salt on a slice of a fully-grown tomato if you wish. Hmmmm…good eating!

Did you enjoy this post? Get more like it by subscribing to the Condo Blues RSS Feed or to Condo Blues by Email.

Monday, June 2, 2008

How to Make Quickie Compost

I wanted to add the natural green goodness of compost to my potted herb plants. I already spread the all of the winter batch of compost from the covert composter in my flowerbeds. The next batch of compost won’t be ready until the end of the summer. I didn’t want to use chemical fertilizers on plants I planned to eat. What to do? What to do?

Easy. I whipped up a batch of quickie compost for my potted plants. Quickie compost takes only a few minutes to make, unlike traditional compost that can take up to six months to break down.

You can make quickie compost by mixing coffee grounds and shredded paper together (shredded junk mail works well for this project.) Then add the quickie compost mixture to the soil. That’s it. As the coffee grounds and paper mixture naturally break downs in the soil, it adds beneficial nitrogen and composty goodness to the soil for your plants.

Photobucket


Do not try to make quickie compost by working raw fruit and vegetable scraps into planted soil. If you do, the raw material will remove nutrients from the soil around your plants as it breaks down and may attract nasty critters like rats or raccoons to your garden bed. The quickie compost method works well for apartment dwellers or anyone else who wants to use compost in their potted plants or small flower gardens but doesn’t have a large area available for a traditional compost bin.

Did you enjoy this post? Get more like it by subscribing to the Condo Blues RSS Feed or to Condo Blues by Email.

Monday, April 28, 2008

Grub Resistant Gardening

I am allergic to anything green. Spending a lot of time digging in a garden guarantees me a welt-covered body. So when we found out that The Condo came with “low maintenance landscaping” I was all for condo living!

Photobucket

Unfortunately, within two years of owning The Condo three of the seven low maintenance bushes that came new with The Condo were dead.

Photobucket

Monday, April 14, 2008

How to Make a Compost Bin from a Trash Can

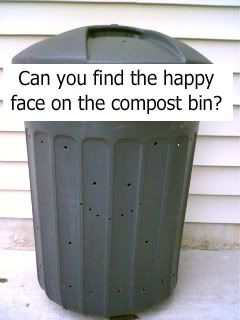
Any plant unlucky enough to be stuck in my yard with it’s nothing but clay and zippo topsoil is destined for a slow painful death. I needed do something to enrich my so-called soil. Compost was the answer. However Condo Association mows our lawn. They won’t allow us to have freestanding doo-dads like sheds, playhouses, or compost bins that the lawn people have to circumnavigate with their mowers. So what to do about my desire to make compost? Easy. I decided make a Covert Composting Bin out of a COA-allowable garbage can.


How to Make a Compost Bin Out of a Garbage Can