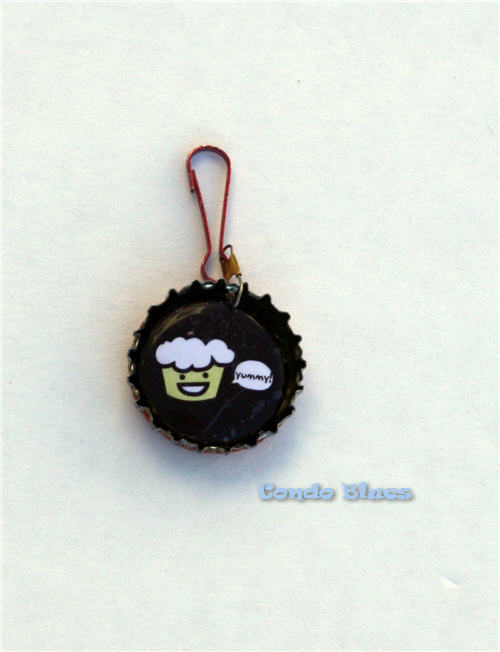
I can fix this by making a unique handmade zipper pull for each backpack so I can tell them apart.
This is a quick and easy recycled craft that is fun to do with kids. Sourcing the materials might be the best part of the project because we are reusing bottle caps. Enjoying a soda treat in the name of recycled organizers? Don’t mind if I do!
How to Make a Zipper Pull Backpack Charm from Recycled Bottle Caps
In this example, I am decorating my bottle cap zipper pull with a button I got from a local dairy free bakery but you can fill the inside of your bottle cap with whatever you like. Get creative! Go nuts!
The vegan bakery is close to my hair salon. I take it as a sign that I should treat myself to a cupcake after every hair appointment. Supporting local small businesses is hard sometimes, yo.
You will need:
Bottle cap – Either source your own or if you plan on making this project with a group, you can buy 100 vintage inspired bottle caps from Amazon here
Needle nose pliers
Bottle cap hole punch
Fish lure swivel – They are easier to work with and sturdier than jump rings
Cabochons, pins, stickers, charms, or anything you want to use to decorate the inside of your bottle cap – I pulled this little collection of doodads together after organizing a drawer in my craft room.
Wire cutters
Liquid Fusion Glue – Any strong glue made to bond to metal will work. I prefer Liquid Fusion because it is non-toxic, cleans up with water when wet, and I don’t have to worry about ventilation or heavy fumes like I do when I work with E-6000
Lobster clasp or lanyard hook
Disclosure: This post includes affiliate links.
Make it:
1. If desired, use the needle nose pliers to pull the plastic seal out of the bottle cap. This will give you a flat background for your design and many say the glue will adhere better than if you leave the seal inside the bottle cap. I’ve done this project using both techniques.
Tip: Put the bottle cap in a bowl of warm water to soften the glue if you have problem yanking the seal from the inside of the bottle cap with the piers alone. Sometimes, those little guys do not want to budge for neither love nor money!
2. Punch a hole in the top of the bottle cap with the bottle cap hole bunch.
The bottle cap hole punch makes a clean hole in a bottle cap like a knife spreading soft
butter. So much so that I will never go back to punching a hole in a bottle cap with a hammer and nail again! This little tool is a game
changer and I cannot recommend it enough!
3. Use the wire cutters to cut the swivel off the fishing lure if needed.
4. Attach the fishing lure swivel through the hole and to the bottle cap.
Tip: Depending upon the size of the swivel you are using, you might want to close the clasp with some help from the needle nose pliers. They can be fiddly!
5. Optional: Use the wire cutters to cut the pin off your pin back button, the loop off a charm, etc. This makes it easier to glue the item to the bottle cap.
Bye bye pin back!
6. Glue your decoration (s) into the bottle cap.
7. Attach a lanyard hook or lobster clasp to the top of the fishing lure swivel.
This project was an excuse to treat ourselves to a soda pop from the retro candy store - which totally canceled out the local and sustainable lunch we had at the restaurant across the street. This project is making me full of excuses today, isn't it?
8. Clip your new bottle cap zipper pull craft to a zipper and show the world!
Did you enjoy this post? Get more like it by subscribing to the Condo Blues RSS Feed or to Condo Blues by Email.


No comments :
Post a Comment
I love comments and read them all! If you’re shy and don’t want your opinions made public, you can always email me at condoblues [at] gmail [dot] com.