
In my case we have one three shelf cupboard that holds actual food and the other cabinets hold dishes, mugs, and a bunch of empty mason jars waiting for our garden to ripen.


Replacing the current kitchen cabinets with my dream of cabinets that go all the way up to the ceiling isn't on the 2013 DIY List. Someday, but not today.
Where can I find space in our small kitchen?

Hey Lisa, look up! Why don’t you make a storage crate for your empty
jelly jars and store them out of the way on top of the refrigerator?
jelly jars and store them out of the way on top of the refrigerator?
Out of the mouths of dogs. This girl is smart!
How to Build a Mason Jar Storage Crate
I have several real vintage wooden fruit crate that would look awesome in the kitchen but are too tall to fit on the of top of the fridge. I decided to build my own in a custom size and fake the vintage look.

A Sharpie marker dot on the top of the used mason jar lids helps me keep them separate from the new mason jar lids I use for canning. I put the used lids to good reuse for storing homemade banana chips, brown sugar, etc. and DIY projects.
I have a bunch of reclaimed cedar fence wood sign blanks left from my football team welcome sign project you can read about here and will those to build my crate. A bit of sanding to knock down the ridges in the wood and to remove the solid layer of background craft paint, it will give the wood, and my finished project, a vintage look.
You will need:
Lead test swabs – if you are using reclaimed wood like I am
4 pieces of wood 6 inches wide by 16 inches long
2 pieces of wood 6 inches wide by 11 ¼ inches long
Random Orbital Sander and sandpaper – I’m using 80 grit sandpaper to make the wood smooth enough so my jars don’t tip over in the crate but rough enough so the finished project looks like an old crate. If you want smoother wood you will need to use 120 grit sand paper after sanding the wood with he 80 grit.
Safety glasses - I'm digging my fancy pants "tortoise shell" safety glasses.
Dust mask
Wood glue
Pencil
Nails or wood screws – I’m using wood screws for stability since I will be pulling on the sides of the box when I need to grab it from on top of the refrigerator.
Hammer – for nails
Drill and small drill bit
Screwdriver - for screws
Right angle clamp
Disclosure: I included affiliate links for your convenience.
1. Check it. If you are using reclaimed wood like I am please use a lead check swab to check the wood for lead because you don’t want to make hazardous lead filled sawdust during the project which could happen with reclaimed wood. My wood passed as well as the craft paint I used to paint the sign blanks.
2. Sand it. It is easier if you want/need to sand the front back and sides of all of the boards first
instead of last. Make sure you protect your peepers with safety glasses and lungs with a dust mask.
3. Do a dry fit. But the ends of two 6 x 16 pieces of wood and two 6 x 11 1/4 pieces of wood together on a work surface to form a rectangle shape. This will be the size of the finished crate.
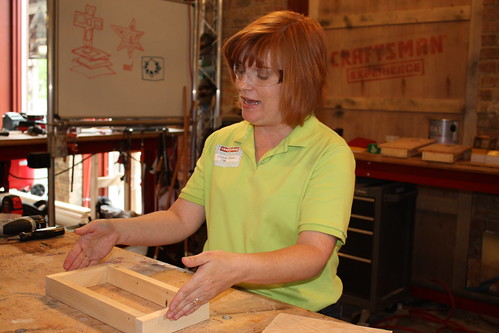
I don't have a photo of the crate dry fit (bad blogger!) but this dry fit photo from my tabletop corn hole game tutorial (you can read it here) is the same principle with smaller dimensions.
4. Mark it. Use the pencil to indicate where you want to attach the ends of the boards together with the screws/nails.
5. Drill it. If you are using screws, drill a shallow pilot hole for each screw you marked in Step 4 with the drill and drill bit. The pilot hole will keep the wood from splitting when you screw the boards
together.
6. Glue and screw the corners. Run a bead of wood glue along one 6 x 16 piece of wood and one 6 x 11 1/4 piece of wood and use a clamp to hold the two pieces of wood together while you use the hammer/screwdriver and the fastener of your choice to attach the board together.

Congratulations! You created a butt joint!
Really.

This type of corner is called a butt joint because the two pieces of wood butt up against each other instead of being cut at an angle. The angled corner is called a miter joint.
5. Attach the bottom boards to the crate frame. You have several options when making the bottom of your crate.
- Glue and clamp then nail or screw a solid piece of 11 ¼ x 17 inch piece of wood to the outside bottom of the crate frame.
- Glue and clamp then nail or screw 2 6 x 17 inch pies of wood side by side and to the outside bottom of the crate frame.
- Glue and clamp, then nail or screw 2 5 x 16 inch boards side by side and to the inside bottom of the crate frame. This is what I did since I had a height limit.

I didn't screw the crate together perfectly for fake beat up crate realness.
(Yes, I know you taught me better Dad. I'm going for an aesthetic here.)
6. Filler her up! As an extra precaution I cleaned the sawdust from the finished crate with vinegar since this crate will live in my kitchen.
Vinegar is a natural disinfectant and if it pickles the wood, that’s OK because I loves me some patina!
Lacey made this simple little box a fantastic project!

Of course I'm going to let you build the crate uninterrupted. It was my idea!
Did you enjoy this post? Get more like it by subscribing to the Condo Blues RSS Feed or to Condo Blues by Email.
No comments :
Post a Comment
I love comments and read them all! If you’re shy and don’t want your opinions made public, you can always email me at condoblues [at] gmail [dot] com.