Condo Blues: ideas
Showing posts with label ideas. Show all posts

Sunday, June 13, 2021

Ten Things You Need to Know to Level and Repair an Uneven Floor

After  I replaced the moldy wood subfloor in my master bathroom, I checked it with a torpedo level (a torpedo level looks like this,) declared it level, and promptly passed out in bed from exhaustion. (Disclosure: I am including affiliate links for your convenience.) The next day, I double checked the new subfloor with the correct tool for the job, a large I-beam level (an I-beam level looks like this.)

The new wood subfloor is not level.

There are a few random areas where the floor isn’t flat, mainly where some of the seams of plywood sheets meet - a pretty common thing when you are replacing a subfloor (especially if it is the first time you’ve removed and replaced a subfloor.)

You can’t lay tile on an uneven floor. Well, you could, but the grout and tile will eventually crack and break in those areas and you’ll curse the day you were born when you have to rip everything out (probably) and do what you should have done in the first place. Fix the uneven wood subfloor with a self leveling underlayment coating for floors.

how to fix an uneven sloping floor

Save this post to your Pinterest boards for later! Share it with your friends!

Thursday, June 3, 2021

Edible Landscaping Groundcover Ideas and Friday Favorites Week 584

Last weekend was a long holiday weekend here in the US and my husband and I spent a chunk of it digging in the dirt. We want to add more color to our front flowerbeds which is largely an oasis of black mulch. Wood mulch isn't a bad thing. Mulching protects the soil from eroding and helps keep moisture in the soil after watering. Wood mulch also breaks down over time and add nutrients to the soil - which a good thing for our clay soil but also a bag thing because we have keep buying heavy bags of mulch. Anything we can do to less the chance of the yearly hefting mulch into the landscaping beds is a good thing in our book.

We didn't have to look any further than our own backyard for a practical zone 6 living groundcover solution: transplant the golden oregano overflowing its pots in the container garden to the front yard.  Thyme is another fast growing perianal garden groundcover we could use or mix in with the golden oregano but we don't cook with thyme as often as we do with oregano. We're hopping the yellow in the ground cover will make the lavender blooms pop a bit more.

Please don't die.

Thursday, May 27, 2021

My First DIY Cold Process Soap Project and Friday Favorites Week 583

I fell in love with using handmade soaps after trying some I bought at a renaissance festival. Every year I'd buy a bar or five. I dabbled with making soap with a melt and pour kit like this one   because I could play with herb add ins, natural scents, and colorants without messing around with lye because lye sounded scary! (Disclosure: I am including affiliate links for your convenience.) A soap maker friend encouraged me to keep experimenting because that's how you learn how different herbs and oils interact and influence the final product.

When I stumbled upon a liquid hot process soap tutorial online, I realized I had most of the equipment needed and I could buy the soap ingredients at the grocery store. I gave it a whirl and realized working with lye isn't as scary as I thought!  But liquid soap is tricky (at least for me.) The book I have doesn't give a lot of why to the how and there is even less information on line unless you're making cold process bar soap. Cold process soap tutorials didn't seem as scary as they did before I started making soap in an old crock pot. I bought this exact The Natural Soap Making Book for Beginners book and made my first batch of cold process soap!

DIY cold process soap
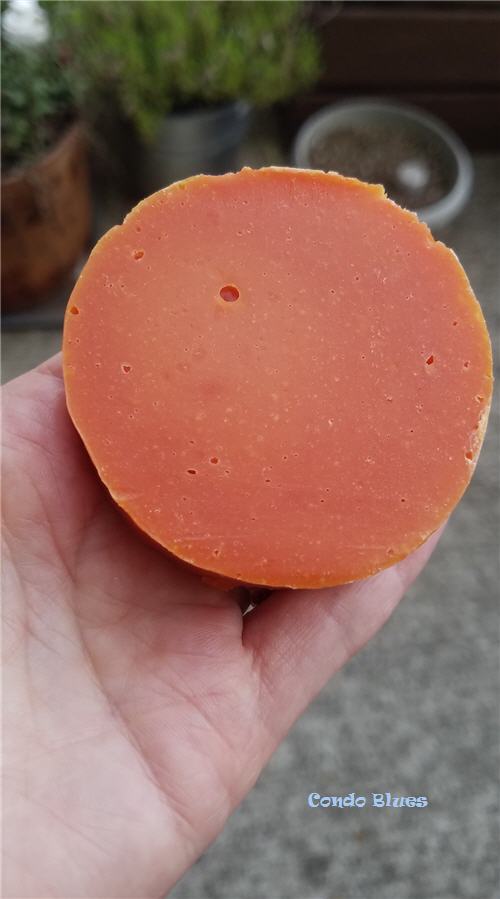
The color is a little *intense*  and there were some slight bubbling after sequestering but overall I'm pleased with how my first batch of real deal bar soap came out. 

Thursday, May 20, 2021

Steampunk Dinosaur Decor and Friday Favorites Week 582

I have a bad habit of buying a piece of wall art and not framing it and hanging  because I want to paint a  wall, rearrange a room, or have some grand project that often gets moved down in priority on my project punch list. 

I have bare walls when I could at least have something interesting on them. 

I decided it was time to frame and display this piece I bought at the Columbus Art Festival in the before times. Everybody say Hi to Uncle Morty!


steampunk decorating ideas
Uncle Morty is not the title of the work. I named him Morty, because its a name that brings up the idea of a lovable, life of the party, fun uncle, who miiiiight have a business where he knows a guy and you shouldn't make him mad but probably not because he's always a sweet guy who pulls a quarter out of your ear every time he sees you (maybe.)


Oh and if you are wondering, the friend I went to the Art Festival with when I bought the piece thought I was weird when I bought it and so did my husband when I brought it home.

Time to link up your favorite projects, recipes, and posts! 

Tuesday, May 18, 2021

7 Beginner Resin Casting Mistakes and How to Avoid Them

I was able to salvage the last builder grade vanity  from my bathroom renovation for my workshop. I want to make it into the miter saw cabinet I desperately need – on wheels!

how to turn a cabinet into a rolling miter saw stand
I love that standard bathroom vanities are the perfect Lisa height work bench

I had to make some repairs to the cabinet to fix the damage I made to it when I removed it. I added a few reinforcements to ensure the cabinet  will take stand up to a heavy saw and before I added four locking casters just like these to the bottom. (Disclosure: I am including affiliate links for your convenience.) I chose casters I can lock in place to reduce the chance of the miter saw stand rolling backwards when I use the saw. I don’t think that would be a pleasant experience.

Thursday, May 13, 2021

Easy Garden Watering Hack and Friday Favorites Week 581

I used to have a hard time not killing plants in my flower, herb, and vegetable gardens. I'd either overwater them or under water them. 

Often I thought a recent summer rain had already watered plants for me because the soil was wet on top but not deep down at the root of the plant. The result? Plant murder. (Unintentional, but it's still death.)

A few years ago, I learned a great little gardening hack on how to know when you need to water a garden that works 100% of the time - use a simple rain gage like this one! (Disclosure: I'm including an affiliate link for your convenience.)


best gardening tip and watering idea
I put my rain gage in a pot in my outdoor container garden.


Thursday, May 6, 2021

DIY Door Sign and Friday Favorites Week 580

It's funny how you think you come up with a totally new and original idea for a craft or decor project to find out someone (or many someones) have done it too. It's fun to see  how another person put their creative spin on a great mind think alike situation. Case in point:

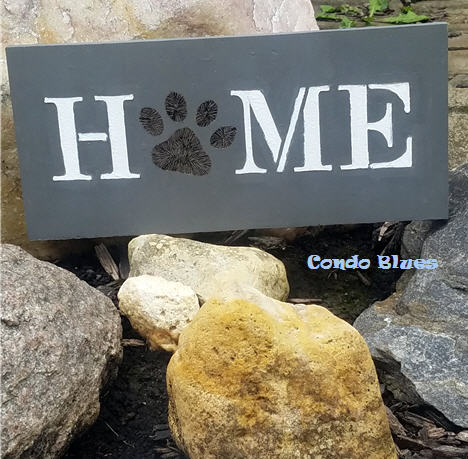
I added a hanger to a sign I made with this exact Home paw print stencil and added my little creative spin using a woodburning tool like this one to add texture so it looks like the bottom of a dog paw. (Disclosure: I am including affiliate links for your convenience.)

how to stencil and wood burn a Home door sign
I hang the sign on the front door sometimes instead of decorating with a wreath

Tuesday, May 4, 2021

How to Make Easy Storage Bin Labels

I am a famous for storing something in "a better place" and forgetting where I put it. 

And that goes double for my sewing room and craft studio.

I eventually learned that if I take 10 minutes of my time to make a label for an item, I will always put it back where it belongs and save an hour of searching for it later. It also keeps family members from asking me to stop what I'm doing to find household items that are staring them in the face. I tell them to read the label to the bin/caddy/pocket/shelf/whatever.

Genius!

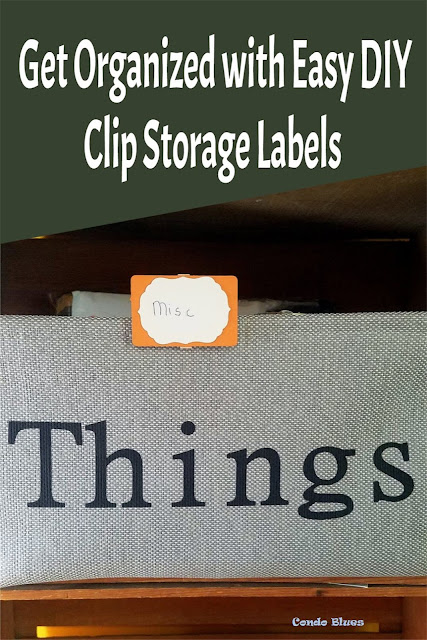
I need to label the new storage bins I'm putting in my craft room. I want them to look cute but they also need to be something I can easily update because my supplies rotate in and out. I considered chalkboard labels like these  but figure the writing will wear off with handling based on other chalkboard labels I use (Disclosure: I am including affiliate links for your convenience.

how to make clip on storage container labels
Save this tutorial to your Pinterest boards for later! Share it with your friends!


One thing I like about decluttering and organizing a creative space is I often find a long forgotten cache of supplies that I can use to make or build the custom storage solution I need. In this case, the buried treasure is a bunch of discontinued countertop samples a friend gave me. I'm going to craft those countertop samples into storage bin and box labels and show you how to do it! 

Sunday, May 2, 2021

The Best Ever Quick and Easy Sewing Pattern Storage and Organization Idea

I store my sewing patterns in a recycled shoebox because it is the width of a sewing pattern envelope.

Also, with a husband who is a long distance runner, I can get a replacement shoe box when I need it on the regular.

It worked for awhile - until it didn’t.

As I’ve done more costuming work, my pattern envelopes are  in all shapes and sizes. On more than one occasion I plopped the whole pattern into a gallon size zipper baggie because the pattern pieces won’t fold to fit back into its envelope. I try to store my sewing patterns by category but they quickly return to their natural disorganized state – a pile busting out of its shoe box(es.)

how to store and organize craft and sewing patterns
Please excuse the carpet that needs vacuuming. That’s what prompted me to move the pile and find a better solution.

This is not working. I need to find a better way to store and organize my sewing patterns that fits in a small, limited craft room space.

Friday, April 30, 2021

Friday Favorites Week 579

Time to link up your favorite projects, recipes, and posts! 


Please support and follow our lovely blog party hostesses:

Jerri at Simply Sweet Home - Twitter | FB | G+ | Pin | Inst

Lisa at Condo Blues - Twitter | FB | G+ | Pin | Inst

Amy at A Day of Small Things - Pin

Penny at Penny's Passion - Twitter | FB | G+ | Pin | Inst

Jennifer at Busy Being Jennifer - Twitter | FB | Pin | Inst

If you are featured this week, be sure and grab a featured button for your blog!

You can show your love for this week's favorites by going over and commenting on the posts and by pinning or sharing!

Sunday, April 25, 2021

DIY Farmhouse Floating Shelf

During our bathroom renovations the bed in the guest room/craft room has become a de facto storage area that also holds crafty bits.

Who am I kidding?

The bed is a  dumping ground. It is a mess and it is driving me nuts.

Fortunately I have a great spot for a wall shelf to store the crafty bits above the closet door if I use a floating shelf. Let’s do it!

how to make a farmhouse style floating shelf
Save this tutorial to your Pinterest boards for later! Share it with your friends!


How to Make a Quick and Easy Floating Shelf

Thursday, April 22, 2021

Celebrate Earth Day with the Rule of Half and Friday Favorites Week 578

Today is Earth Day, although honestly we try to make every day Earth Day around here by refusing, reducing, reusing household items with the goal of running a low waste home.  One useful and FREE way to do that is to follow The Rule of Half whenever possible. The Rule of Half is to try using half (or at least less) of the amount of stuff  you would normally use to get the job done. 

how to save money for FREE with the Rule of Half

A good example of this is toothpaste. Instead of loading up the length of your toothbrush with toothpaste like the toothpaste companies show you, put the dentist recommended pea size to half a length of toothpaste on your toothbrush. You create a little less trash because a tube of toothpaste lasts a little longer. One tube of toothpaste might not seem like such a big deal but if you do the same (or at least measure items instead of just chucking it in) with the majority of items you use on a daily basis it can make a difference in the amount of household trash you put by the curb every week and all for the affordable price of FREE. No fancy eco products required! (Unless you want to.)


Time to link up your favorite projects, recipes, and posts! 

Sunday, April 18, 2021

10 Zero Waste Craft Projects that also Save Money

I recently read an article claiming that zero waste living doesn’t have to be expensive.

That immediately said to an interviewed college student who said that they couldn’t afford a $20 zero waste made from adopted unicorn tears deodorant that the student just needs to change their attitude because they are buying better and more expensive stuff. 

Because apparently the superior feeling of spending more money on low waste deodorant outweighs the reality of the starving student   having enough money for school books, tuition, food, and shelter I guess?

The author also said that no one who wants to go low waste (which is a more accurate description than the search engine friendly term zero waste) does it to save money.  It really burns my cookies that when confronted with the reality of price, a zero waste expert ignores it and tells you to buy it anyway when they are claiming zero waste living doesn't have to be expensive. That's how zero and low waste living gets the (wrong) perception that its only for the privileged!

10 ways to make zero waste save money

Save these ideas to your Pinterest boards for later! Share them with your friends!

My family is practically debt free because we don’t waste things. As we started switching from disposables to reusables the amount of trash we make plummeted and extra dollars accumulated in the bank.

For example it cost zero dollars to stop using plastic zipper baggies and plastic wrap for sandwiches and leftovers and start using the containers with lids (many repurposed) I already had. I had no idea how much money we wasted on that stuff until we didn’t need to buy it anymore - and you could see a serious dent in how much landfill trash it kept out of our bin.

Thursday, April 15, 2021

How to Spring Clean Your Dryer Vent and Friday Favorites Week 577

I'm Spring Cleaning inside of the house, like ya do, and I noticed one thing I need to Spring Clean on the outside of my house - my dryer vent!

DIY dryer vent cleaning
I'll spare you the current gory state of dryer lint build up and give you this one when I first installed my energy efficient dryer vent.

Even if you clean the link trap/screen in your dryer after every load lint can still build up in the dryer duct, vent, and end cap. Dryer lint is highly flammable (which is one the reasons why people use it to make homemade fire starters) and according to experts it doesn’t take much for accumulated dryer lint to cause a dryer fire. Fortunately cleaning a dryer vent is a quick and easy thing to do. Learn how in my post How to Clean a Dryer Vent the Easy Way! you'll be glad you did.

I showed you my project, now you show me yours! Time to link up your favorite projects, recipes, and posts! 

Sunday, April 4, 2021

How to Make a Recycled Wine Cork Wall Organizer

After putting the job off as long as humanly possible, it is time to clean and reorganize my craft room.  Every craft supply and tool found an organized storage space with the exception of my embroidery hoops. I kept moving them place to place during the decluttering project. It didn’t help matters that I added several big and hard to store machine embroidery hoops to the mix when I got a sewing and embroidery machine for my birthday.  

how to organize machine embroidery hoops

Her name is Bernadette. She can sew everything from chiffon to leather and has so many settings and features it is like flying a rocket ship. Cool, I always wanted to be an astronaut! 


 I sat and looked around the room trying to find a place for more storage. After quite a bit of time (I may have also been streaming Netflix) I found it – blank wall space under a shelf.  Great!

One of the things I like about cleaning, decluttering, and organizing a creative space is rediscovering supplies (fancy talk for I forgot I had that!)  I almost always end up using the found objects to make storage and organizers for the item I uncovered that don’t have a good store bought solution including this one. 

Sunday, March 28, 2021

Why and How to Sift Compost

I recently upgraded our single tumbling compost bin to this exact double tumbling compost bin hoping to correct some mistakes we made when we started our first compost pile. (Disclosure: I am including affiliate links for your convenience.)

The mistakes we made weren’t horrible and we did create usable compost that turned our practically all clay tan colored garden beds to earthworm rich dark black soil. But the compost coming out of the bin has always been soggy. It was also full of plastic bits we thought would compost but didn’t break down.

How did this happen? Well for one, since we don’t have access to grass clippings or leaves we used shredded paper and cardboard for brown matter (and any sawdust I made in the garage) and we simply didn’t add enough. The fix for wet or smelly compost is to always have more dry brown matter in your compost pile than green matter (vegetable and fruit peels, coffee grounds, etc.) As for the plastic bits, we’d just empty the entire contents of our home office paper shredder into the compost bin and all of those window envelopes I shredded thinking they would break down because they are made from cellulose where actually some sort of plastic.

There was finished compost  in the bottom of the single compost bin but because it stopped turning and we couldn’t mix it very well with one of those compost turner things that look like this. Our compost was a big wet clump full of unwanted bits that I could easily save by sifting the almost finished compost and chucking a ton of this exact wood chip pet bedding into one side of the new compost bin and let it break down. Adding more shredded paper and cardboard boxes would also do the trick but I didn’t have enough of either in the quantity I needed at the time.

how to fix wet smelly compost

Save this idea to your Pinterest boards for later! Share it with your friends!

Thursday, March 25, 2021

DIY Replacement Lawn Chair Bag and Friday Favorites Linky Party Week 572

Ah Spring! Where it is sunny and tempting but still too cold to play outside. 

And by play I mean, dig in the garden or build stuff in the yard.

Instead, I ramp up the Spring Cleaning, reorganizing, and repairing. That way it gives me plenty of time to repair our toys and gear for summer fun. For example, the bags our folding lawn chairs can in ripped beyond repair and I sewed this quick and easy camp chair replacement bag from a jaunty nautical fabric.

how to make a replacement folding camp chair bag


Time to link up your favorite projects, recipes, and posts! 

Tuesday, March 16, 2021

DIY Non Toxic Resin Look Coasters

Six years ago I made a set of aluminum can coasters that looked like this:


After years of abuse with a constant stream of hot coffee cups and cold beverages all day every day the coasters on our desks now look like this:


DIY coaster makeover before

Choosing a difference adhesive may have helped as well as adding a  protective coating to the top. Cutting down on coffee and ice water is not going to happen  - ever.


Sunday, March 7, 2021

How to Make an Easy Indoor Fairy Door

Columbus has many visit this type of business, stamp a passport, and collect a prize trails. We have a local coffee trail, craft brewery trail, a local small business trail, and a delicious donut trail among others. I recently learned about a cool one in Dublin, Ohio – The Fairy Door Trail. Dublin goes completely nuts for all things Irish,  Celtic, and St. Patrick’s Day. So it makes sense that they start a new trail by putting new fairy doors in their local small businesses in March for St Patrick’s Day just in case a leprechaun would like to use it. Which is mighty thoughtful.

I fell into an Internet fairy door rabbit hole after that and wanted to add another fairy door to my house just in case a fairy, gnome, leprechaun, or hopefully - a Borrower - would use it. I loved the Borrower books and movies as a kid and I often think a Borrow probably borrowed that thing I can’t find (which is way more fun than acknowledging I misplaced it.) If you don’t know what I’m talking about  you can read The Complete Adventures of the Borrowers series here. (Disclosure: I am including affiliate links for your convenience)


It’s National Craft Month so why not make an indoor fairy door (or the mythical sprite of your choice) to celebrate?


Let’s make stuff!

How to Make an Indoor Fairy, Leprechaun, Gnome, Elf, or Borrowers Door


how to make an indoor fairy door

Save this fairy door craft idea to your Pinterest boards for later! Share it with your friends!

Thursday, February 25, 2021

DIY Bottle Cap Bees and Friday Favorites Linky Party Week 568

February is almost over and we are inching towards Spring which brings warm weather, flowers, and happy little bees! Bees are going to be this year's craft and decor trend. Why not get started a little early and recycle a few bottle caps into cute little bees?

I made the recycled bottle cap bees and little trinkets to trade with children when I do (someday) children's theater. It's a versatile craft project. You can glue a magnet to the back to make them magnets, a pin back to make them into pins, or punch a hole and make it into a necklace. The possibilities are only limited by your imagination!


Time to link up your favorite projects, recipes, and posts!