Condo Blues: paint project
Showing posts with label paint project. Show all posts

Tuesday, March 2, 2010

Are Low VOC Paints Long Lasting?

My builder used the cheapest paint possible to paint the interior of my house. Based on the touch up paint they left for us, they most likely watered it down too. Whenever I try to clean a mark from the wall with nothing put a damp sponge paint and sometimes drywall end up on my sponge.

Ick.

Photobucket
Not all of my touch up paint is thin and runny. Some of it is so thick it looks like cottage cheese and broke the stir stick.


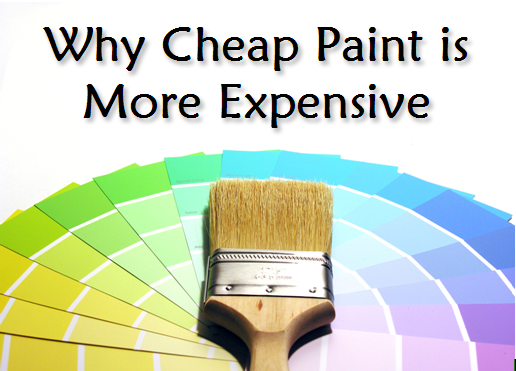
I have several rooms that desperately need priming and painting.

Now that low and no VOC (Volatile Organic Compound) paints are more readily available I did some research.


“VOCs are solvents that get released into the air as the paint dries. (Other products emit solvents, including adhesives, cleaning supplies, and even some home furnishings.) VOCs can cause acute symptoms, including headaches and dizziness. The long-term effects are less certain, but according to the U.S. Environmental Protection Agency, some VOCs are suspected carcinogens.”
In my experience, VOCs are also what make things like paint or wood glue stink.

Phew!

Since I get migraine headaches from time to time, using a low VOC paint may be in my best interest.

Several years ago I read an article in the New York Times Home and Garden section that reports that while most paint and home design professionals like that manufacturers are developing low VOC paints, in their experience, a low VOC paint job doesn’t last as long and their clients often demand a new paint job within a year or two because of signs of wear and tear.

Have you used low VOC paint? Is this true?

While I’m willing to invest more money in a quality paint that may not harm my friends and family who visit, I really don’t want to be in the same situation I’m currently in after spending up to $45 a gallon for low VOC paint to repaint my guest room, living room, kitchen, and hallway a year or two later.

If low VOC paint doesn’t live up to normal wear and tear, it doesn’t seem sustainable to me. I’d consider it expensive and wasteful since I’d have to buy new paint and supplies every couple of years.

Not to mention I don’t like to paint. Yes, I know it's the easiest and cheapest way to transform a room but that doesn't make the task any more likable. I’d like to do this job once and keep that way for several years to come. And by several, I mean more than two.

However, this article was written two years ago. With time comes change in techniques and technology. There are many more brands and types of low VOC paint to choose from now than when this article was written. Lack of durability might be a moot point by now.

Do you know? Have you ever used low VOC paint? Did you like it? More importantly, did your paint job last?

And if you are happy with the performance of low VOC paint, what brand was it?

Tuesday, February 23, 2010

How to Frame a Tin Ceiling Tile the Easy Way

I framed two tin ceiling tiles from the 200 year old church where Husband and I were married. I gave them to Husband as a token of my love.

Photobucket
The frame ceiling tiles hang above the banister in our living room

The tiles were removed to repair a leak in the ceiling in the church parlor. Do you believe that a man on the repair crew wanted to throw these gems away?! Fortunately there was an antiquer among the volunteers working on the project who knew how valuable these sweet babies are and convinced them to not to toss them aside – whew!

I’ll take two please. Thank you.

I cleaned the tiles with a mild soap and water solution and removed the chips of paint before it had a chance to flake all over the carpet. I didn’t want to take any chances of Blitzkrieg sniffing out and possibly eating paint flakes. Bad, bad, bad.

Building the frame was simple. I went to an art supply store and bought canvas stretcher bars in the dimensions of the tin tiles. I assembled the frame, glued it together with wood glue instead of the stapling it together as you would if you stretched canvas over the bars in order to paint a picture. I filled the corner channels with wood filler for an even finish.

Once it was dry, I painted the frames red to play off of the red and white curtains that hang in the living room and in front of the kitchen patio door.

Photobucket
Some people buy t-shirts as souvenirs when they go on vacation. Husband and I buy curtains at Ikea.

I bent the rough edges of the tiles back on themselves with a pair of needle nose pliers. I drilled pilot holes in the tiles and screwed them to the wooden frame with leftover screws from my toolbox.


Photobucket

I screwed in two large eyes into the top of each frame so I could hang the tiles back to back in from hooks I screwed into a ceiling joist.

A discreet loop of wire keeps the tiles standing back to back standing at attention over the stairwell banister.


Photobucket


Husband loved his gift! It has extra special meaning because his parents were married in the same church. Awwww….


Did you enjoy this post? Get more like it by subscribing to the Condo Blues RSS Feed  or to Condo Blues by Email.

If you are joining us from Trash to Treasure Tuesday,DIY Day, Today's Creative Blog, Penny Pinching Party, The Girl Creative, Toot Your Horn Tuesday, Works for Me Wednesday, and Show and Tell - welcome!

Tuesday, November 24, 2009

Habitat Restore Treasure Hunt

One of my favorite places to shop (and donate) materials for my creative reuse projects is the Habitat Restore. Several readers have asked me. “What’s the Habitat Restore?” The Restore is a thrift store that helps fund Habitat for Humanity so they can build houses for low income people. But this is no ordinary thrift store my friends, oh no! The Restore is a thrift store of home improvement supplies. I put on my Big Game Bargain Huntress pith helmet, grabbed the bathroom fan I replaced and wanted to donate, and hopped on down to my local Restore to poke a round. Here’s what I found.

The first thing to greet me when I walked in the door where these big silver Christmas trees. Love. They are shiny, would look perfect flanking my porch in two groups of three, and remind me of drag queens. Probably donated by the Limited Brands, Gap or some other store that’s based in Columbus. I want!

Photobucket

Sadly storage is an issue. Maybe I could go with the baby ones? Instead of drag queen trees, I suppose that makes these little gems drag princesses?

Photobucket

Thursday, November 5, 2009

6 DIY Recycling Ideas for Non DIYres

It only takes a short drive to go from my city that has a formal recycling program for glass, paper, metal, and plastic to tiny rural town America that tried and failed to make their city recycling program pay for itself. They reluctantly canceled the program.

In a situation like that I would take the DIY approach to recycling and reducing my household waste. But what do you do if you aren’t a DIYer, don’t have the skills, or time? Don’t worry; you can easily recycle items if you put your mind to it. Here are six DIY ways to reuse items even if you are not a DIYer.

Six Ways to Recycle When You Don't Have Time


1. Paint Halloween pumpkins instead of carving and use as food later. This year I painted my pumpkin which means it didn’t uh, self compost early like Husband’s carved pumpkin. The day after Halloween, I cut the pumpkin in half, scooped out the seeds for roasting, composted the goop, and then roasted, drained, and pureed the pumpkin for food. I froze 8 cups of puree from that pumpkin – that will make a lot of pumpkin soup!

Thursday, October 29, 2009

Decorate Your Pumpkins with Stencils!

Husband wanted to carve pumpkins this year for Halloween. Intricate carving with stencils kind of pumpkins like the Bruce Campbell/Evil Dead pumpkin our friend carved last Halloween. I wasn’t surprised. He's been talking about  it off and on ever since he snatched up a pumpkin carving kit on super duper mega sale last year after Halloween.

Looks like we’re decorating pumpkins this year.

We gathered our supplies. Pumpkins – check. Carving Kit – check. Stencils – check. Paints – check.

Photobucket

Can you believe we got these little beauties for $1.99 each?! First we went to the North Market for pumpkins. They only had one and it was a little bigger than a softball so we passed. Then we trucked over to Aldi to grab milk and saw what was left of the Halloween pumpkins for sale. They were the right size and on sale for $1.99. Yes please.

Chances ae the pumpkins were so cheap because they were a little dirty and the backsides are a little mottled but some water, dish soap, and a few squirts of vinegar from a spary bottle took care of the dirt. Using the front side of the pumpkin dealt with the mottling.

Big Game Bargain Huntress score!

*bows deeply*

Photobucket

Husband plunged a knife into his pumpkin and scooped out its brains!

We saved the seeds for roasting and the stringy pumpkin goo. Husband says the goo is what you’re supposed to use for cooking. I think it’s the rind. Does anyone know for certain?

Photobucket

I got my spider stencil off the internet and printed it out on the backside of some junk mail.

Photobucket

I used the stencil to paint my pumpkin because Husband said he can’t trust me with knives (he’s right.) Well that and I wanted to keep at least one pumpkin intact to use for food after the holiday.

Also I can’t draw worth squat without a computer. Hence, the stencil.

Photobucket

As you can see, I choose to paint my pumpkin in the style of a 5 year old child with no arms and no legs. When I told Husband my plans he shouted, “Like Matisse!” Goofball.

If you’re thinking “Hey that looks a little like the bug that’s on the Method bottle!” you wouldn’t be wrong. I had to use their stencil so I could enter my pumpkin in Method's pumpkin carving contest. The winner gets cleaning supplies. I figure after this little adventure I'll need a slew of cleaning supplies to clean up the leftover pumpkin chunks and goo.Wish me luck!

Husband carved his pumpkin following the lines of a stencil that came in the kit. I think his came out much better than mine.

Photobucket

You can bet these little beauties will grace our porch on Beggar’s Night.

Updated 11/4/2009: Hey guess what? Method did a random drawing on their pumpkin carving contest entries and I won! My prize is a bunch of Method cleaning supplies. Yay me!

Tuesday, October 6, 2009

Porch Chair Revamp Take 2

I cheaped out on paint and fabric when I revamped the freebie chairs on my front porch. Well, even after living under a covered porch, the weather did a number on them and they looked like this a short time later.

Photobucket
   
 Ick.

 This revamp to the second power has been on my Do It Yourself Honey List for awhile. I better do it now before the weather turns too cold to paint outside.

Photobucket

 I scored a remnant of outdoor fabric at Old Time Pottery for the chair redo. I learned my lesson about using apparel weight fabric for outdoor projects.

Don’t.


Wednesday, September 23, 2009

How to Paint a Metal Exterior Door

Under our unofficial You Broke It, You Fix Rule my repainting of The Condo's scratched and scruffy front door was long overdue.

Did I mention that it was my fault the paint was scratched and scruffy because I used various loops of tape, hangers, and magnets to hang things on the door in the first place? Yeah. My bad.

Fortunately, repainting the front door was a quick no cost project because the builder left us some touch up paint. So while it may or may not be an environmentally friendly outdoor paint (I suspect it isn’t) using the paint you already have on hand is an environmentally friendly practice (saves money too) so that’s what I did.

Here’s how I did it.

How to Repaint a Door

Photobucket


1. Wash the door with a mild soap and water solution. I used diluted Basic H. Dish detergent great works too.

Tuesday, September 22, 2009

Why Using Cheap Paint Doesn't Save Money

Until I found the perfect set of porch chairs I decided to repaint and revamp a couple of doctor’s office chairs that Husband had from his bachelor days.

Since I hated these chairs with a fiery vengeance and thought they would be better served as firewood, I didn’t want to invest a lot of time or money into their makeover. I bought a couple of cans of cheap spray paint from Dollar General and got to work.


The chairs didn’t look so hateful. After surviving Hurricane Ike, not finding anything the right scale that I liked, and the price being right (free) I decided they could stay.

That sealed my fate. *Enter the Condo Blues whammy.*

Tuesday, September 8, 2009

Grow Flowers in Old Lawn Chairs

Here’s a seriously cute creative reuse project for those old 50’s style lawn chairs – turn them into flower pots!

I was be bopping along one of my favorite shopping haunts and found these little beauties outside a shop as an art piece.

They look a lot nicer than my mushroom patio chairs too.
Photobucket


Looks easy enough to duplicate. Find some ugly 50’s style lawn chairs, paint them a wild color (I’m digging the hot pink), stuff them full of dirt (tricky I suspect), and plant a bunch of succulents or any other type of water-retaining plant. (I suspect cactus might look tad inhospitable. Ouch!)

Monday, March 16, 2009

10 Green Decorating and Craft Projects

I’m searching around the Condo and the Internet for ideas on what to write about for St. Patrick’s Day. I have the Scotch-Irish bloomers that I made for a show. Not historically accurate by any means, but still fun way to hide my unmentionables in case my skirt flew up during a fast and vigorous Scottish Country Dance turn during the show.


Photobucket

I can’t believe I just showed my underwear to you people!

(Granted it’s underwear that goes over my underwear but it’s still underwear.)

But as the subject of a whole blog post - meh.

I think I’ll take it another way and
be lazy
do a recap of some the green (literal) and green (figurative) things we have around The Condo because I like to decorate with both types of green.

1. I made chew toys for Blitzkrieg’s dog cousin Chopper from scrap fabric. I’m also responsible for his festive t-shirt.


Photobucket


2. Blitzkrieg has he own green blanket I made from a cast off baby blanket and paw print scarves.


Photobucket


3. My first attempt at organic gardening! Sadly it doesn’t look this nice anymore. I replanted a couple of diseased plants and they spread pestilence throughout the garden bed . However, on the bright side, this year I get to completely redo the flower beds and make them 100% organic.


Photobucket


4. A green/green project. I repainted and recovered these old doctor’s office chairs that Husband had in his bachelor apartment. The chairs now sit on our front porch.


Photobucket


5. Organic gardening gone right. Once I figured out the nuances, I got a bunch of tomatoes from the plants growing in my upside down tomato planter .


Photobucket


6. Another double green project. The light fixture in my craft room I made from old stemware!


Photobucket


7. Don’t forget my green/green burlap rice bag turned shopping tote bag . I was so happy to find a good reuse for those old faded green curtains.


Photobucket


8. Something I see everyday – the green tissue paper wallpaper behind my desk in my computer room!


Photobucket


9. A row of green halogen desk lights on top of these bookshelves works as energy efficient overhead lighting in my computer room. Our builder didn’t install junction boxes in the ceiling of this room. This was a much easier fix. Cheaper too because I scored these sweet lights on sale at Target.


Photobucket


10. Lastly, Husband’s childhood Mego Hulk stands guard over the washer and dryer in the laundry room. He’s green/green too because I decorated the laundry room with what I already had. Yes, it looks like a dorm room but fun for visiting kids.


Photobucket


Now if only I could convince those visiting kids to do a load a laundry while they’re at it….


Did you enjoy this post? Get more like it by subscribing to the Condo Blues RSS Feed  or to Condo Blues by Email.

Visit thecsiproject.com

Thursday, February 5, 2009

Filing Cabinet Handle Revamp

I got a filing cabinet has a gift to hold all of the papers and whatnots that goes with being a responsible adult. It’s made of flimsy thin metal. I’m sure it was a Wally World (ugh!) special because shortly after we got it the plastic drawer pull snapped off in my hand when I tried to use it to open the drawer.

I looked for a replacement handles at Lowes but I couldn’t find anything that would fit the screw holes that were already drilled in the cabinet drawer front. Husband and I both remarked that we should just go to Staples and get a more substantial filing cabinet and send the cheap-o cabinet to that great metal recycling bin in the sky. OK, not really a recycling bin in the sky, more like the recycling dumpster outside of the fire station around the corner but you get my drift. I was trying to be poetic about refuse.

I was poking around the Habitat Restore and found some hideous brass 1970’s drawer pulls. The only redeeming quality was that these drawer pulls had a back plate that would cover the old screw holes in the drawer front if I needed to drill new ones to install the new handle. Oh, that and the handles were cheap. At fifty cents for the pair I figured that I could do something with them to deuglyfy them and have a more useful filing cabinet once again.

I painted the drawer pulls and back plate with some leftover silver spray paint. Once the silver paint was dry, I painted the interior of the back plate with black paint for interest and to de-70’s the look at bit.

Photobucket

Wednesday, October 29, 2008

Make a Halloween Witches Parking Sign

Made this Witches Parking sign out of an old decorative sign I picked up at Old Time Pottery. I liked the painted border of the original sign but I didn’t like the saying. So I painted the center with black craft paint. After the paint was dry, I painted my own saying, “Witches Parking Only: All Others Will Be Toad” in the center of the sign with white craft paint.

Photobucket

I hung it on my porch next to a bamboo-handled broom. I tied the broom to the sign with raffia so it wouldn’t be tempted to fly away with any mischievous goblins or ghouls on Beggars Night.

Friday, July 11, 2008

Fabulous Flamingo Front Porch

During the first summer in our Condo, I wanted to sit on our front porch and watch the world go by. (That is, until the temperature hit 90+ degrees, then I’d watch the world go by looking out of the window from the comfort of my air-conditioned Condo.) For that, I needed chairs. I didn’t know what I wanted other than:
  1. Something pretty
  2. Sturdy enough not blow off the porch during high winds
  3. I wanted them now
At the time, I was working on painting and decorating our bedroom. I didn’t have time to search for The Perfect Set of Porch Chairs. As a cheap and easy stopgap, I repainted Husband’s ugly bachelor dining room chairs (once upon a time these heavy monsters may have lived in a doctor’s waiting room) green to coordinate with the green shutters on the house. I also did a little staple gun upholstery to upgrade the fabric on the seat and chair back. The revamped chairs looked better. I didn’t hate them with the white-hot intensity of a thousand suns anymore.

Photobucket

Tuesday, June 24, 2008

Turn a Picture Frame Into Raised Dog Feeder

I wanted a raised feeder for Blitzkrieg’s food and water bowls in my kitchen because my boy is a sloppy eater. As long as I filled it with food and water on a regular basis, I knew Blitzkrieg wouldn’t care what his new feeder looked like.

However, since I have to look at it, I wanted something that looked good. Most of the feeders I found were functional, but ugly.

That being the case, I decided to make one myself.

Photobucket


How to Make a Raised Dog Feeder

Materials
Measuring tape or yardstick
Shadow box picture frame large enough to hold your pet’s food and water bowls
A thin piece of wood that fits into the backside of the picture frame (optional)
Paint
Four napkin rings
Hot glue (because what is a craft without a little hot glue action?)

1. Measure your dog from the paw to the shoulder. If a dog uses a raised feeder that's either too high or too low it could hurt their back after long-term use. After measuring your dog from paw to the shoulder, divide the measurement by two. This is how high you should make your dog's raised feeder. For example, my Peke Blitzkrieg is 8 inches from his paws to the top of his shoulder. That means Blitzkrieg's feeder should be 4 inches tall.


2. Paint the wooden interior of the shadow box picture frame or, if your frame has a cardboard backing, paint the thin piece of wood that fits instead your picture frame.


3. Watch the paint dry. Crafting is so exciting!


4. Insert and secure the painted backing or piece of wood into the picture frame after the paint dries.


5. Hot glue a napkin ring each corner of the bottom of the picture frame for the legs. Fortunately, my napkin rings were 4 inches high, the perfect size for a Pekingese.


6. Turn the feeder right side up, fill your pet’s bowls with food and water, and put the bowls in the feeder.


7. Puppy chow time!

Tuesday, June 10, 2008

Inherited Bathroom Décor That Works

One of the nice things about being the first buyer of our newly built Condo is that I didn’t inherit any wild and wacky or otherwise tacky decoration from the previous owner. ThatNanda of Craftster wasn’t so lucky. She writes:

When we bought our house, it had all the original decor from the late 50's -
awful shag carpeting, chandeliers, orange and brown appliances, the works. We
were able to fix all but one room - the horrible, pink, and black tile bathroom.
Since it's too expensive to redo at the moment, we decided that, rather than
fight it, we'd just go with it. So we painted the upper walls teal, a la retro
50's diner, and I made a pink, frou-frou poodle curtain.

Photobucket

I think going retro with her bathroom decoration is an excellent example of the Tim Gunn, “Make it work!” edict in action.

Personally, I’d be sorely tempted to keep the retro design as it since I’m going through a retro-modern-Bauhaus-contemporary-found and funkified-Da Da-Danish decorating phase of my own. What do you think?

Did you enjoy this post? Get more like it by subscribing to the Condo Blues RSS Feed or to Condo Blues by Email.

Thursday, May 15, 2008

Evil Dead Laundry Room (Really)

Husband and I had a bunch of action figures, toys, and posters in the computer room of our rental. It looked like a cross between That Old Guy Who Still Lives In His Parent’s Basement, a geek’s dorm room, and a cubical in an IT firm. Long story short – Interior Decorating Hell. 


Photobucket

Doesn't everyone have a Bruce Campbell bobble head on their dryer?
 Actually we have two.

Then Husband and I buy The Condo. We have a mortgage. That officially makes us Grown Ups. Grown Ups don’t decorate their homes with toys. That is until those Grown Ups have children. Grown Ups With Children are allowed to have toys strewn all over their homes without getting a citation from the Decorating Police. However, those toys aren’t decorations they are just children's toys.

The botched paint job distressed wall treatment in the laundry room gave me an idea. The walls reminded me of a roughed up cabin in the woods. Cabin In The Woods? Hey, wasn’t that the working title of the movie Evil Dead ? The nieces and nephews gave Husband some Evil Dead and Army of Darkness toys collectible action figures as gifts. 

Hmmm... I could use them to create an Evil Dead Laundry Room! Why not? It seems appropriate; after all laundry is an evil chore.

How I Decorated a Room with Toys

Monday, May 12, 2008

How to Create a Distressed Wall Treatment

Before we bought The Condo, my painting experience was limited to finger and tempera. I wisely decided that my first attempt at painting an actual wall should be in the laundry room because if I screwed the paint job up horribly, who would see it?

Turns out I did screw up the paint job horribly but was able to save it by creating a distressed wall treatment. Now I take everyone to see it.


Photobucket
Distressed Wall Treatment 

When bargain shopping, I love nothing more than The Thrill of the Hunt. I definitely found it at Habitat’s Restore . The Restore is a thrift store that sells donated new and used home improvement materials and the proceeds go to support Habitat for Humanity. I bought a new gallon of dark red paint for the walls and a 32 oz can of tan paint for the ceiling for under $8.00. Environmentally friendly because it keeps the stuff from going into a landfill and a steal because this paint usually goes for $24.00 at Sherman Williams.

The following weekend I cleared the laundry room of stuff, put down drop clothes and started painting the walls. The first coat of red paint was streaky but I figured that that the second coat would even things out. No such luck. After the second coat of paint dried, I still had blotchy walls. I used up all of my red paint and I couldn’t get more of that color because it was a mistint. Looks like I wasted a whole weekend painting. Gone. Kaput. Fineeto.

Friday, May 9, 2008

How to Make a Bottle Cap Tile Picture Frame

Every Friday Husband and I have a TGIF ritual. We drink a few dark craftbeers to celebrate that fact that we both made it through yet another often-crazy week. 

One Friday I came back from Trader Joe’s with a six-pack of Sea Dog Porter (because unlike college days, it’s all about the quality, not the quantity of the beer.) Husband jokingly accused me of buying Sea Dog because of its paw print bottle caps. He asked me if it was some sort of homage to Blitzkrieg.

Busted.

Then Husband says, "These bottle caps are cool though. I bet you could do something with these." So I did.


My apologies for the photo quality, I had to use my phone for this photo.

How to Make a Bottle Cap Tile Picture Frame