Condo Blues

Friday, August 11, 2023

How to Make a DIY Yeti Cooler

Our coolers don't keep food cold enough for as long as we'd like. While the body has insulation, the lids do not. I began searching for an upgrade.

When it comes to coolers and cold boxes, it seems there are only two options:

1. Fairly cheap eskies with minimal insulation in the lid and body that only keep food cold for a day or less.

2. Expensive chilly bins that are heavily insulated, bear-proof, and keep food cold for almost a week.

While I value quality, I don't want to spend hundreds of dollars just to keep food cold for a few weekends a year. Additionally, I'm struggling to find a well-insulated cooler in the compact size of our favorite Playmate cooler.

Wondering if you can insulate a Playmate cooler to match the performance of a Yeti cooler? Yes you can! Not only that, but your DIY Yeti cooler will also weigh much less when it is empty.

Here's how to do it.

How to Hack a Cooler to Make it Colder

how to DIY a yeti cooler the easy way

Save this cheap and easy tutorial to your Pinterest Boards for later! Share it with your friends!

Friday, June 30, 2023

Front Porch Makeover Reveal

Since we rarely use our lovely front porch, it's time to give it some attention after focusing on our back patio last year.


 I call this decorating style Hey, what do we do with this stuff from our old house? Put it on the porch for now, we'll style it later. 

Wednesday, June 7, 2023

How to Make Quick and Easy Outdoor Coasters

I added a new seating area with a tempered glass topped side table to my front porch. I’m a little concerned about placing hot coffee cups directly onto the glass and am in need of a coaster or two.

Let’ s make some outdoor coasters!

how to make outdoor waterproof coasters

Save this quick coaster tutorial to your Pinterest boards for later! Share it with your friends!


I considered sewing a set of cute coasters from outdoor fabric until a very windy day reminded me that I need something with a little more weight. Otherwise, I’ll have to keep rescuing my porch decorations from my neighbor’s yard.


Wednesday, May 31, 2023

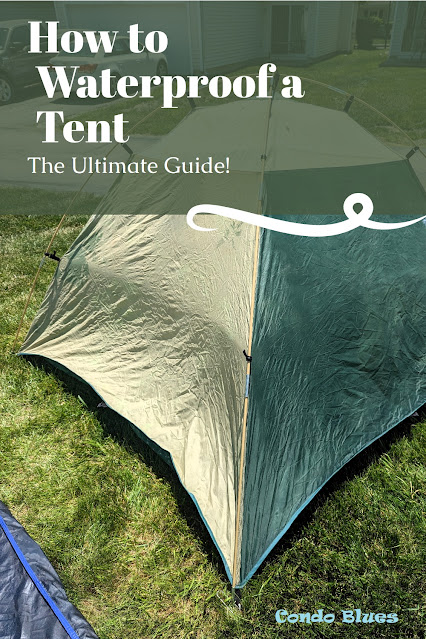
How to Waterproof a Nylon Camping Tent

Last year the tent floor leaked in a few spots of water here, even though we put a tarp down first. We let the tent air out and dry in the garage before putting it away for the year. Can you add extra waterproofing to a tent and floor? 

Yes you can! Here’s how.  

how to waterproof a leaking tent
Save this easy tutorial to your Pinterest boards for later! Share it with your friends!

Selecting the Right Waterproofing Products


Before diving into the actual waterproofing process, it's crucial to select the right products that will effectively provide a waterproof barrier for your nylon camping tent. With so many options available on the market, it can be overwhelming to make a decision. Here are some key factors to consider when choosing the right products for your tent.

First, consider the type of waterproofing product you want to use. There are two main types: 

Tuesday, May 23, 2023

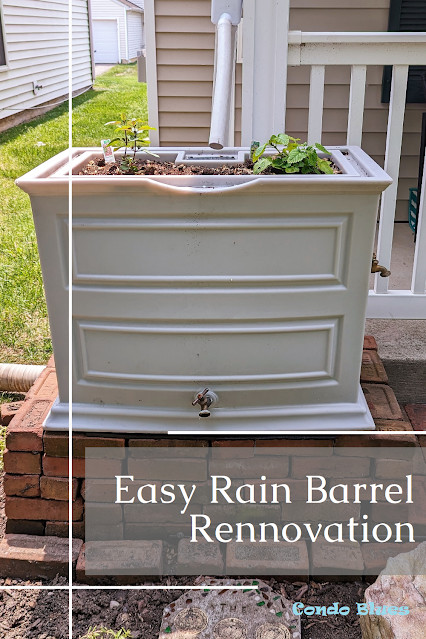
Rain Barrel Planter Renovation!

One of the first garden improvement projects I did after we bought our condo was to install a rain barrel that looks like a rock in my front yard. I figured (correctly) that if my rain barrel looks more like a lawn ornament I wouldn’t get the stink eye from my neighbors or my Homeowner’s Association.

But mostly I wanted something that looks nice since I have to look at it.

The only downside is that the rain barrel is one solid piece and almost impossible to clean when leaves and whatnot block the spigot from the inside of the rain barrel. After many years of service, the rain barrel started to leak. Instead of trying to repair it again, I decided to replace it with this exact decorative rain barrel planter that is easier to clean and winterize. (Disclosure: I am including affiliate links for your convenience.)


how to install a rain barrel
Save this unique rain barrel idea to your Pinterest boards for later! Share it with your friends!

Friday, May 12, 2023

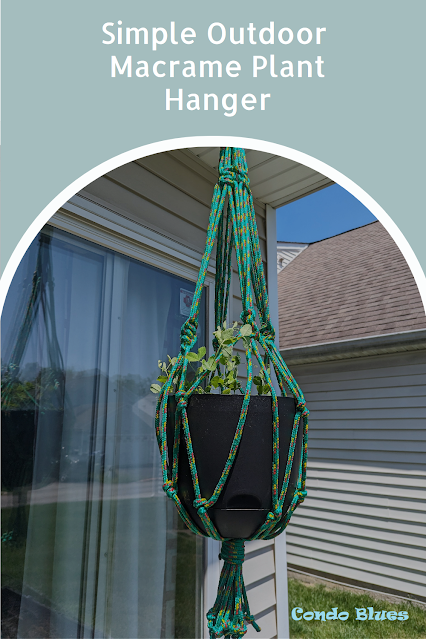
DIY Outdoor Plant Hanger

I have a bunch of pea seeds left from last year’s garden by design. I need to find a better way to plant them so the vines don’t take over my small patio container garden like they did last summer.

The heavy duty plant hanging eye bolt similar to this kind I used years ago and largely ignored gave me the inspiration to try growing peas in a hanging planter. (Disclosure: I am including affiliate links for your convenience.)

Spoiler alert: All of the hanging planters I found were so high off the ground they required my short little self to pull out a step stool to water them. I hate dragging out a step ladder to store things normal people can reach. That’s why anything above my head is dead to me – including hanging plants.

I considered a macrame plant hanger but I wasn’t sure how well cotton or jute cording would hold up outside. And again, the hangs the plant too high and over my head thing.

The only solution was to make an outdoor plant hanger myself. 


how to make an outdoor macrame plant hanger
Save this hanging planter idea to your Pinterest boards for later! Share it with your friends!

Thursday, April 27, 2023

How to Stretch Tight Shoes the Fast and Easy Way

I recently bought a pair of these exact Naot Women's Borasco shoes after a friend recommended them as a cute and comfortable work/walking/dress up or down travel shoe (Disclosure: I am including affiliate links for your convenience.) My friend did not do me wrong. Ilove everything about the shoes except for one minor thing:

I’m having some pain and discomfort because of the new leather is stiff so the shoes are a little too tight.

I don’t have time to have my shoes stretched at the shoe repair shop or at home with a pair of shoe stretchers. I need to break my new shoes in fast and make them more comfortable in the heel and ball of my foot for an upcoming event. Fortunately, there is a simple and effective way to stretch new shoes quickly – and it is cheap too!

how to stretch tight shoes the easy way

Save this custom shoe stretching hack to your Pinterest boards for later! Share it with your friends!


How to Custom Stretch Tight Shoes with Hot 

Water

Wednesday, April 19, 2023

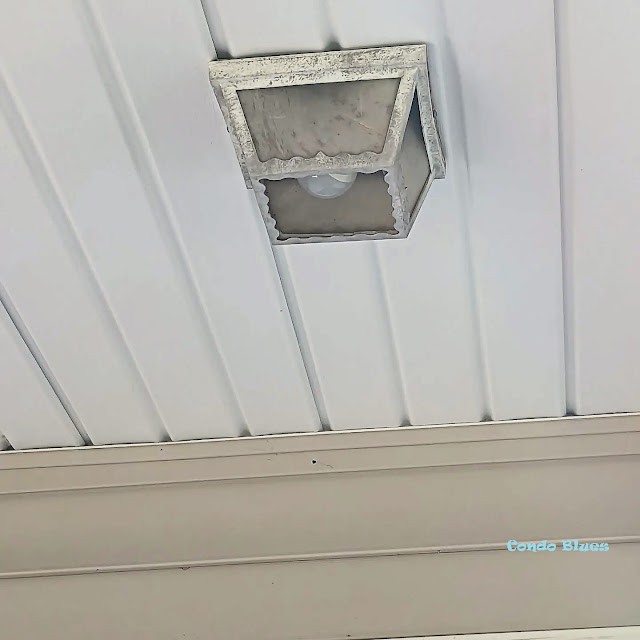
Easy Porch Light Update

Now that we are moving on in to warm Spring weather (in theory. This is the Midwest after all. We can experience all 4 seasons in one week just to keep things interesting) it's the perfect opportunity to spiff up, renovate, and decorate our front porch and yard.

Which shoots a long overdue project to the top of our porch project punch list: replace the overhead porch lights!

Our porch light fixtures are original to the house and not made to last. The entire fixture is made of plastic and was so brittle it broke apart when I gently shuttled it from the porch ceiling to a waiting garbage can. There was no salvaging any part of this light fixture and truthfully, we didn't want to either. 


front porch light makeover before
Please excuse the dirt and yuck in these photos. Pressure washing the porch is on the list - honest!

 The hunt for new porch lights was on!

Monday, April 3, 2023

How to Drill a Hole in Ceramic, Porcelain, and Stone Tile

One day after refilling the conditioner in this hanging soap and shampoo Dispenser , The pump bottle refused to snap into place, lurched from the wall, and tried to kill me. I bobbed. It weaved. The bottle crashed to the floor and cracked. (Disclosure: I am including affiliate links for your convenience.)

One of the things I like about the Dispenser is that you can buy replacement parts. I did so several times over its lifetime. However, this time I needed so many new parts it ended up costing as much money as if I bought a new wall mounted shampoo and conditioner pump.

Since my Dispenser was looking shabby and I think we got more than our money’s worth out of it considering it was a yard sale purchase, I bought a replacement.

I bought this exact Simple Human Double Wall Mount Shower Pump because we really only use two pumps out of the original four. From reviews, it is sturdier (I see the same dispenser in hotels so it has to be durable to take constant abuse) which means I may not have to replace the pumps over time. I love that!

The only negative according to the reviews is the bracket adhesive is not as strong as the adhesive the Dispenser uses. There were reports of the Simple Human dispenser falling off the wall after all of the instructions were followed. Not a huge deal because the Simple Human dispenser also comes with screws and wall anchors. I grabbed my drill and got ready to answer the question,

How Do you Drill a Hole in Tile?

Friday, March 24, 2023

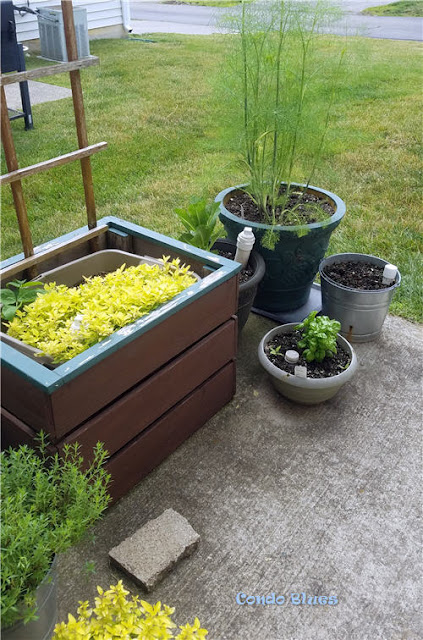
New Self Watering Patio Vegetable Garden Tour

Every year my husband and I come home from the nursery with more plants and seeds than we have pots in our container garden even though we swear we aren’t going to do it this year. 

Honest. 

Promise. 

We swear.

And totally ignore when we are buying plants and seeds. 

At least we are consistent.

We really don’t use the patio for anything other than a few potted plants.I finally made peace with myself that we will never be a hanging out on the patio around a fire pit kind of family (sad face.) Since our eyes and shopping cart are always bigger than our space and with supply chain issues and inflation we decided to turn the entire patio into a vegetable garden which more than doubled the amount of room we have to grow vegetables in a small space.


 Patio container garden BEFORE

Friday, March 10, 2023

DIY Bathroom Vanity Upgrade

I found patches of black mold on our bathroom vanity, wall, and subfloor due to several micro leaks and needed to replace everything in the bathroom.

Which is totally fine because we hated the builder grade bathroom vanity with a passion.

I demoed, replaced and leveled the subfloor, and laid new tile. Now it’s time to update and upgrade the bathroom vanity. 

how to install a double sink bathroom vanity
Save this idea to your Pinterest boards for later! Share it with your friends!

Thursday, March 2, 2023

How to Light a Room without a Ceiling Light Fixture

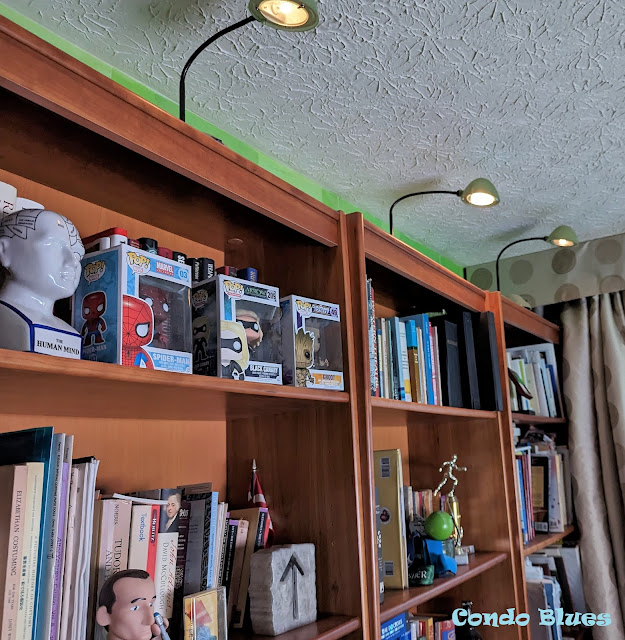
For some baffling reason, two bedrooms in my house do not have wiring for ceiling lights. I’m not sure why the builder though that some folks in a house doesn’t deserve overhead lighting like the main bedroom but here we are.

I originally solved our room lighting issue with placing four halogen desk lights on top of the bookshelves that line the wall in our office. This worked well for years until it didn’t. The light bulbs started to burn out more frequently. Replacement light bulbs seemed to burn less brightly (I used the same wattage) and even more puzzling, a random light would blink one day and be fine the next.

 office lights before

Overhead office lights BEFORE

Wednesday, February 8, 2023

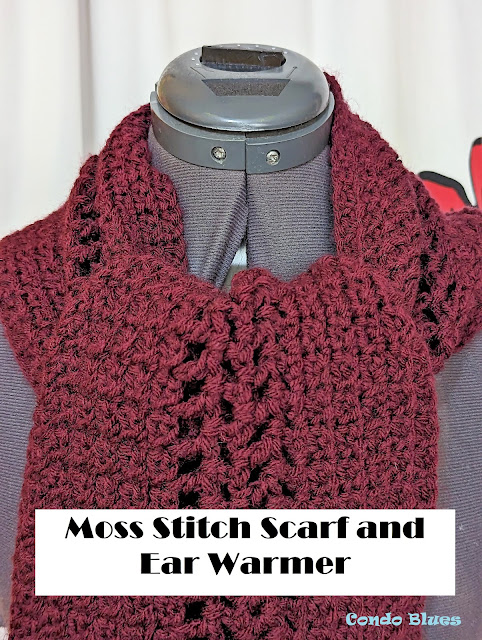
Easy Moss Stitch Crochet Scarf and Ear Warmer

While poking around on Pinterest (follow me on Pinterest @condoblues pretty please?) for new and different beginner friendly crochet stitches, I kept coming back to projects using the moss stitch. I recently made Stitching Toghether's Moss Stitch Ear Warmer pattern (a quick and easy scrap yarn project, by the way) and liked is so much (and got compliments when I wore it) that I wanted to try to make her matchingCrochet Moss Stitch Scarf pattern

I need a thicker winter scarf. Fortunately I found a skein of yarn in my yarn stash I bought to make a practice crochet project that I forgot what I had planned to make with it.

Ain’t that just the way?

(To quote my favorite mini- series, Over the Garden Wall.You can watch it here. ) (Disclosure: I am including affiliate links for your convenience.)

So I got these two crazy kids together and crocheted a cute winter scarf


how to moss stitch crochet a scarf and ear warmer
Save this easy crochet idea to your Pinterest boards for later! Share it with your friends!


Friday, January 27, 2023

How to Prevent Cabbage Worms and Garden Pests the Easy Way!

For the 2023 gardening season depending upon how it goes in 2022

One summer, my husband and I tried growing a cabbage from its stem. Once it grew a good set of roots, I planted it outside in our container garden. 

Where we learn just how much cabbage worms love cabbage. We vowed never to plant cabbage again. 


how to grow vegetables from scraps

We were successful growing the cabbage and Romain lettuce. The celery failed us.


So what did I do? I decided to grow broccoli, kohlrabi, and bok choy thinking the seeds would be a better gardening investment because those fresh vegetables can be on the more expensive side in the grocery store.It was only after I got home that I learned I bought a bunch of seeds in the brassicas (cabbage) family.

We were right back where we started. Because not only do cabbage worms like to eat and destroy cabbage plants, they also like chowing down on broccoli, kohlrabi, and baby bok choy.

Fortunately there is an easy one and done way to prevent cabbage worms from wreaking havoc on your vegetables: use floating row covers. 

How to Use Floating Row Covers on Container Garden Flower Pots and Planters

Thursday, January 12, 2023

How to Repair Rips, Tears, and Holes in a Sleeping Bag

I tried washing one of our sleeping bags in my washing machine thinking it would fit since I washed our other sleeping bag in this same machine.

Turns out I was wrong.


Save this tutorial to your Pinterest boards for later! Share it with your friends!

Note to self: Next time go to a laundry mat and wash the sleeping bags using a big industrial size washer and dryer.

We invested in buying a good Coleman cold weather sleeping bag similar to this one. (Disclosure: I am including affiliate links for your convenience.) It’s in my best interest to repair it since the rest of the sleeping bag is perfectly fine and would be a bit expensive to replace for cosmetic reasons. I’d rather spend that cash on extra s’more supplies to be honest.

Fortunately, repairing a sleeping bag is easy and may already have what you to need to fix at home.

How to Repair Sleeping Bag Rips, Holes, and Tears the Easy Way!

Wednesday, November 23, 2022

Easy DIY Christmas Peg Doll Gnome Tutorial

 Do you know what is better than making little wood peg doll gnomes?

Making GIANT wood peg doll gnomes!

I made and donated a giant (well, according to the store. I was looking for the biggest I could get) peg doll gnome that looks like the character I play at renaissance fairs and Christmas festivals and donated it to a charity silent auction.

My giant peg doll gnome makes a cute decoration (whether for Christmas or for everyday home decor,) a quick DIY gift idea, or toy depending upon how you decorate the peg doll base. Let’s make!


how to make peg doll gnomes

In Denmark, they call gnomes nisse and that’s where I took the name for my gnome character Nissa.

Save this craft tutorial to your Pinterest boards for later! Share it with your friends!

How to Make DIY Christmas Gnomes


Monday, November 14, 2022

Two Quick and Easy DIY Woven Heart Mug Cozies

I have a set of double wall stainless steel barrel mugs similar to this kind (I am including affiliate links for your convenience) that quickly the household MVP of mugs. My husband usually keeps his in the freezer to keep his cold beverages extra cold. I like keeping a hot drink in mine while I’m preforming during outdoor Christmas events – instant hand warmer AND hot chocolate all in one!

Not bad at all for a couple of free promotional mugs. What’s not to like about that?

Actually there is one minor quibble. The mugs have a logo etched on the mug. Not a big deal when we are at home but it iswhen I’m doing the Christmas Gnome Thing.

I solved the problem by sewing a quick and easy no slip mug cover.

how to make 2 kinds of christmas gift mug cozies

Nissa the Christmas Gnome salutes you with her woven heart mug cozy!


Wednesday, October 19, 2022

How to Clean Makeup Brushes and Sponges Naturally

I have a bunch of dirty makeup brushes, beauty blenders, and sponges that are dirty and could use a little extra love. I use them to apply stage makeup, some of it that is activated with 99% alcohol which can be rough on brushes and applicator tools (and skin. Skincare is even more important when using water resistant makeup.)

So if you are considering using rubbing alcohol to clean your makeup tools – don’t. Unless you like replacing makeup brushes on the regular. That is why the makeup brushes featured in this post are a cheap, but serviceable, synthetic bristle set that I only use for stage makeup. I have a separate set of natural bristle makeup brushes for my every day makeup.

Either way, this homemade makeup brush cleaner will work and care for both types of makeup brushes and tools.

How to Make DIY Makeup Brush, Beauty Blender and Sponge Cleaner


non toxic diy makeup brush beauty blender sponge cleaner
I use this exact stand-up foldable makeup brush bag and can't recommend it enough, especially for travel! Save this makeup cleaner recipe to your Pinterest boards for later! Share it with your friends!

Tuesday, August 9, 2022

DIY Crochet Pumpkins with Recycled Yarn

I recently inherited some yarn which included a few work in progress knitting projects without the patterns or were not far enough along to know what the creator intended them to become.

Which is fine because I don't know how to knit. 

One of the projects was a panel with orange and green yarn stripes (maybe a sweater or some sort of tote bag?) that made me think of Fall and Halloween pumpkins. Why not try to reclaim the yarn and use it to crochet a simple beginner pumpkin decoration?  


DIY crochet pumpkins with recycled yarn
Save this recycled craft idea to your Pinterest boards for later! Share it with your friends!

Since the project wasn't finished, it was easy to pull the stitches out and wind the yarn from each stripe into a ball as I worked. I joined the small yarn ball sections together with a magic knot until I had one ball of orange and ball of green reclaimed yarn.

Friday, July 29, 2022

How to Dye Fabric Shoes and Sandals

I needed a pair of sandals. After a fair bit of shopping I found a pair of wedges that fit (this is harder to do since I have to shop in the kid’s department) but are the wrong color. However the price was cheap enough that I thought I’d try my hand at dying a pair of the white shoes black and other pair brown – the colors I wanted.

I’ve dyed 100% cotton fabric shoes. I’ve also dyed suede shoes using this exact suede dye with great success. (Disclosure: I am including affiliate links for your convenience.) Dying these sandals will be a bit more challenging because they are a cotton and synthetic fabric blend and all of the fabric dyes I’ve used up until now require 100% natural fiber fabric.

 Can you dye polyester fabric and synthetic fibers? Yes you can! Here’s how.


How to dye fabric shoes and sandals the easy way
Save this shoe refashion idea to your Pinterest boards for later! Share it with your friends!

How to Dye Cotton Blend Shoes

Friday, July 15, 2022

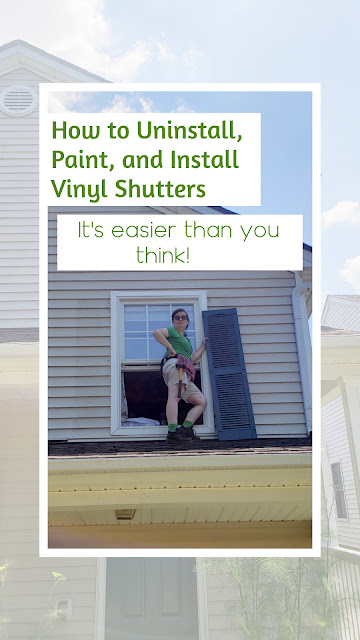
How to Remove, Paint, and Install Vinyl Shutters So Easy!


After many years of sun, snow, wind, and rain the vinyl shutters on our house are faded. Instead of replacing them, I’m going to spiff them up so they look better than new.
Can you paint vinyl shutters? 


Yes you can! Here’s everything you need to know.


can i paint vinyl house shutters
I don't mind heights and was taught how to walk on a roof safely as a kid. If you are not confident with heights or ladders please hire a pro. Either way, keep reading this tutorial so you know what is involved in this simple DIY project! Save this tutorial to your Pinterest Boards for later! Share it with your friends!
 

How to Remove Vinyl House Shutters

Tuesday, July 5, 2022

Easy Self Watering Patio Herb Garden

At first my husband and I grew the typical basil, oregano, etc. we'd buy at the grocery store after the growing season. Then we started adding a couple of "I wonder what that bougie herb tastes like" plants  for fun. It turned out to be a tasty budget living hack because I use this exact Nesco dehydrator to dry my fresh herbs and use during the rest of the year for free instead of paying a much higher price at the fancy grocery store. (Disclosure: I am including affiliate links in this post for your convenience.)

  We. Need. More! 

Insert Mad Scientist laugh here: Mawhaha! 

Living in a condo my vegetable gardening space is limited to my small patio. It took a bit of a think until I realized the same indoor small indoor space organizing idea can also be applied to outdoor spaces. If you can't build out, build up!

I got the ball rolling last year, when I scored this metal plant stand for 5 bucks at Goodwill last summer. Since most herbs like cilantro, dill and the like grow tall, I wasn't sure how to mange growing herbs on the second shelf and gave it a test run with  the current pots last season.

Friday, June 17, 2022

How to Add Pockets to Skirts and Dresses Without Sewing

Women’s summer dresses are notorious for not having pockets. The same goes with women’s skirts, shorts, skorts, pants and everything else because the arbiters of fashion don’t think women have stuff they want to carry in a pocket.

Yeah, yeah. I know I can carry stuff in a purse. But carrying a purse is sometimes a hassle, like say at a party or BBQ or days that end in a Y. That’s one of the reasons I started sewing my own summer skirts and dresses. I can add as many functional pockets as I want to, take that clothing designers!

Well. Mostly.

I found some fun Captain America cotton fabric that would look super cute if I made it using my favorite retro wrap sundress pattern (you can find the Simplicity 8085 sewing pattern I used here) to wear on the Fourth of July. Or our local Marvel Comics exhibit. Or to watch a Marvel movie on date night. Or well, you get the idea.(Disclosure: I am including affiliate links in this post for your convenience.)  


how to add pockets to skirt or dress without sewing
Save this fashion hack to your Pinterest boards for later! Share it with your friends!

Wednesday, June 8, 2022

How to Make Decor Decisions without Arguing

To try to keep the costs down where we could, replacing the bathroom vanity lights was not in the plan. I don’t love them but I don’t completely hate them either. The plan was to try to repair the light with a socket that would not stay lit and if it can’t be fixed we replace the lights.

We need to replace the lights.

Which is fine by me because I hoped to update those Restore bargain lights in one way or another. (Actually the working light will get a little update and installed in another bathroom in our house.)

As much as I love the thrill of the hunt, my husband HATES shopping, comparison shopping in particular, with a white hot fiery passion but wants input because this is his house too. I learned early on in our relationship that the best way to satisfy both of the ways we like to work is to treat my husband as I would working with a client. I search to my heart’s desire. I present my top three (at most) selections to my husband and we make our decision together. If we can’t agree on the top three, I usually have others to chose from or I look for something that fits what we discussed.

Do I always get my number one choice? No. Does he? Also no. But more often than not, our favorite of the three is the same which makes it easy. (We also unknowingly do the same thing in restaurants.)

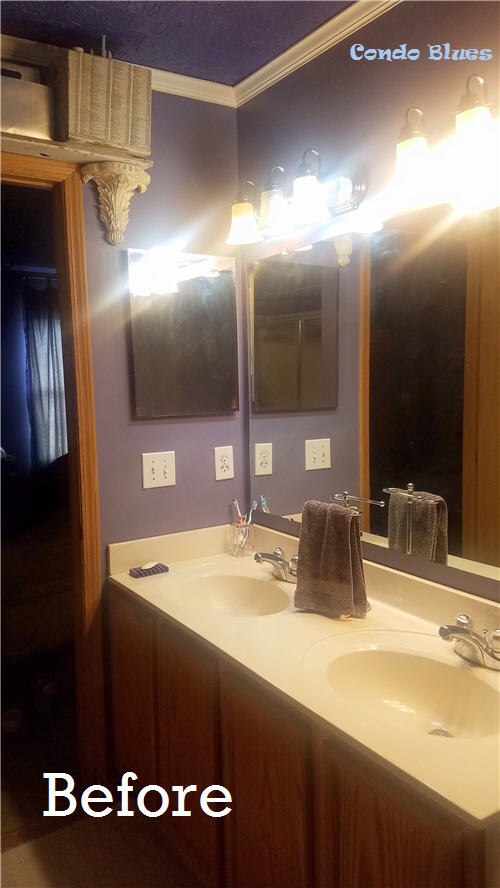
As a refresher, these are the bathroom vanity lights we need to replace.

condo bathroom remodel before
I sold the medicine cabinet, mirror, shower doors, counter top and faucets on Marketplace.
 

Here are our top three replacement vanity wall lights.


how to buy bathroom vanity lights

Drum roll

I installed the Quoizel Grant Vanity Bath Light (learn more about it here)! (Disclosure: I am including affiliate links for your convenience.)


how to make decisions without steamrolling

 Save this idea to your Pinterest boards for later! Share it with your friends!


This wall sconce is a combination of two of my favorite design styles: modern with an old world flair. I installed the sconces with the lights pointing down but if I want a new look later I can flip them to point up for a new zero dollar look.

This fixture does not include the light bulbs which is one of the things my husband and I like about it most. I bought these exact Edison light bulbs which really make these wall lights sing.

Looking for more bathroom decoration ideas? Check out the following options – and more!- Below!

Did you enjoy this post? Get more like it by subscribing to the Condo Blues RSS Feed .

Thursday, May 19, 2022

How to Make Flower Pots with Drainage Holes into Self Watering Planters

I have two large planters in my patio garden that have drainage holes in the bottom of the pot. I grow vegetables in them but they they need a little more attention in the watering department than the rest of my container garden that is planted in self watering flower pots.

I tried using these terra cotta watering stakes   to get the drainage pots on the same watering schedule as the self watering pots with varying degrees of success. I think the watering stakes work better when I’m going to be away from the house for a bit than as a full time self watering solution. (Disclosure: I am including affiliate links in this post for your convenience.)

I’m redesigning and adding more space to grow herbs and vegetables on my patio. Since I am removing and remixing the current potting soil with new in all of my planters, I figure it is a good time to plug the drainage holes in the green planters and convert them into self watering planters.

How to Make a Self Watering Container Garden

how to make easy self watering garden planters

Save this tutorial to your Pinterest boards for later! Share this idea with your friends!

Monday, May 2, 2022

How to Install Electrical Boxes Without a Wall Stud

Every once and awhile someone asks me why I named this blog Condo Blues, when in reality, I actually like my house.

Oh gentle reader, I will say that after a steady diet of every DIY, home renovation, and decorating TV show imaginable my sweet, simple, naive self quickly found that some basic home projects are not as simple as they appear on TV once I bought a house. My most recent big, glaring smack in the face turned out not to be easy as I thought was replacing a set of bathroom vanity lights in an hour or two.

Because I found this hiding under the old vanity lights. 

how to put electric junction boxes in a wall

 Surprise! My one hour project will now take two days at the least!


There aren’t any electrical boxes installed in the wall for the wiring like there should be. I’m also pretty sure that is a crack in the fabric of space and time on the right. I better patch that before Weeping Angels, Daleks, and all sorts of bad things seep though and ruin the progress I’ve made on my bathroom renovation.

The most electrical boxes (especially when you need to hang a wall light off it) are installed by attaching the electrical box to a stud when the wall is being built. This is not the case with the wiring for my bathroom wall lights because the electricians ran the wiring in the center of the wall stud because of the plumbing for the sinks sharing that space in the framing. The builders could have installed a number of electrical boxes to work around this but apparently took the easy and possibly not building code complicate (based on a huge discussion on the Condo Blues Facebook page ) way out with bare wiring poking through a hole in the drywall.

Tsk. Tsk.

How to Install a Wall Sconce Electrical Box

Thursday, April 7, 2022

How to Repair and Replace a Moldy Bathroom Floor

 My master bathroom renovation is coming along at a good clip. We had a leak and a little 5 minute flood in our master bathroom. Everything was just wet enough that we had to call in remediators with giant dryers to dry out what couldn't be removed. After they removed the vinyl flooring, they also found batches of mold around the toilet and recommended ripping out all of the flooring down to the joists. Which gave us an opportunity to replace everything in the bathroom from the ground up - literally!

DIY bathroom floor repair
Save this information to your Pinterest board for later! Share it with your friends!

I found more surprises when I removed the bathroom vanityy More leaks and more mold!


How to Repair a Moldy Floor 
I’m not a doctor, but I have the feeling the cause of my constant ear and sinus infections was living under this sink.
 

Working in sections, I unscrewed the sub-flooring from the joists and used an oscillating multi tool to remove the glued flooring from the joists (you can learn more about my Rockwell Oscillating Tool that uses universal blades here which I chose the Rockwell over other brands, TBH.) (Disclosure: I am including affiliate links for your convenience.)

Once I removed the old moldy subfloor, I realized that there wasn’t anything to screw the new flooring to around the edges of the room. I can’t leave it this way or the new floor could slope over time, the tile will crack, and we’d have to start the process all over again. Trust me, once is more than enough! 

I fixed the issue by using construction adhesive and screwing supports along the existing joists and around the toilet flange (this is called sistering.)  

The wax ring underneath the old toilet was smashed to one side (another unknown water leak!) and the floor flange sat at angle around the plumbing. The toilet didn’t sit level and this caused one of leaks and eventually mold.  I figured that possibly going overboard with sistering and adding framing  in between the joists to keep the toilet level is better than taking a shortcut and regretting it later. Wood is cheap. Mistakes are expensive.


how to sister joists

 I can't tell you how tempted I was to stick a toy skeleton down there before I covered it with plywood.

Cutting the subfloor sections to size wasn't difficult because before I removed the original subflooring I cut the tile underlayment to fit and to used the underlayment pieces as a pattern when it came time to cut the new plywood sub floor.

How to install subflooring

A ton of screws, construction adhesives, and bruises later I installed the new subflooring in the bathroom!

I filled the seams in between the sheets of sub flooring with  Fix It All (you learn about this patching compound that’s made specifically for wood sub-floors here)  put on my dust mask, and hand sanded the seams smooth. There were a few random spots that I couldn’t get perfectly level with sanding. I didn’t want to take a chance on the tile floor cracking over time because of it and started prepping the floor for leveling compound by using spray foam insulation to make an expansion joint around the wall of the room and as a barrier around the furnace duct and toilet flange.

how to patch seams in a wood floor

 Patched!

When you are suing self leveler on a wood floor it is the same technique as using self leveler on an uneven concrete floor. Only the type of products you use is different. You need to use a self leveling compound made for wood floors which requires the extra step of priming the entire floor first.

I filled all of the cracks and seams between sheets of plywood with patching compound first. (learn more about the Henry Pre-Mixed Floor Patch I used here ) – If there is even the tiniest sliver or gap, by its very nature the self leveling concrete will find it and drip down into it and make a huge mess. After the patching compound dried I applied self leveling compound primer for wood floors (you can learn more about find Level Pro Underlayment Primer for wood I used here) with a chip brush.

Once it was dry, it was time to don my super sexy concrete work boots and apply the leveler to the floor. This part if fairly easy (pour stuff from a bucket and push it around the room) but nerve wracking because self leveling compound has a 10 to 15 minute window before it starts to dry and is unmovable. Meaning, if you get it wrong outside of that window, it stays wrong. 


 Given the short working window my husband and I teamed up for this project. He mixed the cement leveler in small batches while I poured and worked it around the room.


Success!

how to use self leveling floor compound cemet  

Don't worry if you have swirling or color variations in the dried concrete underlayment. As long as those parts of the floor are hard, dry, solid, and level, you're ready to go to the next step in your project.


Finally it was tile time! I applied same tile underlayment and seam sealering "tape" as I used in our guest bathroom. Yes the orange stuff is more expensive than other options but it is water resistant and the fact that I can cut it on the fly with scissors or a utility knife makes it worth it in my book. You can learn more about the Schlter Ditra underlayment I used here.


how to install waterproof bathroom tile underlayment
Dry fit time!

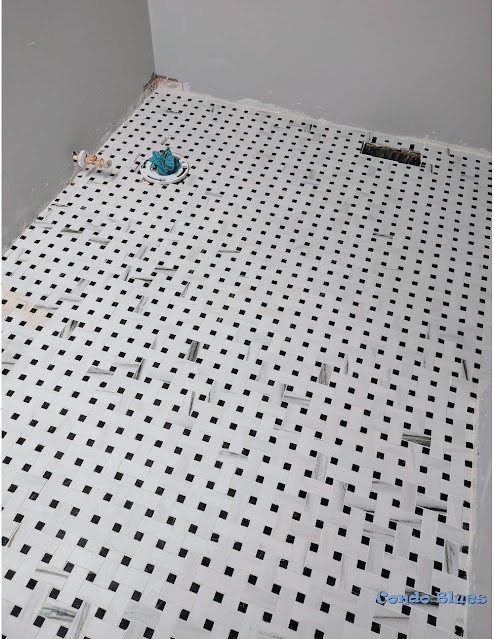
Then it was time to get messy installing the tile floor and grout!


how to grout tile and sealant

I'm using ceramic porcelain tile that looks like marble. I don't need to seal the tile itself according to the manufacturer but it won't hurt if I do.
 

The finishing touch was using this exact spray grout sealer  to seal the grout because is made for moisture laden rooms like bathrooms.

Because I never, ever, ever want to replace a moldy sub floor again.

The next step is installing the new plumbing fixtures and lighting!


Looking for more bathroom floor renovation, organizing, and decorating ideas? Check out the following options - and more! - below!

Did you enjoy this post? Get more like it by subscribing to the Condo Blues RSS Feed .